
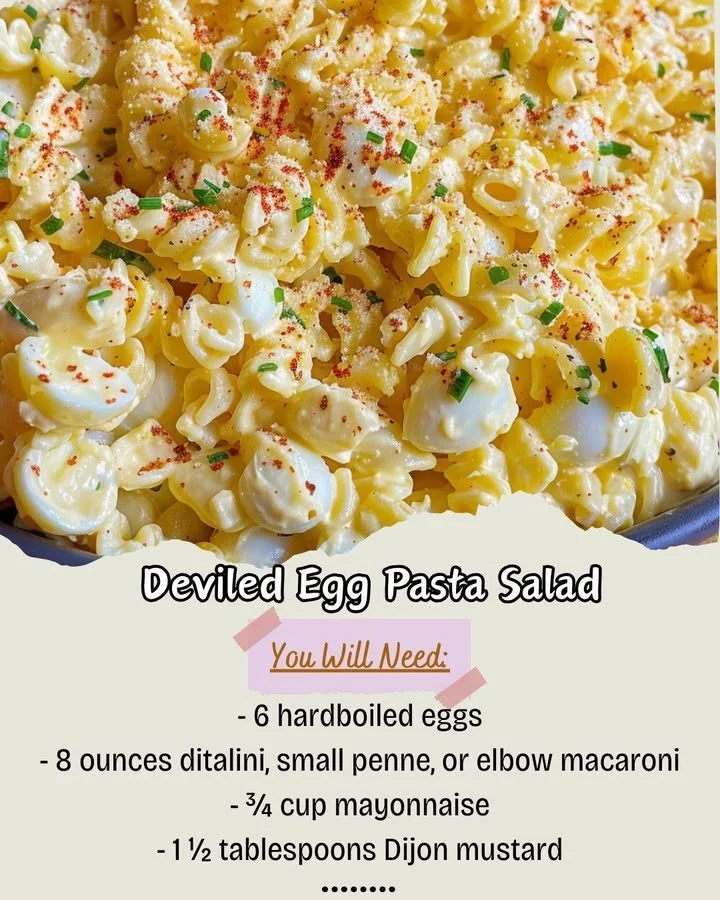
I stumbled upon the recipe for Deviled Egg Pasta Salad one sunny afternoon while flipping through an old family cookbook. It caught my eye not just because of the tantalizing name, but because eggs and pasta are two of my all-time favorite ingredients. As I gathered the ingredients, my kitchen filled with the delightful scent of mustard and a hint of dill, instantly reminding me of picnics and gatherings with family. Making this dish was not just an experiment; it felt like a warm embrace from my childhood. That first creamy bite confirmed it for me—this would quickly become a staple in my kitchen.
Why You’ll Love This Recipe
If you’re anything like me, you love the comforting, nostalgic flavors of deviled eggs but sometimes wish they came with a pasta twist for a heartier meal. This Deviled Egg Pasta Salad marries those two worlds beautifully, giving you the creamy goodness of deviled eggs while also satisfying your hunger with pasta. You’ll love how the flavors mingle and develop over time, creating a dish that’s perfect for any occasion—from backyard barbecues to cozy family meals. Plus, it’s a fantastic way to use up leftover eggs after a holiday gathering!
Ingredients
- 8 ounces elbow macaroni
- 6 hard-boiled eggs, chopped
- 1/2 cup mayonnaise (See the next page below to continue…)
- 2 tablespoons Dijon mustard
- 2 tablespoons apple cider vinegar
- 1/4 cup sweet pickle relish
- 1/4 teaspoon paprika
- Salt and pepper to taste
- 1/4 cup green onions, sliced
Equipment Needed
- Large pot for boiling pasta
- Mixing bowl
- Measuring cups and spoons
- Colander
- Whisk or fork for mixing
- Serving bowl
Step-by-Step Instructions
The first step in making my Deviled Egg Pasta Salad is to boil the elbow macaroni. I fill a large pot with water and bring it to a rolling boil, adding a generous pinch of salt to the water for flavor. Once the water’s bubbling, I toss in the pasta and let it cook according to the package instructions, usually about 7-9 minutes. I pay close attention during this step to avoid overcooking; mushy pasta can really ruin the texture of the salad. After draining it in a colander, I give the noodles a quick rinse under cold water to stop the cooking process.
While the macaroni cools, I turn my attention to the deviled egg portion of the salad. I take my six hard-boiled eggs and chop them up finely. The smell of freshly chopped eggs is nostalgic for me, evoking many memories of family gatherings. It’s at this stage that I make sure to savor the anticipation of flavors that will soon come together. I then grab a mixing bowl and combine the mayonnaise, Dijon mustard, apple cider vinegar, sweet pickle relish, and paprika, whisking it all together until it’s creamy and well-blended.
With the ingredients coming together, it’s time to fold in the cooled macaroni and chopped eggs. I gently mix everything in the bowl, making sure each piece of pasta and egg is coated in the delicious dressing. The vibrant yellow of the yolk against the white mayonnaise makes my heart sing! I usually taste it at this point, adjusting the salt and pepper to my preference, and I can already tell it’s going to be a hit. (See the next page below to continue…)
Finally, I transfer the salad into a serving bowl and pop it in the fridge for about 30 minutes before serving. This chilling period allows the flavors to meld beautifully. When I pull it out, the vibrant colors and tantalizing aroma remind me that I’m about to enjoy a truly delightful dish.
Pro Tips for Best Results
I tested different types of pasta for this recipe, and trust me, elbow macaroni is the way to go. Its shape holds the dressing perfectly, making every bite delicious. I once tried spiral pasta, and while it looked pretty, it didn’t quite capture the essence of deviled eggs like elbow macaroni does. Also, make sure to use quality mayonnaise; the flavor comes through, so I only use my favorite brand for this dish.
Here’s what I learned the hard way about the hard-boiled eggs: not all are created equal! I recommend using eggs that are at least a week old for easier peeling. Fresh eggs tend to stick to their shells, and you’ll end up with a frustrating mess instead of beautiful, creamy eggs. Additionally, I keep an ice bath ready to cool the eggs after boiling; this step makes peeling a breeze.
Lastly, don’t skip the apple cider vinegar—it adds a tangy brightness that complements the dish beautifully. I made this mistake once, and the salad felt flat without it. The vinegar enhances the flavors and balances the creaminess from the mayonnaise, making each bite unforgettable.
Common Mistakes to Avoid
I made the mistake of thinking that any pasta would work for this salad, and I ended up with a gooey mess once while using a larger shape. Stick with elbow macaroni for the best results. Also, don’t rush the cooling process of the macaroni; it’s tempting to just start mixing everything immediately, but trust me—it’s worth the wait. Letting them cool down allows the dressing to cling better, preventing a soupy salad.(See the next page below to continue…)
Another mistake I once made was forgetting to adjust the seasoning after mixing. I recommend tasting the salad before serving and tweaking the salt and pepper. It’s amazing how a dash more seasoning can elevate the entire dish. Also, don’t underestimate the power of paprika; it adds not just flavor but a beautiful color to the salad.
Finally, give the salad enough time to chill in the fridge. I once tried serving it right after mixing, and I found the flavors were still disjointed. Allow it to sit and integrate for at least 30 minutes; it will be so worth it!
Serving Suggestions
I like serving my Deviled Egg Pasta Salad alongside grilled chicken or burgers during warm summer months. The creaminess of the salad pairs perfectly with smoky, savory meats. It also makes a fantastic side dish for any potluck, and I often take it to gatherings where it’s always a crowd-pleaser.
Another way I enjoy this salad is as a light lunch on its own. Sometimes, all I need is a generous portion of this salad with a few crackers or a slice of crusty bread. It’s satisfying and creamy, fulfilling those mid-afternoon cravings without feeling too heavy.
For a bit of extra flair, I sprinkle additional chopped green onions on top before serving. It adds a fresh crunch and makes the presentation pop. Since I love to impress my guests with appealing food, this little touch elevates the dish significantly.
Variations & Customizations
One of my favorite variations of this pasta salad is adding crispy bacon. Whenever I’m feeling indulgent, I cook up a few pieces of bacon, crumble them, and fold them into the salad. It adds a savory crunch that takes it to a whole new level.
Another customization I’ve tried involves mixing in some veggies—like diced bell peppers or even shredded carrots. Adding these gives it a nice pop of color and a bit of extra sweetness, plus it’s a sneaky way to get in more veggies!
If I want a hint of heat, I’ve found that a splash of hot sauce or a sprinkle of cayenne pepper gives the salad an unexpected kick. Layering these flavors has become a fun, creative outlet for me in the kitchen, allowing me to invent new versions of this beloved dish!
How to Store, Freeze & Reheat
When it comes to storing leftover Deviled Egg Pasta Salad, I recommend using an airtight container. It keeps in the fridge for about three to four days, if it lasts that long! I’ve found that the flavors actually improve a day later, as they meld beautifully together overnight.
Freezing is not something I recommend for this salad because mayo doesn’t freeze well. It can separate and become grainy, ruining the creamy texture. Trust me, I’ve made that mistake before, and it’s quite the disappointment when thawing to find an unappealing mess.
Reheating is simple for any leftovers I have—though I usually eat it cold. If I want to enjoy it warm (which I sometimes do on cooler days), I pop it in the microwave for about 30 seconds to a minute, ensuring not to overheat it.
Conclusion
Making Deviled Egg Pasta Salad is one of those recipes that fills my kitchen with warmth and nostalgia. The flavors come together beautifully, reminding me of family picnics and gatherings every time I make it. I hope you give it a try and enjoy it as much as I do! The smiles on my family’s faces when they take that first bite make all the cooking worth it. Happy cooking!