
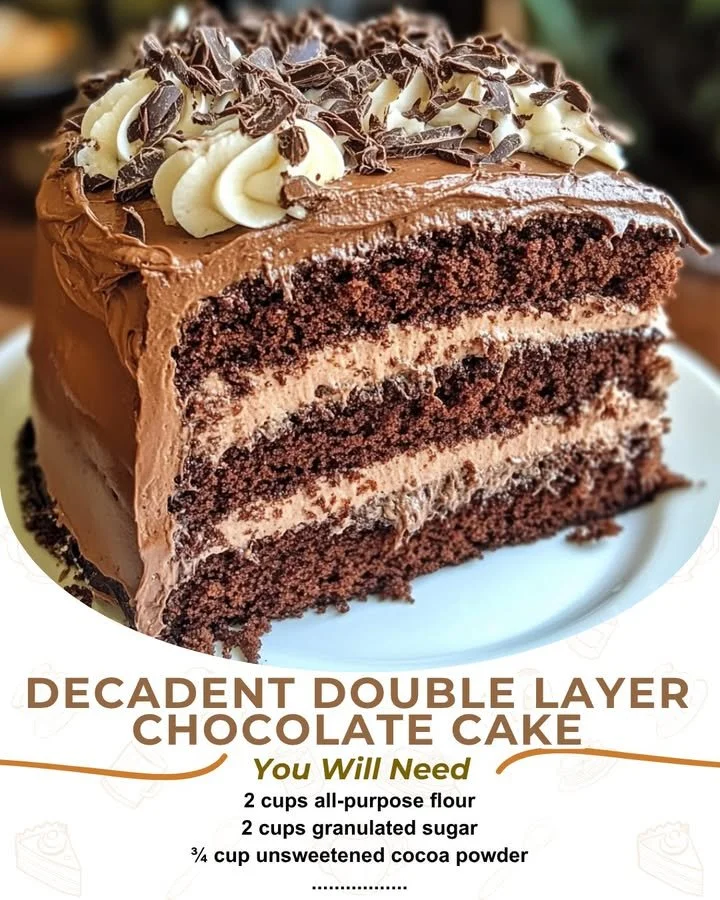
There’s something truly special about a warm, decadent Double Layer Chocolate Cake fresh out of the oven. The chocolatey aroma fills my kitchen, wrapping around me like a comforting hug. I always find that baking this cake brings out the best memories, the laughter shared over a slice, and the smiles it creates. Whether it’s for a birthday, a cozy family gathering, or even just a quiet evening at home, this cake is the ultimate indulgence that never fails to impress.
Why You’ll Love This Recipe
You’ll love this recipe for its rich, velvety layers that just melt in your mouth, combined with a silky-smooth chocolate frosting that is simply divine. Each bite is a celebration of chocolate goodness, making it impossible to resist. Plus, it’s surprisingly straightforward to make, so you won’t have to be a culinary expert to whip it up in your own kitchen. The joy on your loved ones’ faces when they take that first heavenly bite is worth every minute spent baking. (See the ingredients in the next page below…)
Ingredients
– 1 ¾ cups all-purpose flour
– 1 ¾ cups granulated sugar
– ¾ cup unsweetened cocoa powder
– 1 ½ teaspoons baking powder
– 1 ½ teaspoons baking soda
– 1 teaspoon salt
– 2 large eggs
– 1 cup milk
– ½ cup vegetable oil
– 2 teaspoons vanilla extract
– 1 cup boiling water
– 2 cups chocolate frosting (store-bought or homemade)
Equipment Needed
– 2 9-inch round cake pans
– Mixing bowls
– Electric mixer (or whisk)
– Rubber spatula
– Parchment paper
– Cooling rack
– Measuring cups and spoons
Step-by-Step Instructions
First, preheat your oven to 350°F (175°C) and grease your cake pans with butter or cooking spray. To make sure that your cake pops out easily later, I like to line the bottoms with parchment paper. Next, in a large mixing bowl, combine the flour, sugar, cocoa powder, baking powder, baking soda, and salt. I always like to whisk the dry ingredients together first – it ensures everything is evenly distributed. Now, add in the eggs, milk, vegetable oil, and vanilla extract. Beat this mixture on medium speed for 2 minutes. Just as you’re starting to think this will be a somewhat simple cake, carefully stir in the boiling water; the batter will be thin, but that’s what creates the moistness! Oh, the smell is simply luxurious! (See the next page below to continue steps…)
Now, divide the batter evenly between the two prepared cake pans. I usually give the pans a gentle tap on the counter to release any air bubbles. Bake in the preheated oven for 30-35 minutes, or until a toothpick inserted in the center comes out clean. I recommend checking the cakes a few minutes earlier just to be safe; you don’t want to overbake them. After taking them out, let them cool in the pans for about 10 minutes before transferring to a wire rack. The anticipation at this stage is so exciting!
Once the cakes are completely cooled, it’s time to decorate. This is my favorite part! Place one layer of cake on a serving plate, and generously spread a layer of chocolate frosting on top. Then, gently place the second cake layer on top and frost the top and sides of the entire cake. If you’re feeling fancy, you can smooth it out for a clean look or go for a textured finish. I sometimes add chocolate shavings on top for that extra touch of elegance!
Lastly, serve it up and enjoy every decadent bite! This cake pairs beautifully with a scoop of vanilla ice cream or a dollop of whipped cream. Trust me, nothing beats the rich, chocolatey goodness of this cake.
Pro Tips for Best Results
I’ve tested this recipe in various ways and have a few tips to ensure the best results ever. First, always use room temperature ingredients; it makes a noticeable difference in how the cake bakes. If you can, take your eggs and milk out of the fridge an hour before you start baking.
Another tip is to master your oven temperature, as ovens can vary widely. I bought an oven thermometer when I realized mine runs about 25 degrees hotter than set! So be sure to check if your oven needs calibrating – it can save your cake from overcooking or undercooking.
Lastly, let’s talk about frosting. If you’re opting for homemade frosting, make it ahead of time and let it cool. Always try to achieve a good consistency—too soft can slide off the cake, and too stiff can make it hard to spread evenly. I like my frosting at room temperature for easy spreading!
Common Mistakes to Avoid
I’ve had my share of mishaps in the kitchen when making this cake! One common mistake is not measuring your flour correctly. I learned the hard way that dipping your measuring cup straight into the flour can lead you to pack it too tightly, resulting in a dense cake. Use the spoon and level method for accurate measurement. (See the next page below to continue…)
Another mistake to avoid is overlooking the cooling process. If you try to frost the cake too soon, you’ll end up with a melted mess. I once got too eager and they both collapsed under the weight of the frosting! Patience is key here; let those layers cool completely.
Additionally, make sure not to forget the boiling water! It may seem odd to add it, but it’s essential for keeping the texture moist and fluffy. I was skeptical the first time I tried it, but now I swear by it.
Lastly, don’t skip the parchment paper lining at the bottom of the pans! I’ve had beautiful cakes stick terrifyingly to the pan, and nothing is worse than a cake ripped apart when you’re trying to get it out. Take the extra minute to line those pans!
Serving Suggestions
When it comes to serving my Decadent Double Layer Chocolate Cake, I love to get a little creative. One of my favorite ways is to pair each slice with a scoop of vanilla ice cream. The contrast between the warm cake and cold ice cream is simply heavenly and adds a delightful creaminess.
I also enjoy adding fresh berries on the side, like raspberries or strawberries. Not only do they add a pop of color to your presentation, but their tartness beautifully complements the sweetness of the cake.
For a fun twist, consider dusting a bit of powdered sugar on top right before serving. It gives your cake a lovely finish and makes it look like it’s ready for a grand celebration. The delicate white sugar against the rich chocolate color makes each slice even more inviting.
Variations & Customizations
I love playing around with this chocolate cake recipe to create different versions! One variation I sometimes try is swapping out half of the all-purpose flour for almond flour. It gives a subtle nuttiness that elevates the flavor of the chocolate without overpowering it.
If I’m in the mood for a little extra punch, I love adding espresso powder to the batter. Just a teaspoon or two enhances the chocolate flavor without making it taste like coffee, which I find to be a game-changer!
And let’s not forget about the frosting! I’ve experimented with different types of chocolate frosting and even added a hint of mint extract for a refreshing twist. You can also add crushed Oreos or other favorite candies right into the frosting for a fun texture!
How to Store, Freeze & Reheat
Storing this decadent cake is easier than you might think! If you have leftovers (which is rare, let’s be honest), keep it in an airtight container. It stays fresh at room temperature for about 3 days or in the fridge for up to a week.
If you want to prepare in advance, you can freeze the un-frosted cake layers. Just wrap them tightly in plastic wrap and then in aluminum foil to prevent freezer burn. They can last up to 3 months. When you’re ready to enjoy, simply let them thaw in the fridge overnight before frosting.
Reheating is simple too! If you fancy a warm slice, pop it in the microwave for about 10-15 seconds. Just enough to take off the chill but not so long that it dries out. It’s like savoring a piece of chocolate heaven all over again!
Conclusion
Baking my Decadent Double Layer Chocolate Cake always fills my kitchen with warmth and joy, and I hope it brings the same happiness to you and your loved ones. With each bite, you’re not just enjoying delicious cake, but also creating memories that last a lifetime. Don’t be afraid to make this recipe your own and let your creativity shine through. Happy baking!