
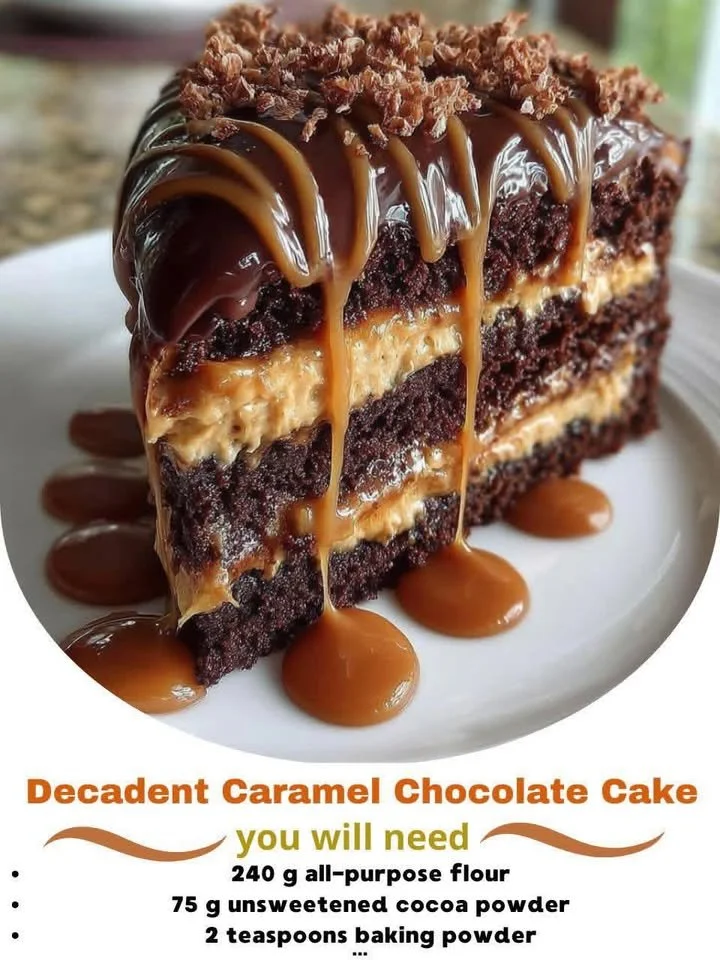
There’s something incredibly special about a decadent caramel chocolate cake that makes any moment feel like a celebration. As I stood in my kitchen, mixing chocolate and caramel together, I couldn’t help but feel a burst of excitement—when the sweet aroma began to waft through the air, I knew I was onto something magical. This cake is dense yet fluffy, with rich layers of chocolate that melt in your mouth, complemented by a luscious caramel drizzle that adds the perfect finishing touch. Join me, and let’s whip up this delightful treat together!
Why You’ll Love This Recipe
What truly sets this caramel chocolate cake apart is its perfect balance of flavors and textures. The contrast between the rich, chocolatey base and the smooth, gooey caramel topping creates a blissful harmony in every bite. Not to mention, it’s surprisingly simple to make, making it perfect for both novice bakers and seasoned pros like myself. Trust me, once you take your first slice, you’ll want to share this recipe with everyone you know! (See the ingredients in the next page below…)
Ingredients
- 1 ¾ cups all-purpose flour
- 1 ½ cups granulated sugar
- ¾ cup unsweetened cocoa powder
- 1 ½ tsp baking powder
- 1 ½ tsp baking soda
- 1 tsp salt
- 2 large eggs
- 1 cup whole milk
- ½ cup vegetable oil
- 2 tsp vanilla extract
- 1 cup boiling water
- 1 cup caramel sauce (store-bought or homemade)
- ½ cup chocolate chips (optional, for decoration)
Equipment Needed
- Mixing bowls
- Electric mixer (or whisk)
- Measuring cups and spoons
- 9-inch round cake pans (2)
- Parchment paper
- Rubber spatula
- Cooling rack
- Saucepan (for caramel, if using homemade)
Step-by-Step Instructions
To get started, I preheated my oven to 350°F (175°C) and lined my 9-inch round cake pans with parchment paper—this little trick ensures that the cakes pop out easily without any fuss. In a large mixing bowl, I combined the flour, sugar, cocoa powder, baking powder, baking soda, and salt. I whisked them together until they were perfectly blended, creating this wonderfully aromatic dry mixture. Then, I added the eggs, milk, oil, and vanilla extract. I used my electric mixer on medium speed to blend everything until it was smooth and creamy. As I added the boiling water, the batter became a thin, luscious consistency that I couldn’t resist tasting! (See the next page below to continue steps…)
Once I poured the batter evenly into the prepared cake pans, I placed them in the oven and let them bake for about 30-35 minutes, or until a toothpick inserted into the center came out clean. The smell of baking chocolate cake filled my kitchen, and it was honestly one of the best olfactory experiences—if only I could bottle it up! While the cakes were cooling, I prepared my homemade caramel sauce. I simmered sugar, butter, and cream until it formed a rich, silky sauce that made my heart flutter in joy.
Next, after the cakes had cooled completely, I carefully removed them from the pans and placed one layer on my serving plate. I drizzled a generous amount of caramel on top and then added the second layer, repeating the process. To finish off this masterpiece, I drizzled more caramel over the top and sprinkled with chocolate chips for an extra touch of decadence. And just like that, my chocolate caramel cake was complete!
Pro Tips for Best Results
I always recommend using high-quality cocoa powder for this recipe. It makes a noticeable difference in flavor and can elevate the cake to a whole new level. The first time I baked this cake, I used a generic brand, and I didn’t realize how much richer it could taste with a premium cocoa!
Another tip I swear by is to make sure your ingredients are at room temperature before you start. Mixing cold ingredients can lead to an uneven batter, resulting in a cake that doesn’t rise as well as it should. So, I always take out my eggs, milk, and butter in advance and let them sit on the countertop for about 30 minutes before getting to work.
Lastly, I suggest letting your cake layers cool fully before adding the caramel. If they’re still warm, the caramel can start to melt into the cake, and while that sounds delicious, it can get messier than intended. Trust me, allowing them to cool will give you clean, beautiful layers!
Common Mistakes to Avoid
One common mistake I’ve made in the past is not measuring the ingredients correctly, especially the flour. A heavy hand can lead to a dense cake that’s less enjoyable. I’m now a fan of the spoon-and-level method: I spoon flour into the measuring cup and level it off with the back of a knife for precision. This ensures I get the right amount every time! (See the next page below to continue…)
Another thing to watch out for is over-mixing the batter after adding the wet ingredients. While it’s tempting to whip it into perfection, too much mixing can develop the gluten in the flour, leading to a tougher cake. I simply mix until it’s just combined and let the oven work its magic from there.
Keeping an eye on the baking time is also essential, especially in the last few minutes. Ovens can vary in temperature, and nothing is more disappointing than finding out you’ve pulled out a dry cake. Set a timer for the minimum time, check for doneness, and keep checking until it’s perfect.
Serving Suggestions
This decadent caramel chocolate cake can stand on its own, but if you’re looking to create a truly memorable dessert experience, I suggest pairing it with a scoop of vanilla ice cream. The cold creaminess complements the warm gooeyness of the cake beautifully and creates this delightful contrast that’s pure bliss.
For a festive touch, you can serve it with fresh berries on the side. The tartness of the berries cuts through the richness of the cake and adds a pop of color to your plate. I love using raspberries as they beautifully contrast the chocolate!
And let’s not forget about making it a full-fledged dessert experience! Why not pair the cake with coffee or a dessert wine like port? It enhances the flavor profile and provides a touch of indulgence that’s simply delightful.
Variations & Customizations
Getting creative in my kitchen is one of my favorite parts of baking, and this cake is no exception! For a nutty twist, I occasionally add chopped walnuts or pecans into the batter or sprinkle them between the layers. The crunch and flavor complement the chocolate and caramel perfectly.
If you’re feeling adventurous, try adding flavored extracts to the batter, such as orange or almond. A few drops can create an unexpected yet delightful twist, taking the cake to a whole new level of gourmet.
And for those who love a bit of spice, consider adding a pinch of cinnamon or espresso powder to the dry ingredients. It amps up the chocolate flavor and gives it a warm, cozy vibe. Each small change creates a new experience and story behind the cake!
How to Store, Freeze & Reheat
If by some miracle, you have leftovers (which is rare in my house!), you can store the cake in an airtight container at room temperature for up to two days. However, if you want it to last longer, refrigerating it is your best bet. Just make sure to wrap it tightly in plastic wrap to prevent it from drying out.
For longer storage, I recommend freezing the cake. Simply wrap each layer in plastic wrap and then foil to protect it from freezer burn. It can last up to three months in the freezer! When you’re ready to enjoy it again, let it thaw in the refrigerator overnight before unwrapping and serving.
If you’re reheating, slice a piece and warm it in the microwave for about 15-20 seconds—just enough to take the chill off and melt the gooey caramel slightly. Trust me; it feels like dessert on demand!
Conclusion
Baking this decadent caramel chocolate cake truly brought joy to my heart, and I hope you find just as much delight in making it as I did. Each slice is a melt-in-your-mouth experience that’s perfect for celebrations or an everyday treat. So roll up your sleeves, grab your apron, and let’s create some delicious memories together in the kitchen! Happy baking!