
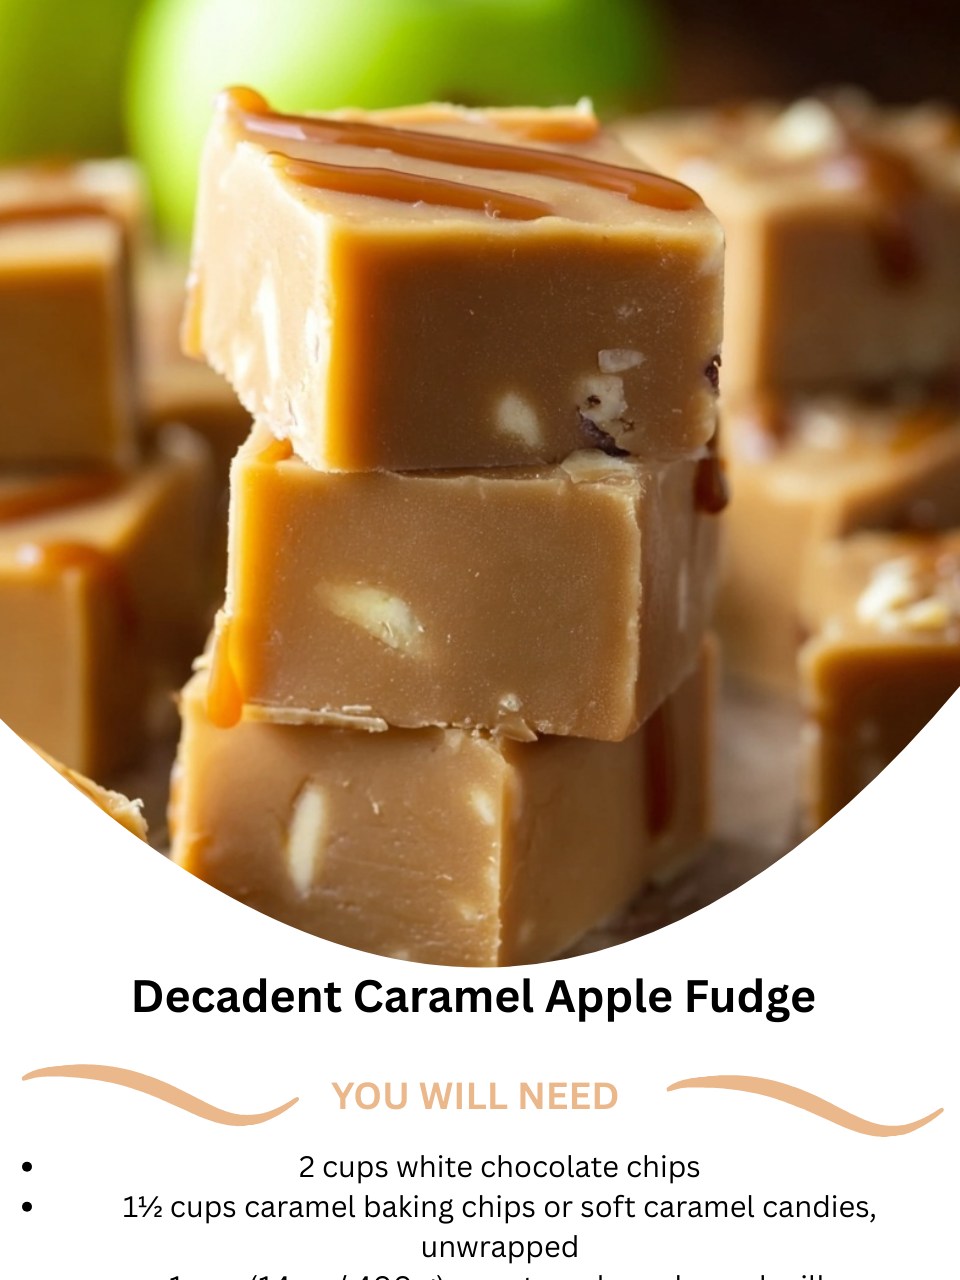
I created this Decadent Caramel Apple Fudge on a crisp autumn afternoon, desperate to capture the essence of my favorite orchard treat in a form I could share at a party. My kitchen filled with the rich, buttery scent of melting caramel and the sweet perfume of white chocolate, a combination so inviting it felt like a hug. When I finally swirled the two together and took my first bite of the chilled fudge, I was utterly transported. It had the creamy, luxurious texture of the finest confectionery, but with the nostalgic, soul-warming flavor of a caramel apple, without the mess. It was an instant masterpiece, and it’s been my signature fall gift ever since.
Why You’ll Love This Recipe
You will absolutely love this recipe because it transforms just two main ingredients into something that feels incredibly gourmet and special. It’s unbelievably easy—no candy thermometer, no intricate techniques—just melt, swirl, and set. The magic is in the marbling: sweet white chocolate and deep, buttery caramel come together in every bite, creating a perfect balance that’s rich but not overwhelming. It’s the ultimate impressive-yet-simple dessert for autumn gatherings, holiday trays, or when you simply need a treat that tastes like a celebration in a square.
Ingredients
- 2 cups high-quality white chocolate chips
- 1½ cups caramel baking chips (or 6 oz soft caramel candies, unwrapped)
- 1 teaspoon flaky sea salt (optional, but highly recommended)
- ½ teaspoon ground cinnamon (optional, for extra warmth)
(See the next page below to continue…)
Equipment Needed
- Medium, heatproof mixing bowl (for the white chocolate)
- Small saucepan or a second heatproof bowl (for the caramel)
- 8×8 inch baking pan
- Parchment paper
- Spatula or spoon for swirling
Step-by-Step Instructions
The entire process hinges on gentle, patient melting. I start by lining my 8×8 pan with parchment paper, leaving an overhang on two sides—this is non-negotiable for easy removal later. Then, I separate my ingredients: the white chocolate chips go into my medium heatproof bowl, and the caramel chips (or unwrapped caramels) go into a small saucepan. For the white chocolate, I use the double-boiler method: I place the bowl over a pot of simmering water, making sure the bottom of the bowl doesn’t touch the water. I stir it slowly and constantly with a spatula. I learned the hard way that rushing this or getting a single drop of water in the bowl will cause the chocolate to “seize” into a grainy lump. It takes a few minutes, but watching it transform into a perfectly smooth, silky pool is worth the wait.
While the white chocolate melts, I turn my attention to the caramel. If I’m using caramel chips, I melt them in a small saucepan over the lowest possible heat, stirring constantly. If I’m using soft caramels, I add a single tablespoon of heavy cream to help them melt smoothly. This is a tip I picked up after my first batch of caramel turned into a stubborn, scorching clump. The goal is a lava-like, pourable caramel. Once both elements are luxuriously melted and smooth, I remove them from their heat sources immediately. This is a crucial moment; you must work quickly before they start to set.
Now for the artistic part: the swirl. I pour the entire bowl of melted white chocolate into the prepared pan, spreading it into an even layer with my spatula. Then, I strategically dollop the warm caramel all over the top. Using a knife or the tip of my spatula, I gently swirl the two together. The key word is gently. I don’t mix them into a homogenous beige blend—that’s a mistake I made once, and it muted the flavor contrast. I want beautiful, bold ribbons of caramel weaving through the white chocolate. Finally, if I’m using them, I sprinkle the top with a pinch of flaky sea salt and a dusting of cinnamon for that signature caramel-apple finish.(See the next page below to continue…)
The hardest part follows: the chill. I carefully transfer the pan to the refrigerator. I tried letting it set at room temperature initially, but it stayed too soft to cut cleanly. It needs a solid 3-4 hours in the fridge to become perfectly firm. I’ve learned to just walk away and forget about it, often letting it set overnight. When it’s time, I lift the entire fudge slab out using the parchment paper, place it on a cutting board, and use a large, sharp knife to cut it into small squares. For pristine cuts, I run the knife under hot water and wipe it dry between slices.
Pro Tips for Best Results
First, quality matters here more than you might think. I’ve tested with generic white chocolate morsels and the flavor was waxy and flat. Spring for a name-brand white chocolate chip you enjoy eating on its own; it forms the base of the entire fudge, so it needs to taste good. The same goes for caramel—good-quality baking chips or a trusted brand of soft caramels will give you a far superior, buttery depth of flavor.
My second tip is all about temperature control. The white chocolate and caramel should be similar in temperature when you swirl them. If the caramel is scalding hot and the white chocolate has cooled too much, the caramel will sink and create a thick, hard layer on the bottom. I let both cool for just a minute off the heat before combining. This ensures they swirl together beautifully and set in distinct, marbled layers.
Finally, don’t skip the sea salt. I know it seems like a tiny detail, but I’ve made batches with and without it, and the salted version wins every single time. That tiny pinch of flaky salt on top just before chilling doesn’t make it taste salty; it elevates the sweetness of both the white chocolate and the caramel, cutting through the richness and making each flavor pop in a way that’s absolutely magical.
Common Mistakes to Avoid
The number one mistake is getting water in your melting chocolate. Even a drop of steam or water from your spatula can cause the white chocolate to seize into a stiff, grainy mass that’s unusable. This happened to me, and I had to start over. Ensure all your equipment is completely dry. If you’re nervous about the double boiler, you can microwave the white chocolate in 20-second bursts, stirring vigorously between each, but watch it like a hawk as it can burn easily.(See the next page below to continue…)
Don’t over-swirl. My first batch looked more like a muddy river than elegant marbled fudge because I got carried away with my knife, swirling for too long. You only need 4-5 gentle passes through the dolloped caramel to achieve that perfect, bakery-worthy swirl. Think of it as gently folding a ribbon through, not stirring batter. The visual contrast is part of the delight.
Avoid using hard, old caramel candies. If your caramels are stale or very firm, they will not melt smoothly, no matter how much cream you add. They’ll become a stubborn, chewy mess. Always use fresh, soft caramels or, even better, caramel baking chips which are specifically designed to melt like a dream. This small ingredient check saves so much frustration.
Finally, don’t skimp on chilling time. Impatience led me to try and cut my fudge after just 90 minutes once. It was a gooey, sticky disaster that wouldn’t hold its shape. The fudge must be completely firm and cold to cut cleanly. If you’re pressed for time, you can speed it up by placing the pan in the freezer for about 1.5 hours, but the refrigerator set is more reliable for the perfect texture.
Serving Suggestions
I love presenting this fudge on a wooden board or a vintage platter during fall gatherings. It looks stunning nestled among some fresh apple slices and maybe a few cinnamon sticks for decoration. The contrast of the creamy white and swirled caramel against a dark board is just beautiful and always draws compliments before anyone even takes a bite.
For a truly decadent dessert experience, I’ll sometimes serve a small square slightly warmed (just 5 seconds in the microwave) atop a scoop of vanilla bean ice cream. The barely-melted fudge creates a luxurious sauce, and the cold ice cream with the warm, rich caramel is an absolute showstopper. It’s my secret weapon for impressing dinner guests with minimal effort.
This fudge also makes the most heartfelt homemade gift. I package squares in clear cellophane bags tied with twine and a small tag. I’ve even stacked them in decorative tins layered with parchment paper. It’s such a personal touch for teachers, neighbors, or hostess gifts during the holiday season, and because it’s so rich, a little goes a long way, making one batch stretch for many grateful recipients.
Variations & Customizations
For a true “caramel apple” experience, stir in ½ cup of very finely chopped, dried apples into the white chocolate before pouring it into the pan. Look for chewy, soft dried apples, not crispy chips. They add a wonderful texture and that authentic apple flavor. I tried this once and it was a revelation, though it does make the fudge a bit more cake-like.
You can play with the swirl! Instead of just caramel, try melting a combination of caramel chips and a handful of butterscotch chips for a deeper, more complex flavor. Or, after swirling, press crushed pretzel pieces or toasted pecans into the top before chilling. The sweet-and-salty combination, especially with the crunch, takes this fudge to a whole new level of deliciousness.
If you’re a chocolate purist, this method works with other chocolates too. I’ve made a stunning version using semi-sweet chocolate as the base and swirling in the caramel. It’s richer and less sweet, reminiscent of a gourmet chocolate truffle. You can also add a teaspoon of pure vanilla extract to the white chocolate as it melts, or a dash of apple pie spice to the caramel for an extra cozy, spiced note.
How to Store, Freeze & Reheat
Storing this fudge is simple. I keep it in an airtight container in the refrigerator, with layers separated by parchment paper. It stays perfectly fresh and maintains its ideal firm-yet-creamy texture for up to two weeks this way. You can leave it at cool room temperature for a party for a few hours, but I don’t recommend leaving it out for days, as it can become too soft and sticky, especially in a warm kitchen.
Yes, this fudge freezes beautifully! I wrap the whole slab or individual pieces tightly in plastic wrap, then place them in a heavy-duty freezer bag. It will keep for up to 3 months. To thaw, I simply transfer the pieces I need to the refrigerator for several hours or overnight. Thawing at room temperature can cause condensation, which makes the surface sugary and wet.
There’s typically no need to reheat this fudge, as it’s meant to be enjoyed cool. However, if you do want to soften a piece that’s just come out of the fridge, let it sit on the counter for 10 minutes. If you’re using it as a dessert sauce as I mentioned, a 5-7 second burst in the microwave is all it needs—any longer and it will melt completely. The chilled, firm texture is part of its charm, so I always recommend enjoying it that way.
Conclusion
This Decadent Caramel Apple Fudge is more than just a candy recipe; it’s a little edible piece of autumn magic that never fails to bring joy. It has saved me during busy holidays, wowed my friends at potlucks, and become a cherished tradition in my kitchen. I hope it finds the same happy place in yours, filling your home with its wonderful scent and your gatherings with sweet, memorable moments. Now, go grab those two simple ingredients and create some magic of your own. You’ve got this