
Introduction
The first time I made DEATH BY CHOCOLATE POKE CAKE, my entire kitchen filled with the deep, rich aroma of chocolate cake baking, and I felt that familiar sense of excitement that only comes from making a dessert you know will be dangerously good. When the warm cake came out of the oven and I poked those little holes across the top, the silky chocolate pudding poured into every gap like molten fudge—it was mesmerizing to watch. As the cake cooled, the pudding soaked down into the crumb, creating pockets of pure chocolate bliss, and by the time I spread the whipped topping and crushed cookies across the surface, it felt like layering pure decadence. The first bite stunned me: moist, fudgy, cool, creamy, and intensely chocolatey—this was no ordinary poke cake; it was pure indulgence.
Why You’ll Love This Recipe
You’ll love this recipe because every single bite delivers a hit of rich, layered chocolate flavor, creamy pudding, and soft cake, all blended into one ridiculously easy, completely irresistible dessert that requires almost no effort but tastes like something you spent all day making.
Ingredients
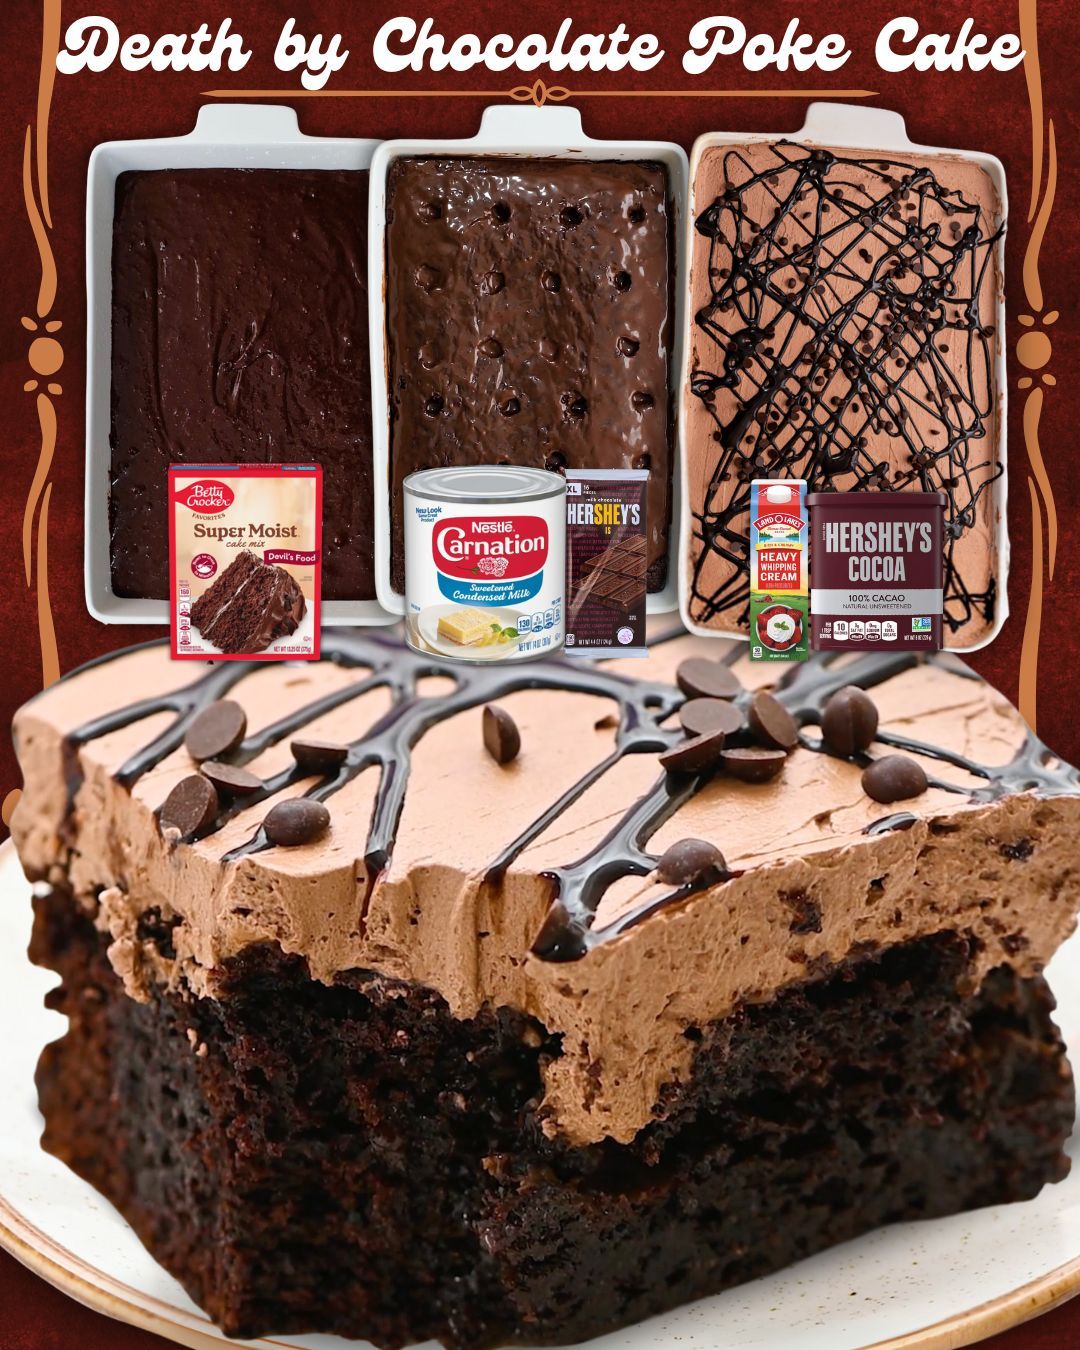
- 1 box chocolate cake mix (plus ingredients listed on the box: eggs, oil, water)
- 2 cups chocolate pudding (prepared from instant pudding mix)
- 1 cup chocolate syrup
- 1 cup crushed chocolate sandwich cookies
- 1 container whipped topping (like Cool Whip), thawed
- ½ cup mini chocolate chips
- Optional: hot fudge sauce for drizzling
When choosing ingredients for this cake, I always reach for a dark or devil’s food chocolate cake mix because the richer flavor really makes a difference. For the pudding, instant chocolate pudding prepared with cold milk works beautifully—the colder the milk, the thicker the pudding. I’ve experimented with homemade pudding too, but honestly, the instant version sets perfectly for poke cakes. The chocolate syrup doesn’t have to be fancy; any good store-bought syrup works. And the toppings—cookies, mini chips, and fudge—add texture and extra chocolate that really earns this cake its dramatic name.
Equipment Needed
- 9×13-inch baking dish
- Mixing bowls
- Whisk
- Rubber spatula
- Wooden spoon or thin handle for poking holes
- Measuring cups
- Plastic wrap
- Refrigerator space for chilling
A sturdy 9×13-inch pan is essential because poke cakes can be heavy once the pudding and toppings are added. I prefer a glass dish because I can actually see the layers once the pudding has soaked down the sides. A simple wooden spoon handle works perfectly for poking the holes—it creates just the right size for the pudding to seep into. I always use a rubber spatula for spreading the whipped topping because it glides so smoothly over the chilled cake. And enough fridge space is important, because this cake absolutely needs time to set properly.
Step-by-Step Instructions
When I make DEATH BY CHOCOLATE POKE CAKE, I always start by baking the cake according to the box directions. I mix everything in one big bowl, pour it into the pan, and bake until the kitchen smells like deep, warm cocoa.
Once the cake is out of the oven, I let it cool for just a few minutes—not fully, because slightly warm cake absorbs the pudding better. This is the part where I grab the handle of a wooden spoon and poke rows of holes all the way across the cake, spacing them about an inch apart. Don’t be shy—poke deep. Those holes are what make the cake magical.
While the cake is still warm, I prepare the chocolate pudding. I whisk the mix with cold milk until it thickens, and then I pour the pudding over the top of the cake. I take my time spreading it, making sure it sinks down into every hole.
This step is incredibly satisfying—the pudding fills each hole like little chocolate wells. I let the cake sit for about 10 minutes to help the pudding settle deeper into the crumb, and then I drizzle the chocolate syrup generously across the top. The syrup sinks into the cracks and crevices, adding an extra layer of moisture and sweetness.
After the pudding and syrup are added, I place the cake in the refrigerator. This chilling step is crucial because it helps the pudding set fully and keeps the cake from falling apart when cut. After about an hour—or longer, if time allows—I pull the cake back out and spread the whipped topping over the surface. The whipped topping glides on like a cloud and instantly transforms the cake into something velvety and beautiful. Then I sprinkle on the crushed cookies and mini chocolate chips.
Once everything is assembled, I chill the cake again to let all the layers settle together. When it’s fully chilled, the cake slices cleanly and looks like a decadent chocolate dream. The pudding pockets, the rich cake, the creamy topping—all of it blends into one unforgettable dessert that tastes even better than it looks.
Pro Tips for Best Results
One thing I tested multiple times was the temperature of the cake when poking the holes. I once tried poking the cake when it was completely cool, and the holes didn’t hold their shape as well. Poke the cake while it’s warm—trust me, the pudding sinks in so much better. Too hot, however, and the pudding melts on contact. So aim for warm, not steaming.
Another tip I’ve learned is to prepare the pudding right before pouring it over the cake. If you let it sit too long, it thickens too much and won’t sink into the holes properly. Whisk it, let it thicken slightly, then pour immediately. This gives you the perfect consistency for soaking into the cake.
The toppings are also important for texture. I once skipped the cookies because I didn’t have any on hand, and the cake felt like it was missing something. The cookie crumbs add the perfect crunch that balances the softness of the cake and pudding. And the mini chocolate chips give little bursts of richness in every bite.
Finally, don’t rush the chilling time. I know how tempting it is to dig in early—I’ve done it! But when the cake hasn’t fully set, it becomes messy and gooey instead of beautifully layered. A full two hours of chilling creates that ideal texture.(See the next page below to continue…)