
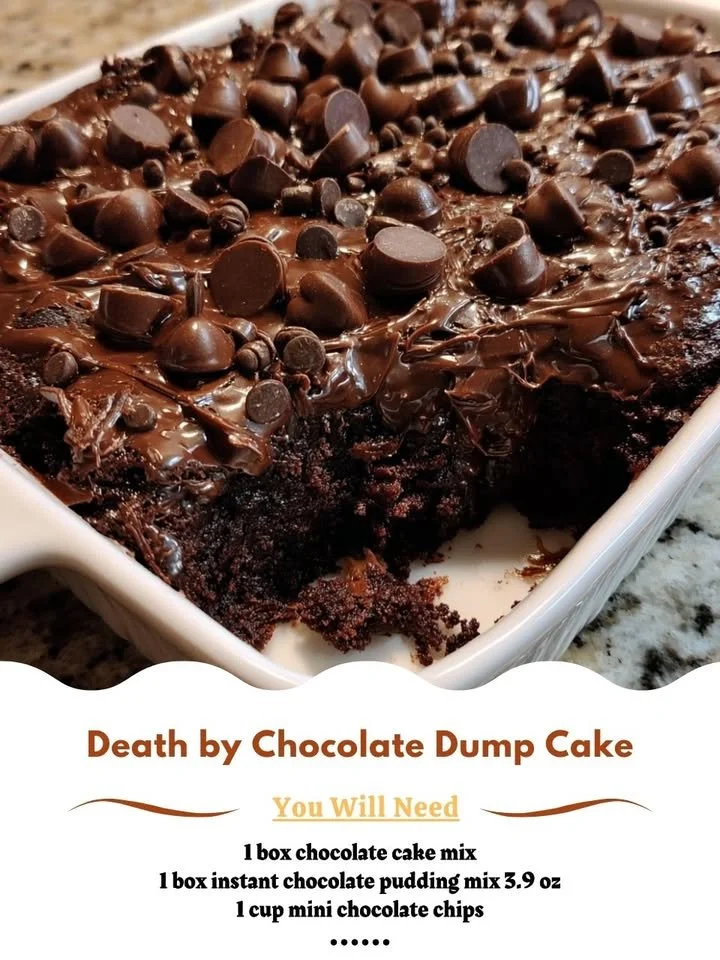
I don’t know about you, but there’s something incredibly comforting about a warm chocolate dessert that just wraps its arms around you, and that’s exactly what my Death by Chocolate Dump Cake does. This cake is a rich, luscious creation that is not only simple to make but is also a crowd-pleaser at any gathering. Trust me, when you see the melted chocolate oozing from the cake, you’ll understand why it holds a special place in my heart—and my kitchen!
Why You’ll Love This Recipe
This Death by Chocolate Dump Cake is the epitome of indulgence, combining layers of chocolate cake mix with pudding and chocolate chips to create a dessert that’s both gooey and fudgy. It’s perfect for anyone who loves a serious chocolate fix without spending hours slaving away in the kitchen. The best part? It practically makes itself! Just dump the ingredients in and let the magic happen. My whole family goes crazy for it whenever I whip it up, and I average about three requests a month to make it! (See the ingredients in the next page below…)
Ingredients
– 1 box of chocolate cake mix
– 1 box of chocolate pudding mix
– 2 cups of milk
– 1 cup of semi-sweet chocolate chips
– 1 cup of vegetable oil
– 4 large eggs
– 1 teaspoon vanilla extract
– 1 cup of chopped nuts (optional)
– Whipped cream or ice cream for serving (optional)
Equipment Needed
– Large mixing bowl
– Whisk
– 9×13-inch baking pan
– Rubber spatula
– Oven mitts
– Serving spatula
Step-by-Step Instructions
First, preheat your oven to 350°F (175°C). As the oven warms up, take out your large mixing bowl and add the chocolate cake mix, pudding mix, milk, vegetable oil, eggs, and vanilla extract. I love watching all those rich, dark ingredients come together; it smells divine! Whisk everything until fully combined, which should take about 2-3 minutes. The batter will be thick and creamy, and it’ll look like pure chocolate bliss! (See the next page below to continue steps…)
Next, pour half of the batter into the greased 9×13-inch baking pan. Make sure to spread it evenly using a rubber spatula. Now, sprinkle the chocolate chips and the optional chopped nuts directly over the batter. Who can resist more chocolate, right? Finally, pour the remaining batter over the chocolate nuggets, and don’t worry if things look a bit messy—that just adds to the rustic charm of this dish! Pop the pan into the oven and bake for 30-35 minutes or until the cake is set in the center.
Once that luscious aroma fills your kitchen, you’ll know it’s almost time to dig in! You’ll want to let the cake cool for at least 10 minutes. Trust me, that’s a tough wait, but it pays off once you slice into it and see those gooey layers. This cake is best served warm, and if you wish, you can top it with a dollop of whipped cream or a scoop of ice cream for that extra touch of decadence.
Pro Tips for Best Results
I tested this cake three ways, and I promise you, the chocolate chips make all the difference. They melt beautifully and add that luscious gooey texture that truly earns it the name “Death by Chocolate.” If you’re feeling adventurous, try adding a sprinkle of sea salt on top of the cake just before it goes into the oven. It enhances the chocolate flavor so wonderfully!
Also, keeping your eggs at room temperature will help them whisk better into the batter, leading to a fluffier cake. On days when I planned to make this cake, I always pulled my eggs out to sit on the counter before I even started gathering everything else. Little changes like this can make such a big difference!
Lastly, don’t skip letting the cake cool before serving. I know it’s hard, but it really helps everything set up nicely. If you’re too impatient (guilty as charged), just ensure that you have some ice cream or whipped cream nearby to counteract the heat!
Common Mistakes to Avoid
One mistake I’ve made in the past is not greasing the pan thoroughly. Trust me, the last thing you want is a beautiful cake that ends up sticking to the pan. I’ve had to pull apart crusty chocolate pieces from the sides before, and it’s not fun!
Another pitfall is overbaking. That chocolate aroma is incredibly tempting, but keep an eye on the cake towards the end of the baking time. Overbaking can lead to a dry and crumbly cake, and nobody wants that! As it sinks in the middle just slightly, it’s often done.
Also, don’t skip the pudding mix! I tried it once without the pudding, thinking it would work just fine, and let me tell you, it was nowhere near as rich and gooey. The pudding adds moisture and that delicious texture we all love. Be sure to include it for the best possible version of this cake.
(See the next page below to continue…)
Serving Suggestions
When it comes to serving this Death by Chocolate Dump Cake, I like to keep it simple yet delicious. A good scoop of vanilla ice cream on warm cake is divine! It’s like a match made in dessert heaven—creamy and sweet against the rich chocolatey backdrop.
If you’ve got company, serving it straight from the pan with a decorative sprinkle of powdered sugar or chocolate shavings gives it that homemade touch. And if I’m feeling particularly fancy, I might drizzle a bit of chocolate syrup on top before adding a generous dollop of whipped cream.
For special occasions, I’ll often turn it into a two-layer affair by prepping a second batch and stacking them. It’s a crowd-pleaser and brings out those oozy layers perfectly. Homemade chocolate sauce drizzled between layers just elevates it further!
Variations & Customizations
One of the things I love about this recipe is how versatile it is! You can mix and match chocolate types—dark chocolate chips, white chocolate, or even flavored chips like mint for a festive twist. I’ve made peppermint versions around the holidays, and they’re always a hit!
You can also consider adding in fruits like raspberries or strawberries. The tartness balances beautifully with the richness of the chocolate. Just be careful not to add too many, or you might alter the batter consistency.
Another variation I enjoy is adding a splash of coffee or espresso powder to the batter. It really intensifies the chocolate flavor, creating a more complex taste experience. It’s subtle but oh-so-satisfying!
How to Store, Freeze & Reheat
Storing the leftovers (if you’re lucky enough to have any!) is easy. I simply cover the pan with plastic wrap or aluminum foil and keep it in the refrigerator. It should last for about 3-4 days if it’s covered properly. Just make sure to reheat individual servings in the microwave for a few seconds before digging in!
If you want to freeze it, let the cake cool completely, then slice it into individual portions. Wrap each slice tightly with plastic wrap, then place them in an airtight container—this way, they won’t get freezer burn. They should last about a month, but I doubt they’ll stick around that long!
To reheat a frozen slice, I like to let it thaw in the fridge overnight, then pop it in the microwave when I’m ready to enjoy it. A few seconds is all it takes to bring that warm, chocolate goodness back to life.
Conclusion
I hope you’re as excited to try this Death by Chocolate Dump Cake recipe as I was the first time I made it! It’s a delightful journey into chocolate paradise that’s perfect for sharing (or not—no judgment here!). Chocolate lovers unite; this one’s for you! Enjoy the journey in your kitchen, and let me know how yours turns out—I can’t wait to hear all about your delicious adventures!