
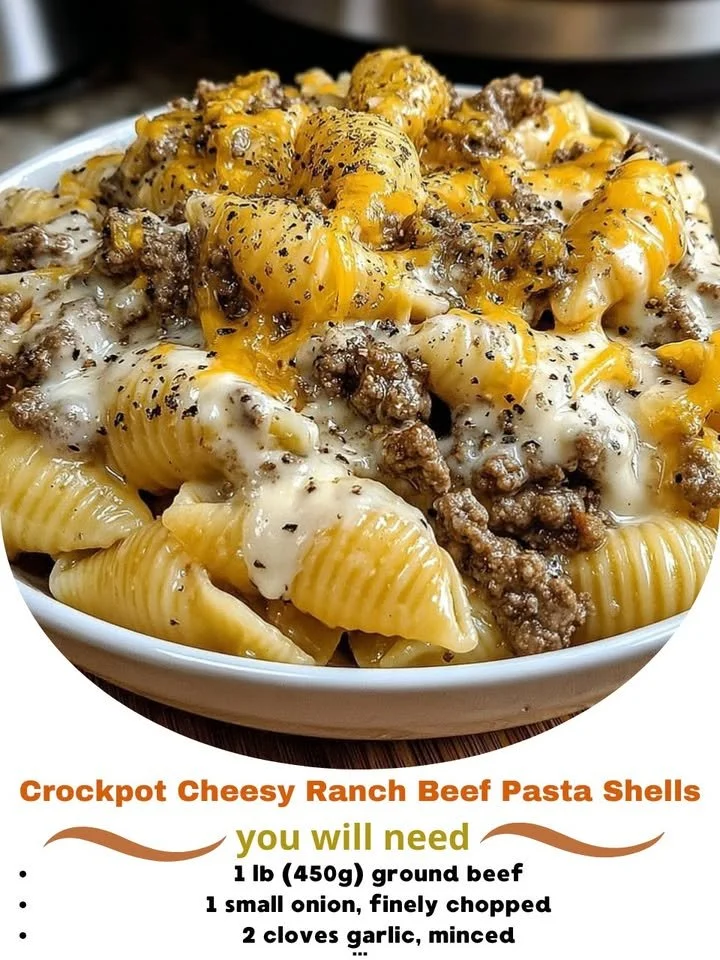
Welcome to my kitchen! Today, I’m thrilled to share one of my family’s favorite meals: Crockpot Cheesy Ranch Beef Pasta Shells. If you’re anything like me, you appreciate a hearty, comforting dish that’s easy to prepare and can feed a crowd. This recipe combines tender beef, cheesy goodness, and ranch flavor for a meal that’s as satisfying as it is delicious. So, grab your favorite apron, and let’s dive into the details!
Why You’ll Love This Recipe
This Crockpot recipe is a game changer for busy weeknights. With minimal prep and only a few hours in the slow cooker, you’ll end up with a creamy, cheesy pasta dish that practically cooks itself while you go about your day. The rich flavors meld perfectly, making it an ideal dish for any occasion, and my kids can’t get enough of it! It’s a true crowd-pleaser that always earns rave reviews from friends and family. (See the ingredients in the next page below…)
Ingredients
- 1 pound ground beef
- 1 packet ranch dressing mix
- 2 cups beef broth
- 1 can (10.5 oz) cream of mushroom soup
- 1 cup pasta shells
- 1 cup shredded cheddar cheese
- 1 cup sour cream
- Salt and pepper to taste
- Optional: chopped green onions for garnish
Equipment Needed
- Slow cooker (Crockpot)
- Large skillet
- Mixing spoon
- Measuring cups
- Knife and cutting board
Step-by-Step Instructions
To start, brown the ground beef in a large skillet over medium heat until fully cooked. This step is crucial because it helps lock in the deep, rich flavors of the beef. Once the meat is browned, drain any excess grease and transfer it to your Crockpot. Sprinkle the ranch dressing mix over the meat, and pour in the beef broth and cream of mushroom soup. Give it all a good stir to combine the ingredients, and then add the pasta shells. It’s a sight to behold when you stir in that creamy soup—it fills my kitchen with a mouthwatering aroma! (See the next page below to continue steps…)
After everything is combined, cover the Crockpot and set it on low for about 4 to 5 hours or on high for 2 to 3 hours. I find that the low setting often yields a more cohesive flavor, but both options work beautifully. When you’re nearing the end of the cooking time, keep an eye on the pasta; you want it tender but not mushy. Once it’s just right, stir in the cheddar cheese and sour cream for that luscious, creamy finish. The melted cheese makes the dish so inviting that you might struggle to resist diving in right away!
After mixing everything together, I usually let the dish cook for another 30 minutes on low. This allows the cheese to melt, infusing every bite with that incredible cheesy flavor. Just imagine how wonderful your home smells right now! When it’s done, I like to serve it hot, topped with fresh green onions for a pop of color and flavor.
Pro Tips for Best Results
I found that using a good quality ranch dressing mix really makes a difference in this recipe. I’ve tried a few store brands, and the flavor profiles differ quite a bit. My favorite is the classic Hidden Valley mix—it has that perfect balance of tanginess and depth!
Another tip that I’ve learned through trial and error is to ensure you don’t overcook the pasta in the slow cooker. It can go from perfectly al dente to mushy in no time, so it’s best to add it toward the end of the cooking process if you’re on the higher setting. When I wait until about an hour before serving to add it in, it keeps that wonderful texture we all love!
Lastly, don’t hesitate to adjust the ingredients according to your taste. I’ve experimented with different types of cheese; gouda and mozzarella are equally delicious and add a unique twist. Trust your palate and have fun with it!
Common Mistakes to Avoid
One of the most common mistakes I made the first time I made this dish was not draining the fat from the beef adequately. This can lead to an overly greasy finished product, and nobody likes a greasy pasta dish! I recommend using lean ground beef or draining the grease well to keep it light and satisfying. (See the next page below to continue…)
Another blunder was adding the pasta too early. I learned this the hard way, as my pasta ended up being mushy and unappetizing. Keep a close eye on the cooking time, whether you choose the high or low setting, and only add the pasta during the last hour of cooking.
Lastly, don’t skip on seasoning. While the ranch mix is packed with flavor, it’s always a good idea to taste and adjust with salt and pepper, especially if you’re using low-sodium ingredients. A dash of extra seasoning can elevate the overall flavor profile and bring out the best in this dish.
Serving Suggestions
When it comes to serving this delightful meal, I like to keep it simple and cozy. Pair it with a fresh side salad for a pop of color and crunch—think romaine, cherry tomatoes, cucumber, and a light vinaigrette. The freshness of the salad perfectly complements the richness of the cheesy ranch pasta.
Another great option is to serve it alongside some crispy garlic bread. Trust me, you’ll want to scoop up every last bit of that cheesy goodness, and garlic bread is perfect for that! Just imagine the wonderful aroma of warm, buttery bread wafting through your home—it’s pure comfort food bliss.
If you’re feeding a crowd, consider adding a dessert to round off your meal. A simple no-bake cheesecake or fruit cobbler always goes over well in my house, making for a delicious family dinner that everyone talks about long after it’s over.
Variations & Customizations
One thing I love about this recipe is its versatility. You can easily customize it to suit your tastes or what you have on hand. For instance, I often add diced bell peppers or mushrooms to the beef mixture for an extra veggie boost. Not only do they add color, but they also enhance the flavor and nutritional value of the dish!
If you’re looking for a lighter option, you can swap out ground beef for ground turkey or chicken. The dish tastes just as fabulous! And for a more decadent experience, try mixing in different cheeses, like pepper jack for a bit of heat or a creamy queso blanco for even more richness. The possibilities are truly endless!
Lastly, if you’re vegetarian, you can certainly adapt this recipe by using lentils or a meat substitute. Just ensure you adjust the cooking times accordingly, as some substitutes cook much faster than ground beef.
How to Store, Freeze & Reheat
If you happen to have leftovers (which is usually not the case at my house but can happen!), storing this dish is super straightforward. Just let it cool, and then transfer the pasta into an airtight container—this keeps it fresh and tasty for the next day. I typically store it in the fridge for up to 3 days, but I’ve found that the flavors often deepen over time, making for an even more delicious leftover meal.
For long-term storage, you can definitely freeze this dish. I recommend portioning it into freezer-safe containers and ensuring to label with the date so you know when it was made. It can last up to 3 months in the freezer—all you need to do is thaw it in the fridge overnight before reheating.
When it’s time to reheat, I find that the microwave works just fine for individual portions, but for larger amounts, I prefer using the stovetop. Just add a splash of milk or additional beef broth to help regain that creamy texture and heat it gently over low-medium heat until warmed through.
Conclusion
There you have it—my go-to recipe for Crockpot Cheesy Ranch Beef Pasta Shells! I hope you find as much joy in making and sharing this dish as I do. It’s warm, comforting, and filled with flavors that feel like a big hug. So, throw on that apron, enjoy some time in the kitchen, and feel free to share your own version of this delicious recipe. Happy cooking!