
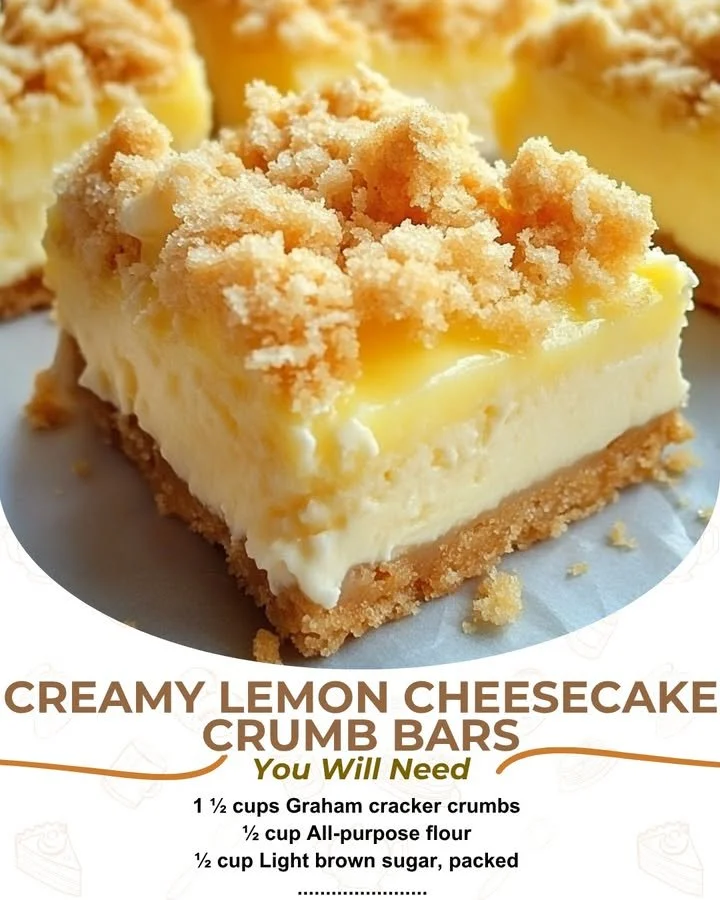
I absolutely love desserts that strike the perfect balance between sweet and tangy, and these Creamy Lemon Cheesecake Crumb Bars do just that. The moment I took my first bite, I was transported to a sunny day, feeling the warmth of the sun on my face, with the bright and refreshing taste of lemon dancing on my palate. Plus, they are simple to make, which is always a win in my kitchen!
Why You’ll Love This Recipe
If you enjoy the classic flavors of cheesecake but want a fun, handheld version, then these crumb bars are for you. They’re buttery, creamy, and have just the right amount of lemon zing to wake up your taste buds. The crumbly crust pairs wonderfully with the smooth cheesecake layer, making for an irresistible treat that’s perfect for any occasion. Whether it’s a picnic, potluck, or just a simple family dessert night, these bars will surely impress! (See the ingredients in the next page below…)
Ingredients
– 2 cups graham cracker crumbs
– 1/2 cup unsalted butter, melted
– 1/4 cup granulated sugar
– 2 (8 oz) packages cream cheese, softened
– 1 cup granulated sugar
– 1/4 cup fresh lemon juice
– Zest of 1 lemon
– 3 large eggs
– 1 teaspoon vanilla extract
– A pinch of salt
Equipment Needed
– 9×13-inch baking dish
– Mixing bowls
– Electric mixer or whisk
– Rubber spatula
– Measuring cups and spoons
– Parchment paper (optional)
Step-by-Step Instructions
First, I preheat my oven to 325°F (163°C) and prepare my baking dish by lightly greasing it or lining it with parchment paper for easy removal later. In a medium bowl, I combine the graham cracker crumbs, melted butter, and sugar, mixing well until everything is thoroughly combined. This mixture will become the delicious base for my cheesecake bars. I firmly press the crumb mixture into the bottom of the prepared pan, creating an even layer. It’s key to make it compact; this ensures that the crust doesn’t fall apart later. (See the next page below to continue steps…)
Next, I pop the crust into the oven and let it bake for about 10 minutes, just until it’s golden and fragrant. While it cools, I get to work on the creamy lemon filling. In a large mixing bowl, I beat the softened cream cheese until it’s smooth and creamy, adding in the sugar and mixing again until combined. The sweetness here balances the tartness of the lemon, and the smell is absolutely heavenly! To this mixture, I add the fresh lemon juice, lemon zest, vanilla extract, and a pinch of salt, blending everything together until it’s velvety and well incorporated.
Once I’ve achieved a smooth filling, I incorporate the eggs one at a time, mixing just until blended after each addition. Careful not to overmix here, as it can lead to cracks during baking. I pour the creamy lemon filling over the pre-baked crust, spreading it out evenly with a rubber spatula. Then, I return everything to the oven and let it bake for around 25-30 minutes, or until the edges are set and the center has a slight jiggle—just like a perfectly baked cheesecake.
After taking the bars out of the oven, I let them cool at room temperature, and then I transfer them to the fridge to chill for at least a couple of hours. This step is crucial! The flavors meld beautifully when they sit, and the texture becomes that lovely, creamy firmness we all crave in cheesecake. Once chilled, they’re ready to be sliced into squares and enjoyed.
Pro Tips for Best Results
In my quest to perfect these bars, I tested the crust three different ways: using sandwich cookies, adding spices, and even opting for no sugar at all. While cookie crusts were fun, I still hailed my graham cracker base as the winner for its classic cheesecake vibe. I also learned the hard way that overbaking leads to dryness, so keep an eye on those bars!
When it comes to zesting, I can’t stress enough how fresh lemon zest makes a difference. Using the zest gives the bars that vibrant lemon flavor, while the juice provides the perfect tangy balance. Always opt for fresh lemons over bottled juice when you can; trust me, your taste buds will thank you!
Lastly, I discovered that these bars taste even better the next day. Storing them overnight in the fridge allows all those lovely flavors to marry beautifully. It’s like a little lemony surprise waiting for you to enjoy in the morning with your coffee.
Common Mistakes to Avoid
One common mistake I made when I first attempted this recipe was not letting the cream cheese soften adequately. Trust me, trying to beat cold cream cheese just doesn’t yield the creamy texture you want. Always set it out ahead of time so it’s soft and easy to mix. (See the next page below to continue…)
Another misstep I see often is not adjusting the baking time based on your oven’s quirks. Every oven is different, and mine runs a bit hot, so I check the bars a few minutes early. If I had followed the recipe to a tee without checking, I might have overbaked them, risking dryness. It’s always smart to keep an eye on your baked goods!
Also, don’t skip the chilling step. Some people think it’s optional, but trust me, you want these bars cold! It’s what transforms them from just good to absolutely unforgettable. Last but not least, use a sharp knife to cut through your bars cleanly. A dull knife can cause a messy squish through your layers.
Serving Suggestions
These Creamy Lemon Cheesecake Crumb Bars are perfect for just about any occasion, but I especially love serving them at spring and summer gatherings. They are refreshing and light, making them the ideal dessert after a hearty meal. Pair them with a scoop of vanilla ice cream for an extra indulgent treat, or top with fresh berries for a burst of color and flavor.
I also enjoy presenting these bars on a beautiful platter, sprinkled with some additional lemon zest and fresh mint leaves for a pop of freshness. It’s all about making them look as delightful as they taste! To elevate the experience, I serve them with herbal tea or lemonade for a delightful afternoon tea setup.
Another fantastic idea is to serve these bars at brunch. They are just the right size to bring a sweet touch to your spread without feeling too heavy. Everyone loves a little sweet bite alongside their coffee, and these bars will definitely be a hit!
Variations & Customizations
While I adore the classic lemon version, there are plenty of ways to customize these crumb bars. For example, swapping the lemon juice for lime juice offers a fun twist that’s equally refreshing. I’ve also tried incorporating a swirl of berry puree, like raspberry or blueberry, right before baking for a vibrant and delicious variation.
If you want to add a touch of decadence, drizzle some white chocolate on top after the bars have cooled. This adds a beautiful finishing touch and complements the lemon flavor quite well.
Lastly, if you’re looking for a gluten-free option, you can easily use gluten-free graham crackers in the crust. It’s just as easy as using regular crackers and doesn’t compromise on taste. Everyone can enjoy these delectable treats!
How to Store, Freeze & Reheat
These cheesecake crumb bars store beautifully in the fridge. I typically keep them in an airtight container, where they can last up to a week. I find that they only get better as they sit! If you want to keep them longer, you can freeze them. Just make sure to wrap them well in plastic wrap and then place them in a freezer-safe container.
To thaw, simply transfer them to the fridge for a few hours or overnight. I’ve done this plenty of times, and they always come out tasting fresh, like they were just made. When it comes to reheating, most times, I prefer them cold. However, if you love a warm dessert, you can pop them in the microwave for a few seconds—just be careful not to overheat!
With this make-ahead nature, they’re perfect for hosting or a cozy movie night. Just slice them up, stash them in the fridge, and they’ll be ready when you are!
Conclusion
I hope you’re as excited to try these Creamy Lemon Cheesecake Crumb Bars as I was when I first made them. They’re a delightful treat that brings sunshine into any day. Don’t forget to share them with family and friends—unless you’d rather keep them all to yourself, which I wouldn’t blame you for! Happy baking!