
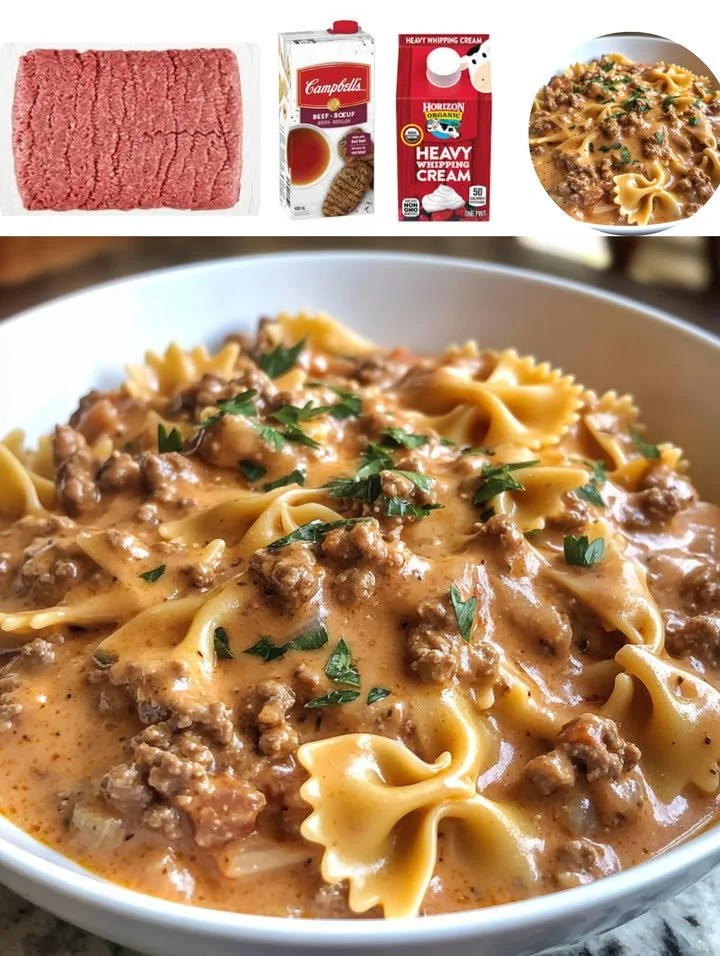
When I first discovered the recipe for Creamy Beef and Bowtie Pasta, it was one of those serendipitous moments in my kitchen that turned a regular weeknight into something special. I was flipping through an old cookbook I had nearly forgotten about when the image of that creamy, savory dish caught my eye. I could almost smell the comforting aroma wafting through the air. As I gathered my ingredients, I felt anticipation building, and when I finally took my first bite, it was like wrapping myself in a warm blanket. This dish quickly became a family favorite, and the rich, creamy sauce paired with tender beef and bowtie pasta makes it hard to resist going back for seconds.
Why You’ll Love This Recipe
I know you’re going to love this Creamy Beef and Bowtie Pasta because it has everything a comforting meal should be: rich, indulgent flavor, easy prep, and it’s downright satisfying to eat. You can whip it up in under an hour, making it an ideal choice for busy weeknights or even a weekend treat. Plus, the way the flavors meld together creates that “what did you put in this?” experience, leaving everyone at the dinner table guessing. Trust me, once you try this, it will become a staple in your meal rotation just like it did in mine.
Ingredients
- 8 oz bowtie pasta
- 1 lb ground beef
- 1 small onion, diced (See the next page below to continue…)
- 3 cloves garlic, minced
- 1 cup beef broth
- 1 cup heavy cream
- 1 tsp Italian seasoning
- ½ cup grated Parmesan cheese
- Salt and pepper, to taste
- Fresh parsley, for garnish
Equipment Needed
- Large pot for boiling pasta
- Skillet
- Wooden spoon or spatula
- Measuring cups and spoons
- Cheese grater
- Serving bowl
Step-by-Step Instructions
To begin, I always boil the water before adding the bowtie pasta. It’s essential to salt the water; trust me, it makes a huge difference in flavor. I never skip this step! Once the pasta is in, I remember to set a timer for about 10-12 minutes, so it’s perfectly al dente. While the pasta is cooking, I can focus on the beef and sauce. Multi-tasking is the name of the game in my kitchen!
In another skillet, I brown the ground beef along with the diced onion. The sizzling sound of the meat hitting the hot skillet is music to my ears. It fills my kitchen with that mouthwatering aroma of caramelized onion and beef. I’m always careful not to rush this step; letting the beef brown thoroughly adds so much depth to the flavor that you just can’t replicate by tossing everything in at once.
Next, I stir in the minced garlic once the beef is browned and the onion is translucent. It only takes a minute for the garlic to become fragrant, and I have to remind myself to stir constantly so it doesn’t burn. Once I can smell that garlic goodness, I add the beef broth and let it simmer for a few minutes. This is where you can really start to taste how the layers of flavor are building up; it’s simply divine! (See the next page below to continue…)
Finally, I pour in the heavy cream and mix everything well before adding the Parmesan cheese. Watching it combine into a luscious sauce is almost hypnotizing! Once the sauce has thickened just slightly, I drain the pasta (making sure to reserve a bit of the pasta water) and toss it into the skillet. However, I’ve learned from experience—if it seems too thick, adding a splash of the reserved pasta water can help loosen it. There’s nothing worse than dry pasta!
Pro Tips for Best Results
From my experience, I’ve learned that using a high-quality beef broth makes a significant difference. I tested it with both store-bought and homemade broth, and the homemade one takes the flavor to another level—it’s rich and complex. If you’re short on time, don’t stress about it, but if you can, use the homemade version for that extra special touch.
Another tip is to use freshly grated Parmesan cheese rather than the pre-packaged stuff. Yes, it’s a bit of extra work, but that fresh taste is so worth it. The pre-grated cheese has anti-caking agents that can dull the flavor. I once made this mistake, thinking it wouldn’t matter, and I could tell right away that the meal lacked that tangy depth.
I also encourage you not to skip the Italian seasoning. I’ve tried making it without it during a time when I thought I had an abundance of fresh herbs, but it just wasn’t the same. A pinch of Italian seasoning brings that Italian café vibe right to your dinner table!
Common Mistakes to Avoid
I made a rookie mistake the first time I made this dish—don’t forget to drain the pasta but reserve some of that starchy water. I ended up with a very dry pasta and sauce, and I had to scramble to add water at the last minute to salvage it.(See the next page below to continue…)
Another thing I learned the hard way was to not overcook the beef. It should be browned but not dried out. I didn’t keep an eye on it during my first attempt, and it turned into a crumbly mess, which was less than appetizing. So keep that skillet hot but don’t walk away!
I’ve found that some might be tempted to skip the fresh herbs, but trust me—don’t do it! Adding fresh parsley as a garnish really elevates the dish, providing a fresh note that perfectly balances the rich flavors.
Lastly, make sure you stir everything well when you mix the pasta with the sauce. The first time I made it, I didn’t integrate the sauce properly, which left me with some bites of dry pasta. I swear, it still gives me shivers thinking about it!
Serving Suggestions
I like serving my Creamy Beef and Bowtie Pasta with a side of garlic bread. There’s something about scooping up that sauce with a piece of garlic bread that takes the meal to the next level. It also helps to soak up all that irresistible flavor—I never let a drop go to waste!
You can also serve it with a light salad. I usually throw together some mixed greens with a simple vinaigrette to cut through the richness of the pasta. It creates a nice contrast and balances the meal beautifully.
Lastly, for special occasions, I often pair it with a nice red wine, which really enhances the savory aspects of the dish. My go-to is always a medium-bodied Cabernet, and I must say, the combination is heavenly!
Variations & Customizations
You can definitely switch things up with this recipe based on what you have on hand or personal preferences. I’ve tried it with ground turkey instead of beef, which works well and is a bit lighter without sacrificing the creamy goodness.
I’ve also added vegetables like spinach or bell peppers for some extra nutrition. Just toss them in when you add the garlic, and they wilt beautifully while soaking up that creamy goodness. It adds a splash of color and a hint of freshness you didn’t know you needed.
Lastly, I sometimes make it a bit spicier by adding red pepper flakes. It gives the dish an unexpected kick, and you won’t believe how it changes the flavor profile! Just be careful—you might become addicted to the extra heat!
How to Store, Freeze & Reheat
From my experience, this Creamy Beef and Bowtie Pasta can be stored in the fridge for about three days. I make sure to keep it in an airtight container to preserve its flavors. It reheats surprisingly well, but I always recommend adding a splash of broth or cream when reheating to keep it creamy—no one likes a dry pasta!
If I know I won’t finish it within a few days, I also like to freeze it. I portion out servings in freezer-safe containers. It’s perfect for a quick meal on a busy night. I’ve found that it freezes well for up to three months.
When it comes to reheating frozen pasta, I’ve learned that the microwave isn’t always the best option—the dish can become rubbery. Instead, try reheating it slowly in a saucepan over low heat, adding a bit of water or cream to loosen up the sauce.
Conclusion
Creamy Beef and Bowtie Pasta has a special place in my kitchen, and I hope it finds a spot in yours too! With its rich flavors, comforting texture, and a delightful presence at the dinner table, this recipe is sure to create smiles all around. So grab your ingredients, and let’s get cooking—it might just become your new favorite dish!