
A mistake I learned early on is over-kneading the food coloring into the dough. If you overwork it, the dough warms up and becomes sticky again, requiring more sugar. I now knead just until the color is evenly distributed and then stop. The dough stays soft and manageable.
Finally, avoid storing the mints before they dry completely. Wrapping them too early traps moisture, causing them to lose their shape and stick together. Giving them enough drying time is the key to achieving that perfect creamy-center, crisp-shell texture.
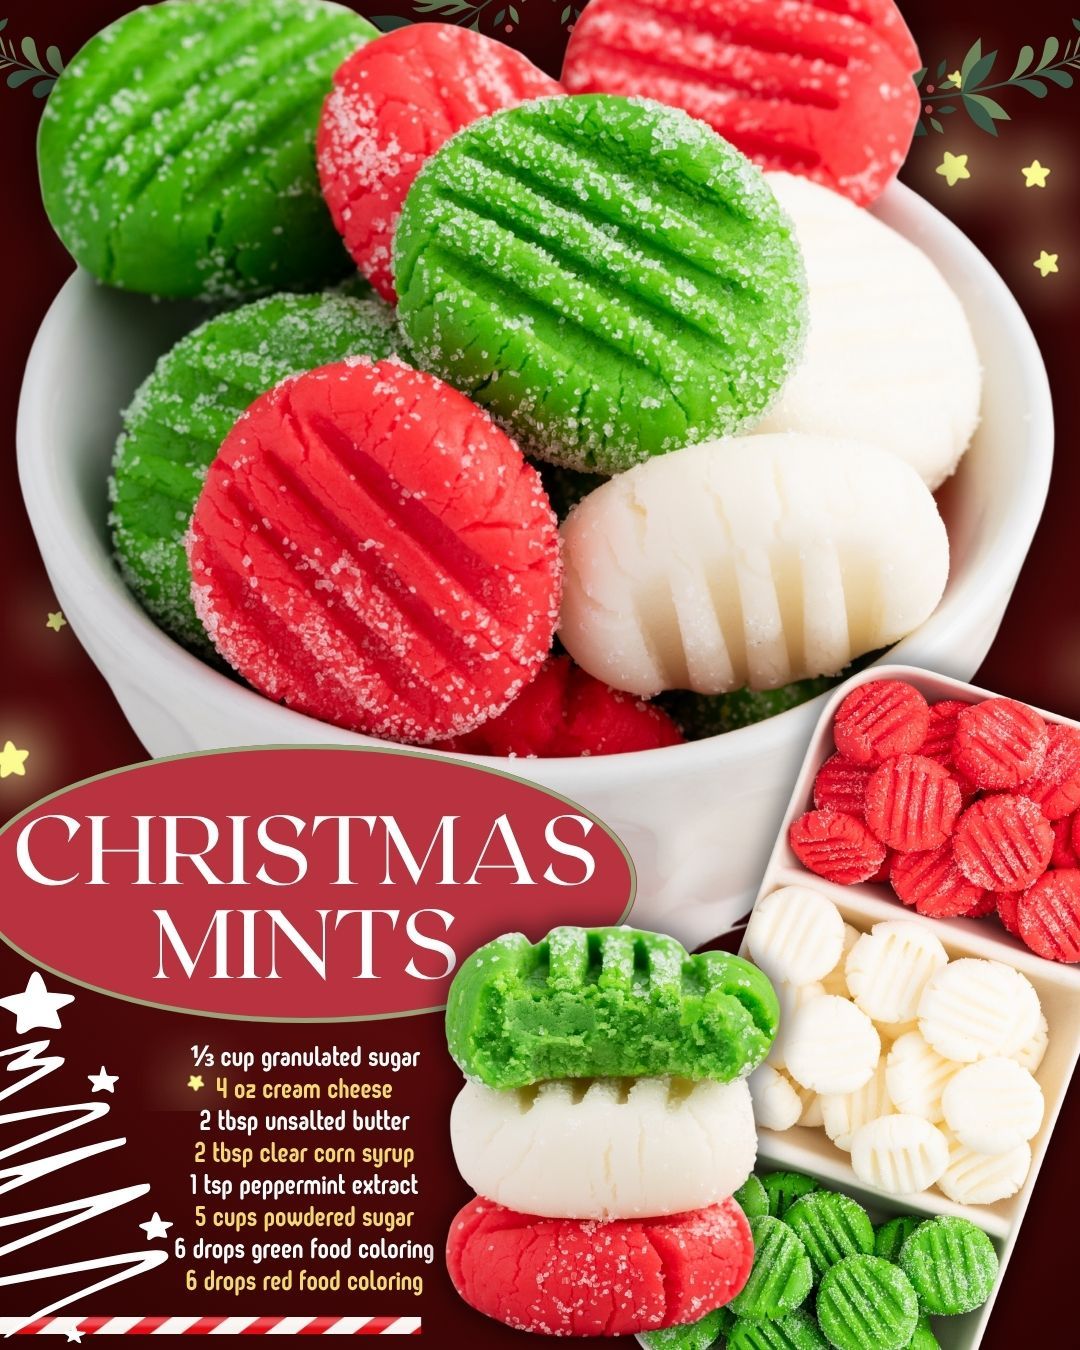
Serving Suggestions
I like serving these Christmas mints on holiday cookie trays because the red, green, and white colors pop beautifully among cookies, fudge, and chocolates. They add such a festive touch and taste like old-fashioned holiday candy that everyone recognizes instantly. They’re always one of the first things people reach for.
These mints also make adorable edible gifts. I love packing them into small tins or clear treat bags tied with ribbon. They look charming and nostalgic, and people are always surprised to hear they’re homemade because they look so polished. I’ve given them to neighbors, coworkers, and teachers, and they’re always a huge hit.
If you want to elevate a holiday dessert table, place these mints in small bowls between other treats or beside a hot cocoa bar. They melt beautifully into hot chocolate, adding a creamy peppermint twist. I’ve even placed a few mints on the saucer of a coffee mug—it looks classy, and they pair beautifully with warm drinks.
For family gatherings, I often put a bowl of these mints on the coffee table during present-opening time. They’re the kind of treat you can pop in your mouth without needing a plate or napkin. Kids especially love the bright colors, and adults love the nostalgic flavor.
Variations & Customizations
One variation I love experimenting with is changing the extract flavor. While peppermint is traditional and perfect for Christmas, I’ve also tried using almond extract, vanilla extract, and even orange extract. Orange mints dipped slightly in granulated sugar taste like little creamsicle bites—unexpected and delicious.
Another fun twist is rolling the mints in colored sanding sugar instead of granulated sugar. The mints sparkle beautifully and look like little jewels on a dessert platter. Green sanding sugar over green mints or red sanding sugar over white mints gives them an extra festive glow.
If you want a marbled effect, you can swirl two colors together by partially kneading them. I’ve done red and white before to create a candy cane look, and it turned out gorgeous. Just be sure not to over-knead or the colors will blend completely.
For a richer, more decadent twist, you can dip half of each mint into melted chocolate. Dark chocolate pairs beautifully with peppermint. It does add a step, but they become even more irresistible—almost like fancy boutique candies.
How to Store, Freeze & Reheat
Storing these mints is incredibly easy. I keep them in an airtight container at room temperature, and they stay fresh for two full weeks. The outer shell remains slightly crisp while the centers stay creamy. Just make sure they’re fully dry before storing so they don’t stick together.
If you want to make them far in advance, they freeze wonderfully. Place the mints in a single layer on a baking sheet, freeze them until firm, and then transfer them to a freezer bag. They keep for up to three months without any change in texture. To thaw, simply place them on the counter for 10–15 minutes—they soften quickly.
There’s no reheating required for these mints, but if you freeze them, resist the temptation to warm them in the microwave. The heat will melt the sugar coating and turn the mints sticky. Room-temperature thawing works perfectly and keeps them tasting fresh.
I’ve also stored them in the refrigerator during especially warm Decembers, but keep in mind that refrigeration can make the mints a bit firmer. They still taste amazing, but the texture becomes slightly more dense. For the classic melt-in-your-mouth feel, room temperature is ideal.
Nutrition Information
Cream Cheese Christmas Mints are definitely a sweet treat, but they’re small enough that one or two satisfy a craving without feeling heavy. The cream cheese gives them a rich, creamy texture that makes them feel indulgent even in tiny portions. It’s the kind of candy where a little really does go a long way.
Because they’re made with simple ingredients—cream cheese, powdered sugar, butter—they’re certainly not low-calorie, but they’re also free of preservatives and artificial flavors found in store-bought mints. I like knowing exactly what’s in the treat I’m eating or giving to others.
If you want to lighten them slightly, you can use reduced-fat cream cheese, though the texture becomes less creamy. You can also make the mints smaller—bite-sized pieces go further and help with portion control without sacrificing flavor. I’ve done this when making large batches for parties.
Overall, these mints fall firmly into the nostalgic holiday candy category where enjoyment matters most. They’re meant to bring joy, not guilt, and a small handful on a festive night feels absolutely perfect.
FAQ Section
Can I make these mints without corn syrup?
Yes, but the texture changes. Without corn syrup, the dough becomes more crumbly. You can substitute a tiny splash of milk, but the mints won’t be as smooth or soft.
Can I use gel food coloring instead of liquid?
Absolutely! Gel food coloring gives even more vibrant colors with fewer drops. Just knead carefully so you don’t overwork the dough.
How long should they dry before storing?
I always let them dry at least three hours. If your kitchen is humid, give them four to ensure they firm up properly.
Why is my dough too sticky?
It likely needs more powdered sugar. Add it gradually until you can roll the dough without it sticking to your fingers.
Can I freeze the dough instead of the finished mints?
Yes! Wrap each colored dough ball tightly in plastic wrap and freeze for up to two months. Thaw completely before shaping.
Conclusion
These Cream Cheese Christmas Mints have become one of my favorite holiday traditions—simple to make, beautiful to look at, and absolutely delicious to eat. Every time I roll the dough, press the little fork ridges, and see the bright red, green, and white colors come together, I’m reminded of everything I love about the season. I hope you enjoy making these sweet, nostalgic treats as much as I do and that they bring a little extra holiday magic into your kitchen.