
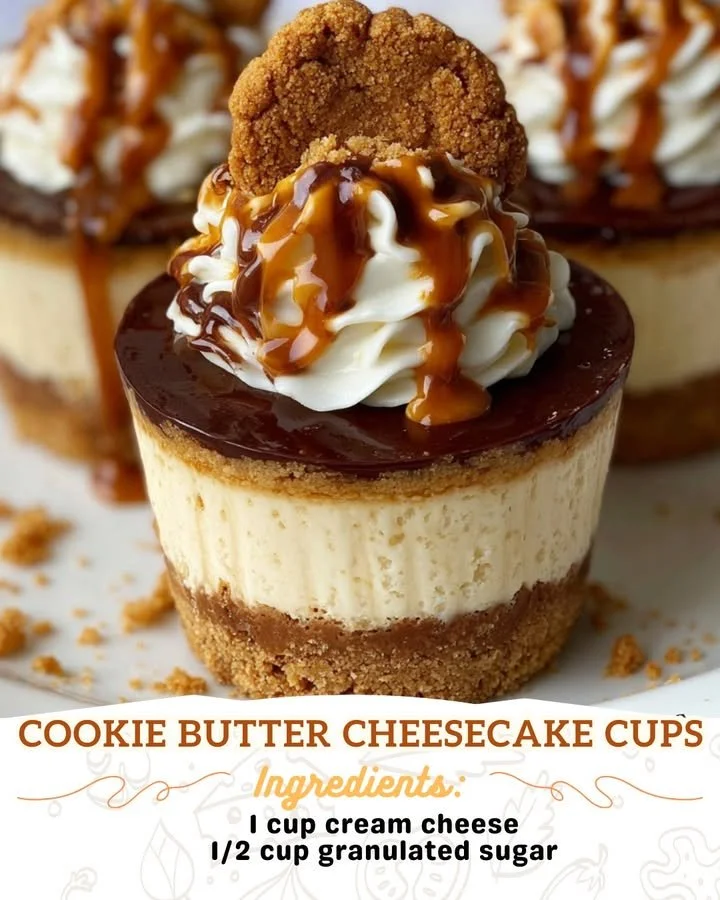
There’s something undeniably magical about combining two of my favorite treats: cookies and cheesecake. When I stumbled upon the idea of Cookie Butter Cheesecake Cups, I knew I had to give it a whirl in my kitchen. Picture creamy cheesecake with a delightful swirl of cookie butter, all nestled in individual cups that make for a perfect dessert to share—or savor alone! Today, I’m excited to share this easy and delicious recipe that will have everyone singing your praises.
Why You’ll Love This Recipe
These Cookie Butter Cheesecake Cups are not just a feast for the eyes; they are a delightful blend of flavors and textures that will have your taste buds dancing. The velvety cream cheese filling pairs perfectly with the rich, spiced notes of cookie butter, and the crumbly crust adds that essential crunch. Best of all, they are beautifully presented in cups, making them super easy to serve and eat! Trust me; you’re going to want to keep this recipe at the top of your baking list. (See the ingredients in the next page below…)
Ingredients
– 1 cup graham cracker crumbs
– 1/4 cup granulated sugar
– 1/2 cup unsalted butter, melted
– 8 oz cream cheese, softened
– 1/2 cup powdered sugar
– 1/2 cup cookie butter
– 1 tsp vanilla extract
– 1 cup whipped cream (store-bought or homemade)
Equipment Needed
– Mixing bowls
– Electric mixer
– Measuring cups and spoons
– Muffin tin
– Cupcake liners
– Rubber spatula
Step-by-Step Instructions
To kick things off, preheat your oven to 350°F (175°C). In a mixing bowl, combine the graham cracker crumbs, granulated sugar, and melted butter. Stir until everything is well-mixed and resembles wet sand. Line your muffin tin with cupcake liners, then press about a tablespoon of the crumb mixture into the bottom of each liner to form a crust. This crust will provide the perfect balance to the creamy filling! (See the next page below to continue steps…)
Next, in another bowl, beat the softened cream cheese with an electric mixer until it’s nice and smooth. Gradually add the powdered sugar while continuing to beat until combined. Then, fold in the cookie butter and vanilla extract, mixing until everything is beautifully blended. The aroma of cookie butter wafting through my kitchen at this moment is heavenly!
Now, it’s time to layer that luscious cheesecake filling over the crusts. Use a spoon or a piping bag to fill each cup with the cream cheese mixture, smoothing the tops with a spatula. Don’t worry if they aren’t perfectly shaped; a little rustic charm is what makes them fun! Place the muffin tin in the oven and bake for about 15-20 minutes until the filling is set but still slightly jiggly in the center.
After they’ve baked to perfection, let your cheesecake cups cool at room temperature before transferring them to the fridge to chill for at least 2 hours. This step is crucial, as it allows the flavors to meld and the texture to become exquisitely creamy. Once they’re chilled and ready to serve, top each cup with a swirl of whipped cream and a drizzle of extra cookie butter for that stunning finish.
Pro Tips for Best Results
I tested this recipe a few different ways before landing on this version, and one of the best pieces of advice I can give is to make sure your cream cheese is at room temperature. This small step ensures that no lumps sneak into the filling and gives you that smooth and creamy cheesecake texture that’s so desirable.
When it comes to cookie butter, I’ve found that not all brands are created equal. Some have a more intense flavor and smoother consistency than others. I recommend using a brand you love—after all, this is the star ingredient!
And don’t skip the chilling time! While it might be tempting to rush the process, allowing the cheesecake cups to rest in the refrigerator makes a world of difference. They firm up beautifully, allowing you to enjoy that creamy texture without any mess.
Common Mistakes to Avoid
One mistake I made early on was not pressing the crust mixture down firmly enough. The crust is what helps hold the cheesecake together, so be sure to pack it tightly in the muffin tin. If it’s too loose, you might find yourself with crumbling cheesecake cups, and nobody wants that! (See the next page below to continue…)
Another pitfall is not allowing the cheesecake cups to cool before refrigerating. If they’re still warm when you pop them in the fridge, they might lose that creamy texture and structure you’re aiming for. Patience is key, my friends!
Lastly, remember that the baking time can vary based on your oven, so keep a close eye on your cheesecake cups as they bake. You’ll know they’re done when the edges are set and the center is just a little jiggly. Overbaking them can lead to a dry cheesecake, which is not what we want!
Serving Suggestions
These cookie butter cheesecake cups are perfect for any occasion! Whether you’re hosting a dinner party, a casual get-together, or simply enjoying a cozy night in, they’re sure to impress. To elevate the experience, try serving them alongside some fresh berries or a scoop of vanilla ice cream for a divine contrast of flavors.
If you want to make things even more visually appealing, you can sprinkle crushed cookies or a dusting of cocoa powder on top of the whipped cream. It adds a lovely touch and a little extra crunch that everyone will enjoy!
And don’t be surprised when your friends and family ask for seconds. I learned that these little cups can disappear fast, so it’s always a good idea to make a double batch if you’re sharing them with a crowd.
Variations & Customizations
One of the best things about these cheesecake cups is how easily they can be customized. If you want to change things up, you could swap out cookie butter for Biscoff spread or even peanut butter for a different flavor profile. Chocolate lovers can mix in cocoa powder to the cheesecake filling or drizzle some melted chocolate over the tops.
For those who prefer a little fruitiness, consider adding chopped fruit to the filling or as a topping. Strawberries or bananas would blend wonderfully with the creaminess of the cheesecake. You might even want to try adding a hint of lemon zest for a refreshing citrus spin!
For gluten-free options, simply substitute the graham crackers with gluten-free cookies or crusts. It’s amazing how versatile these cups can be while still retaining that delightful cheesecake goodness!
How to Store, Freeze & Reheat
If you find yourself with any leftovers (which I seriously doubt), these cheesecake cups can be stored in an airtight container in the refrigerator for up to a week. Just be sure to cover them well to prevent any moisture from affecting that creamy texture!
If you’re planning to make these in advance, you can freeze them too! Simply freeze them in an airtight container for up to 2 months. When you’re ready to enjoy, let them defrost in the refrigerator overnight before serving. Trust me; they’ll taste just as delicious after being frozen!
Reheating isn’t necessary, but if you prefer a warm treat, I’d recommend microwaving them in short intervals (about 15-20 seconds) to warm them up gently without overheating the filling. Just be cautious not to overheat, as this can affect the texture!
Conclusion
And there you have it—my delightful recipe for Cookie Butter Cheesecake Cups! I can’t wait for you to try these out in your kitchen. They’re a wonderful combination of flavors and textures that I hope brings as much joy to your dessert table as they have to mine. Happy baking, and enjoy every delicious bite!