
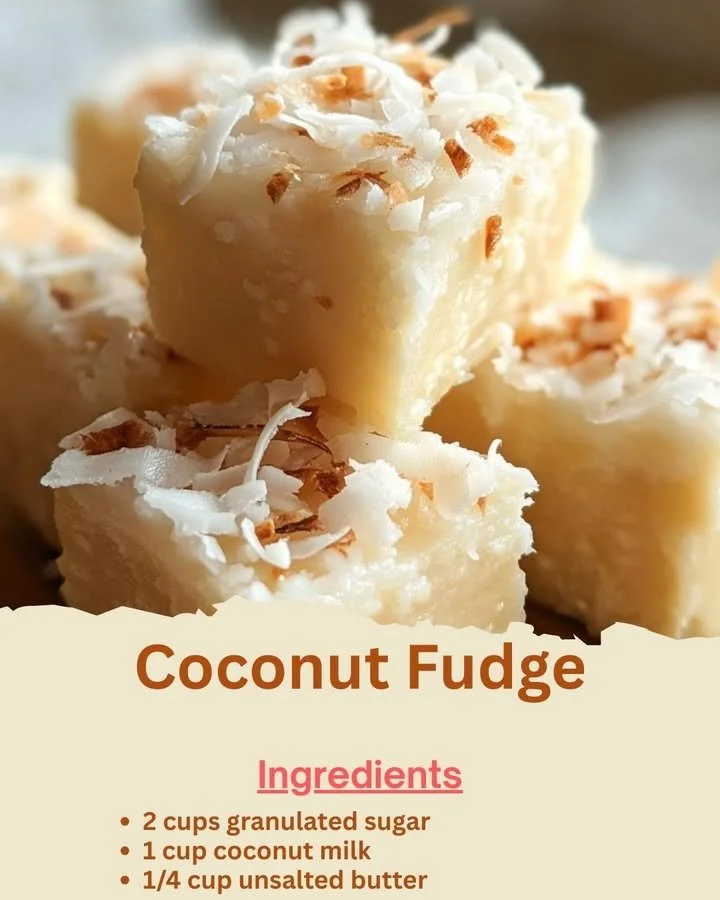
When I first stumbled across the recipe for Coconut Fudge, I was immediately drawn in by the idea of blending creamy coconut with sweetness. My kitchen quickly filled with the warm, inviting aroma of melting chocolate and coconut, transforming my space into a tropical paradise. As I watched the ingredients come together, I felt a sense of early excitement—this was going to be something special. The first bite I took was pure bliss, and from that moment on, I was hooked on this delightful treat that brings a little sunshine to any day!
Why You’ll Love This Recipe
You’re going to adore this Coconut Fudge recipe, just like I do. First and foremost, it’s incredibly simple, making it perfect for both novice and seasoned bakers. The combination of rich coconut flavor and smooth fudge texture is simply irresistible. Plus, you can whip this up in about 30 minutes, and trust me, when you present this to friends or family, they’ll be amazed at how you crafted such a delicious treat so easily! It’s the kind of recipe that brings smiles and happy chatter to the table—who wouldn’t love that?
Ingredients
- 2 cups sweetened shredded coconut
- 1 can (14 oz) sweetened condensed milk
- 2 cups white chocolate chips
- ½ teaspoon vanilla extract (See the next page below to continue…)
- Pinch of salt
Equipment Needed
- Medium saucepan
- Wooden spoon or spatula
- 9×9-inch baking dish
- Parchment paper
- Mixing bowl
Step-by-Step Instructions
Getting started with this Coconut Fudge recipe is a dream. I begin by gathering all my ingredients and equipment to ensure a smooth process. First, I pour the sweetened condensed milk into a medium saucepan. This sets the stage for that rich, creamy base. As I heat it over medium-low, I stir continuously to prevent burning. Once it’s warm, I add my white chocolate chips, stirring until they’re melted and completely combined with the milk—this took me about 5 minutes, but be careful not to rush it; it’s crucial to get that luscious, velvety texture.
With the melted chocolate and condensed milk done, it’s time to incorporate the coconut. I remove the saucepan from the heat and fold in the shredded coconut, vanilla extract, and a pinch of salt. The scent that wafts up is heavenly! I find that the salt really enhances the sweetness, balancing out the flavors beautifully. Make sure to mix it well, ensuring each bit of coconut gets coated with the fudgy mixture. At this point, you might be tempted to taste the mixture—go ahead, it’s irresistible!
Next, I prepare my baking dish by lining it with parchment paper for easy removal later. I then transfer the fudge mixture into the dish, spreading it evenly using my spatula. This is where patience comes into play; I make sure it is smooth and level to achieve perfect squares later on. I often tap the dish gently on the counter to eliminate any air bubbles, which has made a significant difference in preventing cracks in the finished product. Once poured, I let it cool at room temperature for about half an hour before transferring it to the refrigerator for a couple of hours to firm up. (See the next page below to continue…)
Finally, I get to the exciting part—cutting the fudge! Once it’s set, I lift the fudge out of the dish using the parchment paper, and I cut it into squares. The sheer joy of witnessing those glossy, coconut-filled squares is unstoppable. I usually take a photo, as they look stunning! The first bite is always a delight: it’s creamy, chewy, and utterly satisfying.
Pro Tips for Best Results
I’ve experimented with this recipe a few different ways, and here’s what I’ve learned: don’t skip the vanilla extract! It adds depth and enhances the natural flavors of the coconut and chocolate. I remember the first time I made it without the vanilla, and it just didn’t taste quite right—it felt lacking, as if something was missing. Trust me, it makes a world of difference.
Another detail I can’t stress enough is to ensure that your chocolate chips are truly melted before adding in the coconut. I once became impatient and added the coconut too soon, and I ended up with a lumpy mess instead of smooth fudge. If you’re feeling adventurous, I recommend adding in some chopped nuts at this stage for added texture and flavor—I’ve tried it with pecans and almonds, and both were delicious!
Lastly, don’t forget to give your fudge enough time to chill. I know it’s tempting to dive in right away, but letting it set properly gives you that ideal fudgy consistency. It’s well worth the wait, and I promise that the end result will be a rich delight that everyone will rave about.
Common Mistakes to Avoid
Speaking from experience, my first mistake was not reading the recipe thoroughly before starting. I ended up running out of shredded coconut halfway through making my fudge! It was a scramble to the store, and I realized that taking a moment to gather everything first saves time and stress. So take my advice and make sure you’ve got all ingredients on hand before you start. (See the next page below to continue…)
Another pitfall I encountered was misjudging the heat while melting the chocolate. I initially cranked the heat up too high, thinking it would speed things up. Instead, I ended up with burnt chocolate and had to start over. Low and slow is the way to go here; patience pays off with perfectly smooth fudge!
A crucial tip is to keep an eye on the cooling process. If you skip the refrigeration step, you’ll end up with a gooey mess instead of firm fudge squares. I remember my eagerness led me to taste some too early, and it just didn’t hold up. Allowing it the proper chilling time sets you up for success.
Lastly, I once tried to cut the fudge with a serrated knife, thinking it would make for smooth edges. Big mistake! Instead, I found that a sharp chef’s knife works wonders for sliceable, clean edges. Remember to warm your knife slightly before cutting—it makes a difference!
Serving Suggestions
When it comes to serving my Coconut Fudge, I like to bring out its tropical vibes with a little flair. I often plate it alongside fresh pineapple slices or coconut sorbet, creating a delightful pairing that feels like a mini vacation on a plate. The combination of flavors transports me straight to the beach!
I also enjoy wrapping my fudge squares up in colorful wrappers for gifting. Everyone seems to love a homemade treat, and these little gems make thoughtful gifts for birthdays or the holidays. I always get requests for the recipe afterward, which just warms my heart!
If I’m hosting a gathering, I’ve found that serving the fudge on a dessert platter alongside other chocolate treats, like brownies or truffles, creates a beautiful dessert spread. It’s a simple way to show off my baking skills while providing everyone with options to satisfy their sweet tooth.
Variations & Customizations
One of the best aspects of this Coconut Fudge recipe is how adaptable it is. I’ve experimented with adding crushed pineapple in the mix for an extra fruity goodness. The moisture from the pineapple can change the texture a bit, so balancing it is key, but it’s a delicious twist that I highly recommend trying!
I’ve also seen others incorporate a layer of dark chocolate on top of the fudge for additional richness. After spreading the coconut mixture in the dish, you can melt some dark chocolate and pour it on top. It creates a decadent layer that pairs beautifully with the sweetness of the fudge beneath.
For those who prefer a hint of spice, I’ve added a sprinkle of cinnamon or a few drops of almond extract instead of vanilla. It dramatically changes the profile, offering a warm, festive flavor that’s lovely during the holidays or cold months. Don’t be afraid to experiment!
How to Store, Freeze & Reheat
Storing my Coconut Fudge is pretty straightforward, and I often use an airtight container to keep it fresh. Once it’s fully cooled and cut, I layer the fudge squares between parchment paper to prevent them from sticking together, allowing for easy snacking later on. It lasts about a week at room temperature, but if I want to keep it longer, I pop it into the refrigerator where it holds its freshness for up to two weeks.
Freezing is also an option, and I’ve had success with it. I wrap each square tightly in plastic wrap and place them in a freezer-safe bag. When I need a quick sweet fix, I take a couple out, letting them thaw at room temperature for about 30 minutes. They hold up really well, retaining that creamy texture!
Reheating isn’t really necessary, but I sometimes pop a piece into the microwave for just a few seconds if I want it warm. Be careful not to heat it too long, as it can lose its delightful fudge consistency. Just enough to soften it slightly makes for a lovely treat!
Conclusion
Coconut Fudge has become a staple in my kitchen, and I cherish the memories I’ve created while making it. I hope you feel inspired to try this recipe and that it brings you just as much joy as it has brought me. Whether you enjoy it with friends, give it as a gift, or treat yourself, I assure you it’s sure to be a hit. Can’t wait to hear your stories and variations—you’re going to love making this as much as I do! Enjoy!