
Equipment Needed
- 9×13 inch metal or glass baking pan
- Electric hand mixer or stand mixer
- Mixing bowls (large and medium)
- Rubber spatula
- Measuring cups and spoons
- Wire cooling rack
Step-by-Step Instructions
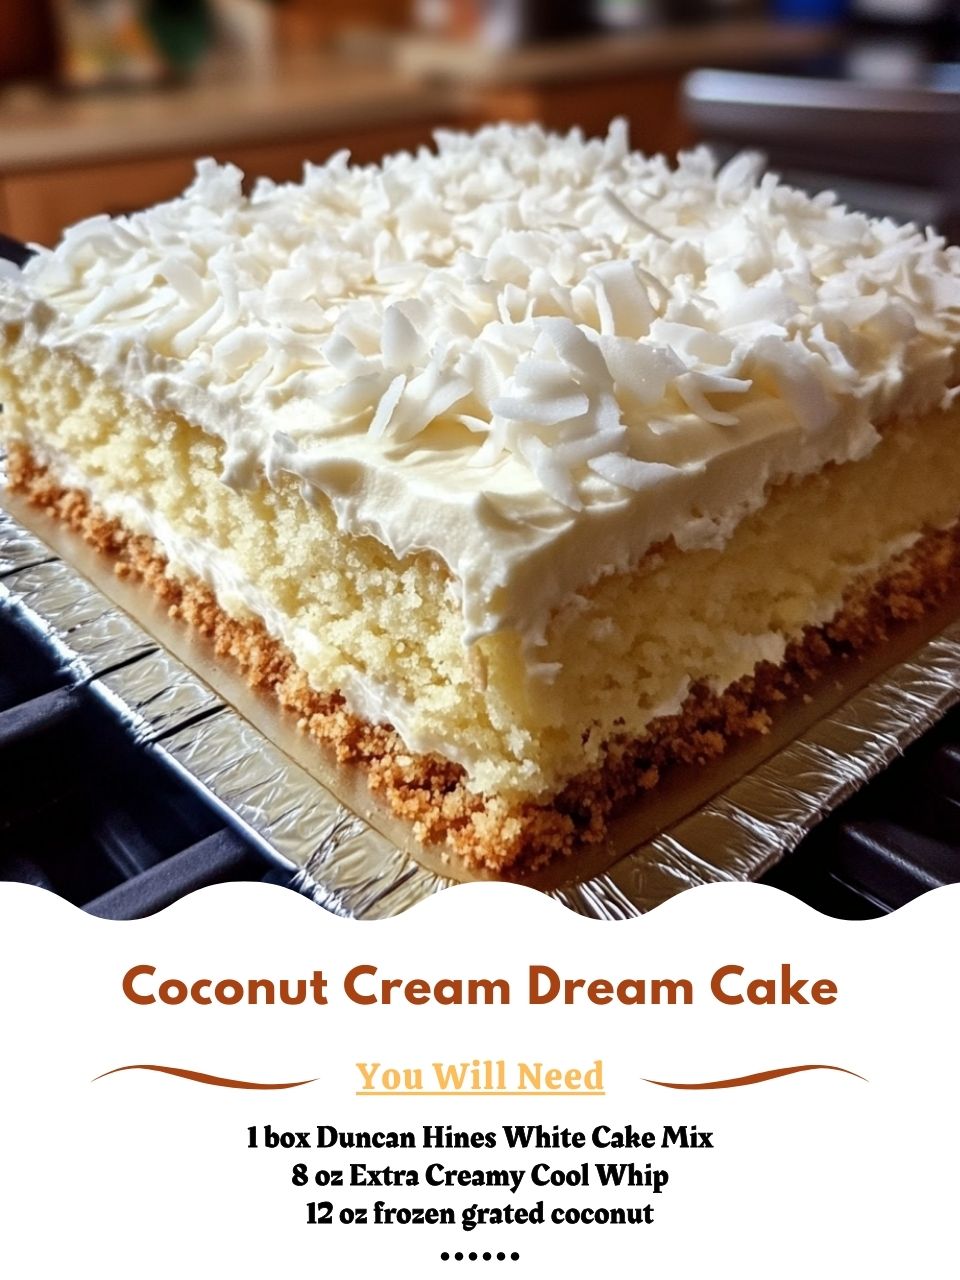
I always start by baking the cake according to the package directions for a 9×13 inch pan, but with one crucial tweak: I use only egg whites. This gives me a beautifully white, tender base that looks and tastes fantastic. I also like to add a teaspoon of coconut extract to the batter for an extra layer of flavor that bakes right in. Once the cake is baked, I let it cool completely in the pan on a wire rack. This is a test of patience, but it’s vital—adding the creamy layer to a warm cake will cause it to melt and soak in, making a soggy mess. I usually bake the cake in the morning for an evening dessert.
While the cake cools, I make the dreamy coconut cream layer. In a medium bowl, I combine the instant vanilla pudding mix with the cold milk. I whisk this by hand for a full two minutes until it’s very thick and smooth. Then, I whisk in the teaspoon of coconut extract. Now, I gently fold in the entire tub of thawed Extra Creamy Cool Whip. I do this with a rubber spatula, using big, sweeping folds until no white streaks remain. The key here is gentleness to keep the mixture light and fluffy. This creamy, cloud-like mixture is the heart of the cake.
Once the cake is completely, totally cool to the touch, I spread the creamy coconut mixture evenly over the top. I use my offset spatula to swirl it into an even layer, going all the way to the edges. Now, for the grand finale: I take the thawed, grated coconut and sprinkle it liberally and evenly over the entire surface of the creamy layer, pressing down gently so it adheres. I use every last bit of that 12-ounce package. The cake should look like it’s been caught in a delicious tropical snowstorm.(See the next page below to continue…)