
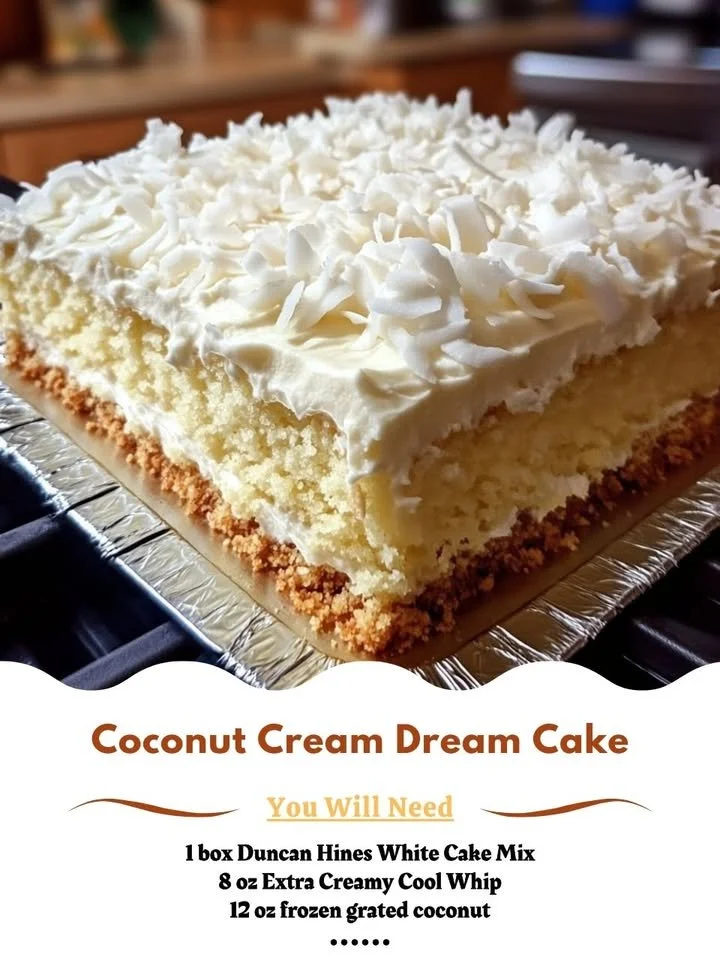
I’m excited to share a recipe that has become a staple in my dessert repertoire—Coconut Cream Dream Cake. This cake is not just another sweet treat; it’s a tropical escape wrapped in layers of moist cake, creamy coconut filling, and beautifully toasted coconut flakes on top. Each slice is like a little vacation for your taste buds, and I can’t wait for you to try it too!
Why You’ll Love This Recipe
Coconut Cream Dream Cake combines the comforting qualities of a homemade cake with the dreaminess of coconut cream, making it an irresistible dessert for any occasion. The layers of rich flavors and creamy textures will have everyone asking for seconds (or thirds!). Plus, it’s perfect for potlucks, birthdays, or just a delightful weekend treat. Trust me; once you make it, it’ll be a cake you’ll want to bake over and over again! (See the ingredients in the next page below…)
Ingredients
– 2 cups all-purpose flour
– 1 ½ cups granulated sugar
– ½ cup unsalted butter, softened
– 1 cup coconut milk
– 4 large eggs
– 2 ½ teaspoons baking powder
– 1 teaspoon vanilla extract
– 1 teaspoon coconut extract
– ½ teaspoon salt
– 1 cup shredded coconut (unsweetened and toasted for topping)
– 2 cups heavy whipping cream
Equipment Needed
– Mixing bowls
– Electric mixer
– 9-inch round cake pans (2)
– Rubber spatula
– Baking sheets
– Parchment paper
– Whisk
– Measuring cups and spoons
Step-by-Step Instructions
First things first, preheat your oven to 350°F (175°C). While it’s warming up, grab your mixing bowls and combine the softened butter and sugar in a large bowl. With my electric mixer, I like to beat them together until they’re nice and fluffy, which usually takes about 3-4 minutes. The moment you start mixing, you’ll notice that lovely aroma filling the air—such a comforting scent! Next, I add the eggs one at a time, making sure to mix well after each addition. Then, I incorporate the coconut milk, vanilla, and coconut extracts until fully blended. (See the next page below to continue steps…)
Now, I take another bowl and whisk together the flour, baking powder, and salt. Gradually add this dry mixture to the wet ingredients, stirring gently until everything is just combined. I always find that this is where the magic begins; the batter should be smooth and slightly thick, and the smell of coconut is heavenly! Divide the batter evenly between your prepared cake pans and bake for about 25-30 minutes, or until a toothpick inserted into the center comes out clean. Allow the cakes to cool in the pans for about 10 minutes, then transfer them to a wire rack to cool completely.
While the cakes are cooling, it’s time to whip up the creamy frosting. I take my heavy cream and whip it until soft peaks form—it’s the point where you can see those lovely little swirls in the cream. Once the cakes are cooled, I spread a layer of whipped cream on top of one cake layer and sprinkle a generous amount of toasted coconut over it. Then, I carefully top it with the second cake layer. Finally, I cover the entire cake with the remaining whipped cream and voilà—your Coconut Cream Dream Cake is ready to shine!
Before serving, let the cake chill in the refrigerator for at least an hour. This waiting period not only helps the flavors meld beautifully but also gives the frosting a chance to set. The sight of that fluffy cake with the toasted coconut on top will surely make your mouth water, and the anticipation will drive everyone wild!
Pro Tips for Best Results
Through my baking adventures, I’ve learned a few gems when it comes to making this cake. First, always use room temperature ingredients—especially the butter and eggs. This helps in creating a batter that’s well-emulsified and results in a lighter texture. I always take my ingredients out of the fridge an hour prior to baking. Trust me, it makes a massive difference!
Another tip is to make sure you toast your coconut flakes gently. For the best flavor, I recommend toasting them in the oven at 350°F. Keep an eye on them because they can go from golden to burnt in a blink! I like to stir them every few minutes until they’re beautifully browned and fragrant. The extra step enhances the overall flavor and adds a lovely crunch to the cake.
Lastly, for an even more delightful taste, consider adding a splash of dark rum or a hint of lime juice to the cream before whipping. It adds an unexpected depth of flavor, and every time I do it, my family keeps asking, “What’s your secret?” Little do they know, it’s just a simple twist!
Common Mistakes to Avoid
When I first started making Coconut Cream Dream Cake, I ran into a few mishaps that I want to save you from! One common mistake is overmixing the batter. I know how tempting it is to keep mixing until everything looks perfect, but overmixing can lead to a dense cake. Just mix until combined—that’s the key! (See the next page below to continue…)
Another issue I faced was not checking for doneness. Every oven is different, and baking times can vary—so I always make sure to check my cakes a few minutes before the suggested time. I insert a toothpick into the center, and if it comes out clean, it’s ready to come out! If not, give it a few more minutes but no longer than that.
Lastly, I’ve neglected to let the cakes cool fully before frosting them, only to find the whipped cream sliding right off! It’s crucial to let your layers cool completely on a wire rack. I often end up being a bit patient here, but it’s worth the wait. Your frosting will be smoother and stay put beautifully!
Serving Suggestions
This cake is truly a showstopper, and serving it is half the fun! I love to slice it into generous pieces and serve it with fresh berries on the side; the combination of sweet berries with the creamy coconut is absolute bliss. You can also drizzle a little chocolate sauce over the top for that added decadence—chocolate and coconut make an irresistible pairing!
Another delightful serving suggestion is to accompany the cake with a scoop of vanilla or coconut ice cream. The creamy texture of the ice cream complements the cake beautifully and takes it to a whole new level. For an authentic tropical presentation, I even like to garnish the plates with a sprig of mint or some passion fruit pulp, adding a pop of color and freshness to the dish.
Finally, don’t hesitate to get creative with your presentation! I sometimes layer individual servings in cute mason jars for a fun twist at parties. Everyone loves having their own little dessert, and these jars look adorable on the table!
Variations & Customizations
One of the best things about this cake is its versatility. If you’re not a huge coconut fan, you can easily swap the coconut milk for almond or oat milk for a different flavor profile. You can also experiment with the extracts; maybe replace the coconut extract with almond extract for a delightful marzipan flavor. The possibilities are endless!
For a tropical twist, I love adding crushed pineapple to the frosting. It adds a juicy sweetness that complements the coconut beautifully. When doing this, I always make sure to drain the pineapple well to avoid excess moisture. This small addition elevates the cake and brings me back to beach days in the sun!
If you’re feeling adventurous, consider adding a layer of lemon curd between the cake layers. The tartness of the lemon curd balances the sweet coconut perfectly and adds a refreshing bite. It gives the cake a whole new personality—delicious!
How to Store, Freeze & Reheat
If you have any leftovers (which isn’t very likely!), you can store the cake in the refrigerator for up to 4 days. Just be sure to cover it loosely with plastic wrap to keep it fresh while allowing some air to circulate. The flavors actually improve after a day, so it can be a delightful treat to indulge in later!
For longer storage, I recommend freezing the cake. To freeze, slice the cake and place the individual pieces in an airtight container or wrap them tightly in plastic wrap and foil. They can last up to 3 months in the freezer. When you’re ready to enjoy a slice, simply thaw it in the refrigerator overnight and let it come to room temperature before serving. The texture remains just as heavenly!
I should note that I wouldn’t recommend reheating the cake in the microwave, as it tends to make the texture a bit soggy. Instead, let it come to room temperature on the counter; this way, it keeps its delightful fluffiness and stays true to its original charm.
Conclusion
And there you have it—my beloved Coconut Cream Dream Cake! It’s not just a recipe but a labor of love that brings joy to anyone who takes a bite. I hope you enjoyed reading about it as much as I enjoyed creating it. Baking this cake is a sweet experience that’s meant to be shared with friends and family, so roll up your sleeves, gather your ingredients, and indulge in the magic of coconut! Happy baking, everyone!