
When I first made these Classic Christmas Sugar Cookies, my entire kitchen filled with the warm, buttery smell that instantly reminded me of holidays at my grandma’s house. I remember watching her press each cookie with a fork and sprinkle them with sparkling red and green sugar, and as I recreated them myself, it felt like stepping right back into those childhood December afternoons. These cookies come out soft, tender, and full of that nostalgic flavor that just makes you smile before you even take a bite. I love how simple they are, yet they carry so much warmth and tradition—it’s the kind of recipe that feels like a hug baked into a cookie sheet.
Ingredients
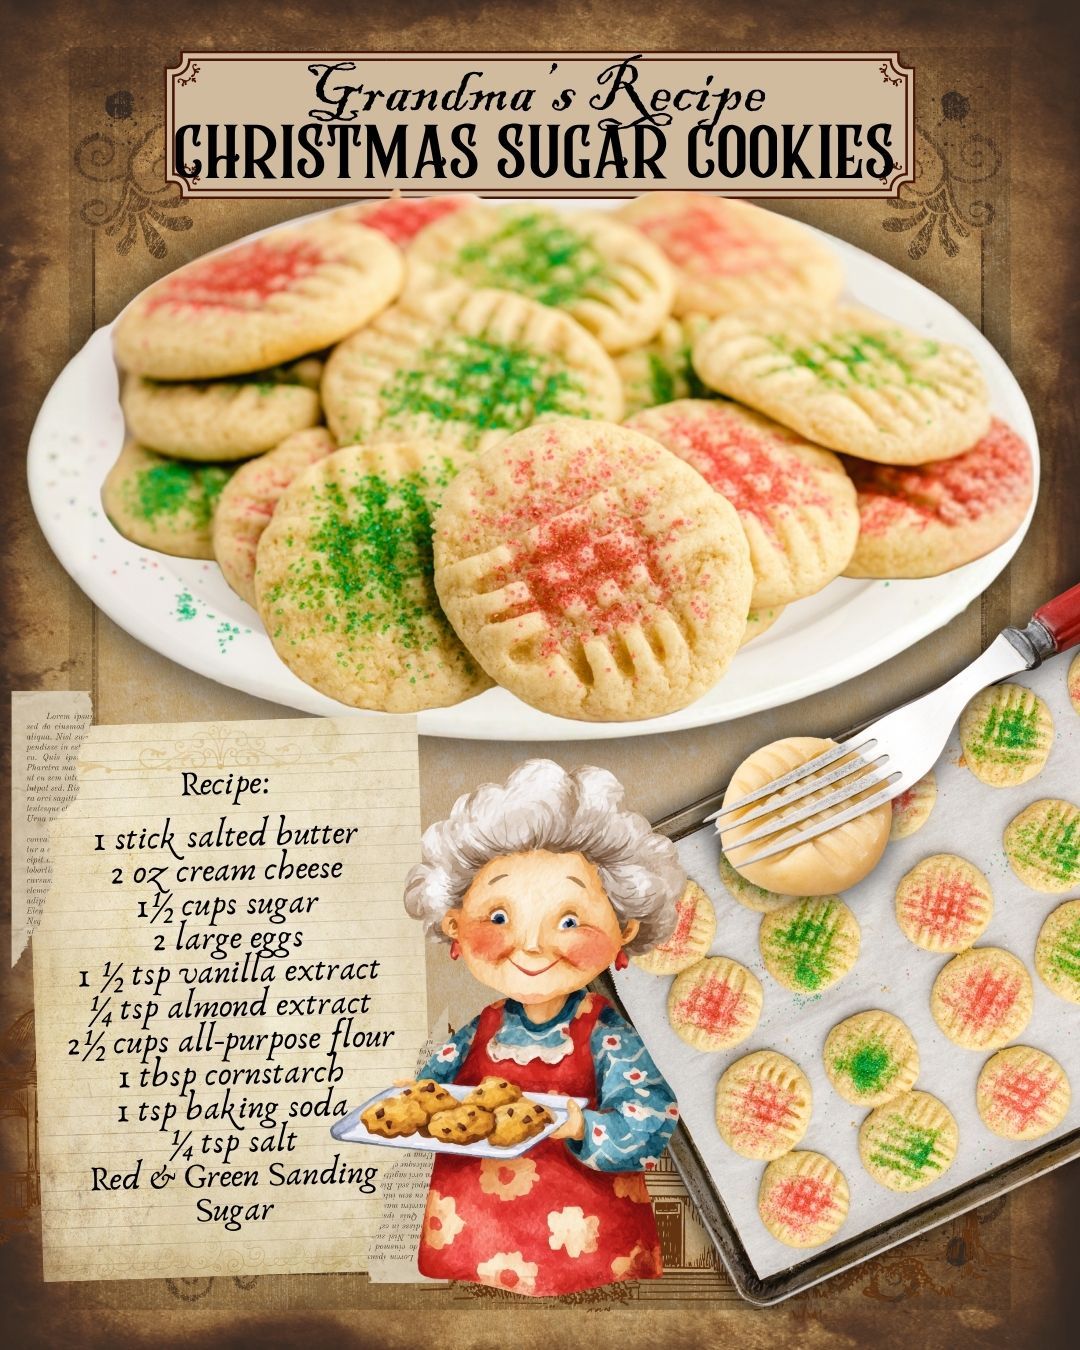
- 1 stick salted butter
- 2 oz cream cheese
- 1½ cups sugar
- 2 large eggs
- 1½ tsp vanilla extract
- ¼ tsp almond extract
- 2½ cups all-purpose flour
- 1 tbsp cornstarch
- 1 tsp baking soda
- ¼ tsp salt
- Red & green sanding sugar
After working with this dough many times, I’ve learned a few things: don’t skip the almond extract—it’s a tiny amount but adds that signature nostalgic bakery cookie flavor. The cornstarch helps keep the cookies soft rather than cakey, so keep it in. If you don’t have sanding sugar, any colored sugar works, but avoid big chunky sprinkles since they melt unevenly. And if you want a richer cookie, you can replace half the sugar with light brown sugar, but the classic version really shines as-is.
Equipment Needed
- Mixing bowls
- Hand mixer or stand mixer
- Rubber spatula
- Measuring cups and spoons
- Cookie sheet
- Parchment paper
- Fork (for crisscross patterns)
- Cooling rack
I’ve made these cookies with both a hand mixer and a stand mixer, and honestly, either works great—just make sure your butter and cream cheese are truly softened so the dough blends smoothly. Parchment paper makes a big difference because it prevents the bottoms from browning too quickly, especially if your oven runs hot. Using a cooling rack also helps the cookies finish setting without getting soggy underneath. And yes, the simple fork is essential—not just for the pattern but for flattening the dough evenly.
Step-by-Step Instructions
When I start making these cookies, the first thing I do is cream the softened butter, cream cheese, and sugar together until the mixture turns pale and fluffy. If you’ve never creamed butter and sugar long enough, trust me—give it the full two to three minutes, because that air whipped into the mixture is what gives the cookies their perfect texture. The moment the mixture turns almost white, that’s when you know it’s ready. Then I add the eggs, vanilla, and almond extract, letting everything blend until smooth and silky.
Next, I whisk together the dry ingredients—flour, cornstarch, baking soda, and salt—in a separate bowl. I used to skip this step and dump them straight into the wet ingredients, but I learned the hard way that it leads to little pockets of baking soda. Mixing them separately really does help the dough come together evenly. I add the dry mixture to the wet in small portions, using a spatula to gently fold everything together until it forms a soft dough. It should be moist but not sticky, and if it seems too soft, chilling for 15 minutes helps a ton.
Shaping the dough is one of my favorite parts. I roll tablespoon-sized scoops into smooth balls and place them on a parchment-lined baking sheet. Then, using a fork dipped in a little sugar, I gently apply the classic crisscross pattern. The trick is not pressing too hard—just enough to flatten the cookie slightly. Once the pattern is made, I sprinkle the tops generously with red and green sanding sugar. Not only does it look festive, but the sugar adds a delicate crunch that really makes these cookies special.(See the next page below to continue…)