
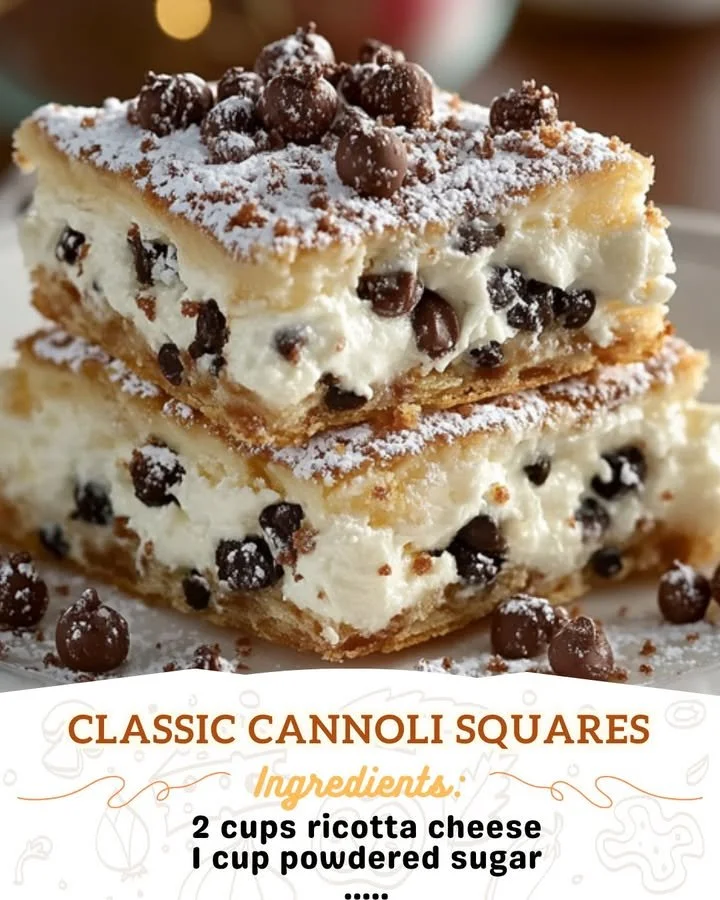
I am thrilled to share a recipe that has quickly become a favorite in my household—Classic Cannoli Squares. If you’ve ever been tempted by the crispy, creamy delight of a traditional cannoli but were hesitant about the fuss of frying and filling those delicate shells, then you’re in for a treat. These dreamy squares capture all that wonderful cannoli flavor without all the mess, and they’re just perfect for sharing with friends and family.
Why You’ll Love This Recipe
This recipe is not just a delicious twist on the classic cannoli but also incredibly simple to prepare. With a crunchy, buttery crust and a creamy, sweet filling packed with ricotta and chocolate chips, each bite is utterly satisfying. Plus, they’re as pleasing to the eye as they are to the palate! I love how this dessert brings back memories of those special occasions when my family would indulge in cannoli, making it perfect for any gathering or simply a sweet treat for your family. What’s not to love? (See the ingredients in the next page below…)
Ingredients
– 1 cup all-purpose flour
– 1/2 cup unsalted butter, softened
– 1/4 cup granulated sugar
– 1 large egg
– 1/2 teaspoon vanilla extract
– 1/4 teaspoon salt
– 1 cup ricotta cheese
– 1/2 cup powdered sugar
– 1/2 cup mini chocolate chips
– 1 teaspoon cinnamon
– Powdered sugar for dusting
Equipment Needed
– Mixing bowls
– 9×9-inch baking dish
– Rolling pin
– Baking sheet
– Plastic wrap
– Rubber spatula
– Sifter
Step-by-Step Instructions
Let’s dive into making these delectable squares! The first step is to prepare your crust. In a mixing bowl, cream together the softened butter and granulated sugar until light and fluffy. Then, add in the egg, vanilla extract, and salt, mixing until well combined. Gradually stir in the flour to form a dough. Once the dough comes together, wrap it in plastic wrap and refrigerate it for about 30 minutes. You’ll want to allow it to firm up slightly, making it easier to roll out. (See the next page below to continue steps…)
Next, preheat your oven to 350°F (175°C) while you roll out the dough onto a floured surface. Aim for about a 1/4-inch thickness—this will ensure a nice crispy crust. Once rolled out, gently press it into the bottom of your greased baking dish, ensuring even coverage. Use a fork to poke holes all over the crust; this prevents it from bubbling up during baking. Pop the dish into the oven and bake for about 20 minutes or until the edges are lightly golden. The smell in my kitchen during this time is enough to make anyone’s mouth water!
While the crust is baking, let’s whip up that luscious filling! In a clean mixing bowl, combine the ricotta cheese with powdered sugar, cinnamon, and mini chocolate chips. Mix until smooth and creamy—your taste buds will challenge you not to dive in with a spoon! Once the crust is out of the oven and cooled slightly, spread this delightful filling evenly over the top. It’s literally like spreading joy on a canvas!
Finally, return the dish to the oven for an additional 10-15 minutes until the filling is heated through. Once done, let it cool completely before dusting it with powdered sugar. Cut into squares, and you’re ready to serve! The textures, colors, and aromas will draw everyone into the kitchen.
Pro Tips for Best Results
I tested this recipe three ways to get the perfect texture for the crust. The key is not to overwork the dough; just mix until it’s combined. If you do, it can result in a tough crust rather than a tender one. Trust me, nobody wants that! Also, make sure to know your oven; if it runs hot, keep an eye on the crust as it bakes to avoid burning.
When it comes to the filling, don’t settle just for plain ricotta! Experiment with different flavors like orange zest or almond extract for a unique twist. I once made a batch with lemon zest, and it was like sunshine in a dessert! Just a little tweak can elevate the flavor to new heights.
Lastly, be generous with the powdered sugar when serving. Not only does it look beautiful dusted lightly over the top, but the sweetness balances the richness of the filling perfectly. A sprinkle right before serving makes all the difference in aesthetics and taste!
Common Mistakes to Avoid
While making these adorable cannoli squares, one mistake is not allowing the dough to chill long enough. I learned this the hard way when my first batch didn’t hold its shape and turned out more like a gooey mess than a crisp crust. So, don’t skip the chilling step! (See the next page below to continue…)
Another common misstep is filling the squares too soon. It can be tempting, especially with that creamy filling enticing you, but if you spread it on a hot crust, it might melt and leak. Patience truly pays off here—allow the crust to cool completely.
Also, keep an eye on your baking time. Ovens can vary, and nothing is worse than burnt edges or an undercooked crust. A golden brown crust is ideal, and checking around 15 minutes is a good way to ensure you’re on the right track. Finally, don’t skip the sifting part for the powdered sugar! It helps lessen lumps and gives a wonderfully smooth finish atop your squares.
Serving Suggestions
These Classic Cannoli Squares are perfect for all occasions, whether it’s a family gathering or a casual get-together with friends. I love serving them alongside a cup of fresh espresso or an afternoon tea. The rich flavors complement the warm drinks so wonderfully, and it’s always a hit!
For a fun twist, consider offering a toppings station. I place bowls of crushed pistachios, chocolate shavings, and even some candied citrus peel for everyone to customize their squares. It’s interactive, and who doesn’t love a little personalization with their dessert? It sparks joy and adds an extra layer of fun to dessert time!
Lastly, if you’re feeling creative, consider pairing these squares with a fruit compote. A raspberry or strawberry sauce drizzled over them not only adds a pop of color but also a refreshing contrast to the creamy filling. The sweetness of the fruit lifts the whole flavor profile and makes for a perfect finishing touch.
Variations & Customizations
One of the great things about Classic Cannoli Squares is just how versatile they are! If you’re looking to change things up, consider using mascarpone cheese instead of ricotta. It adds a rich, luxurious texture that takes the filling to a whole new level. You could also swap in your favorite flavor mix-ins—think toasted coconut or chopped dried fruits for a unique, delightful twist!
For a nutty option, finely chop some hazelnuts or walnuts and stir them into the filling mix. Not only will you get that lovely crunch, but the ingredients also complement the sweetness beautifully. I can tell you from experience, the added texture makes each bite even more enjoyable!
Lastly, if you want to skip the chocolate altogether, try adding some fresh lemon zest to the filling instead. It creates a refreshing and zesty filling that surprises the palate and makes for an excellent summer dessert.
How to Store, Freeze & Reheat
To store your Cannoli Squares, simply cover the dish with plastic wrap and place it in the refrigerator. They will stay fresh for about 3-4 days, but trust me, they likely won’t last that long with how irresistible they are! Just remember to dust with extra powdered sugar before serving if they’ve been stored for a bit; it gives them a fresh touch again.
If you’d like to freeze them, I recommend cutting them into squares before freezing. Place them on a baking sheet lined with parchment paper and freeze until solid, then transfer them to a freezer-safe container. They can last for up to three months in the freezer. To reheat, just let them thaw overnight in the fridge and warm them slightly in the oven—just enough to take the chill off.
For an easy on-the-go treat, consider packing them for lunch or a picnic. Just add a little towel to keep them from sliding around, and you’re set for a sweet escape!
Conclusion
And there you have it—my go-to recipe for Classic Cannoli Squares that I adore sharing with loved ones. They are easy to make, filled with delightful flavors, and have a beautiful, rustic charm that is simply irresistible. I hope you give this recipe a try in your own kitchen and share the joy of these treats with your family and friends. Happy baking!