
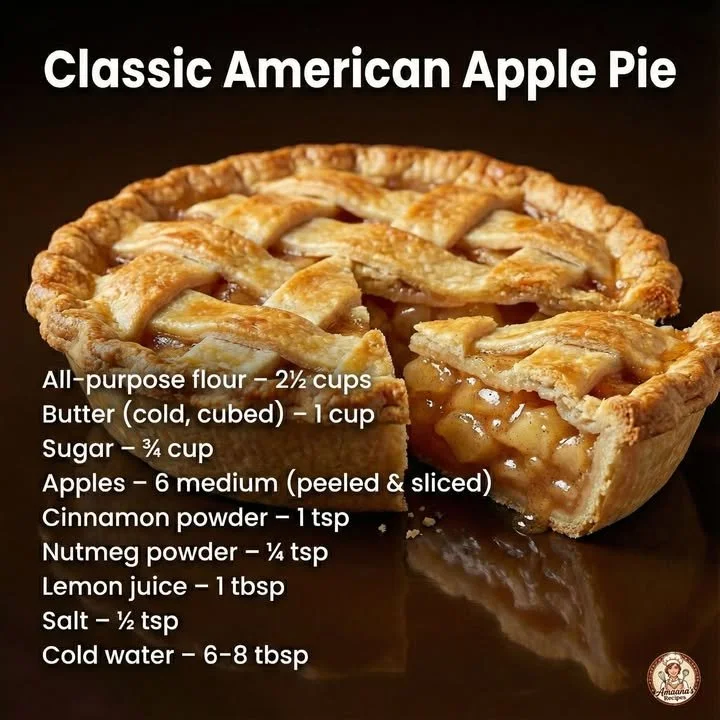
There’s something truly magical about a classic American apple pie. It’s more than just a dessert; it’s a warm hug from my childhood, a symbol of family gatherings, and the scent of cinnamon and baked apples wafting through my kitchen. Whenever I think of autumn, I picture myself rolling out dough, peeling apples, and sealing the pie, anticipating the joy it will bring to my loved ones. Let me take you through my favorite recipe for this timeless treat, which is sure to become a staple in your home as well.
Why You’ll Love This Recipe
This recipe for classic American apple pie is simple yet exquisite, delivering that perfect balance of sweet and tart flavors wrapped in a flaky, buttery crust. Each bite is a delightful mix of soft, spiced apples and that irresistible crunch of the crust. It’s a dessert that evokes nostalgia and is perfect for any occasion, from holidays to casual family dinners. Trust me, you’ll quickly find yourself returning to this recipe again and again to impress guests or simply indulge in a quiet moment with a warm slice topped with vanilla ice cream. (See the ingredients in the next page below…)
Ingredients
- 6 to 8 medium-sized apples (a mix of Granny Smith and Honeycrisp works beautifully)
- ¾ cup granulated sugar
- 2 tablespoons lemon juice
- 1 teaspoon ground cinnamon
- ¼ teaspoon nutmeg
- 2 tablespoons all-purpose flour
- 1 tablespoon butter, cut into small pieces
- 1 tablespoon milk (for brushing)
- 1 recipe for pie crust (homemade or store-bought)
Equipment Needed
- 9-inch pie pan
- Mixing bowl
- Peeler and corer
- Rolling pin
- Pastry brush
- Sharp knife
- Oven mitts
Step-by-Step Instructions
First things first, I like to preheat my oven to 425°F (220°C). While it’s warming up, I start peeling and slicing my apples into thin wedges. There’s something so satisfying about getting the apples just right; I aim for even slices to ensure they cook uniformly. Once they’re all sliced, I toss them in a mixing bowl with sugar, lemon juice, cinnamon, nutmeg, and flour. The sugar helps balance the tartness of the apples, while the spices make my kitchen smell heavenly as they mingle together. I let this mixture sit for about 10 minutes to allow the flavors to marinate and the apples to soften a bit. (See the next page below to continue steps…)
Next, I roll out half of my pie crust on a floured surface to fit my pie pan. I feel like an artist as I gently drape the crust into the pan, keeping it nice and even. Once I’ve filled the crust with my apple mixture, I dot it with butter pieces to add a richness to the filling. Then, I roll out the second half of the crust, cover the pie, and seal the edges with a fork. I always remember to cut a few slits in the top crust for steam to escape, which creates those beautiful, golden-brown peaks as it bakes.
As I brush the top crust with milk, I can’t help but get excited knowing it’s almost time for baking. I place my pie in the preheated oven and bake it for about 15 minutes. After that, I reduce the temperature to 350°F (175°C) and continue baking for an additional 30 to 40 minutes. The goal is to achieve a golden-brown crust and bubbly filling. And oh, the aroma wafting through my kitchen during this time is irresistible! My heart swells with anticipation.
Once the timer goes off, I carefully take the pie out and let it cool on a wire rack. I know the cooling process feels like the longest step, but this wait ensures that the filling sets perfectly, making it easier to slice. Trust me; the extra patience is worth it when that first slice comes out beautifully!
Pro Tips for Best Results
When it comes to creating the perfect apple pie, I’ve tested a few different types of apples and found that mixing tart and sweet varieties truly elevates the flavor profile. Granny Smith apples provide that delightful tartness, while Honeycrisp apples add a natural sweetness that balances everything out. I often buy a few extra just to snack on while I’m preparing—because who can resist?
Another tip I swear by is letting the apple filling sit for at least 10 minutes after mixing. This little step allows the juices to combine with the sugar and spices, creating a more cohesive filling that enhances the overall flavor. The rich syrupy goodness is just divine when it spills out from the slices!
Lastly, I find that a sprinkle of coarse sugar on top of the crust before baking adds that lovely crunch and shimmer that makes the pie inviting. Who doesn’t love a little extra visual appeal, right?
Common Mistakes to Avoid
One mistake I’ve made in the past is not properly preparing my pie crust. If the dough is too warm when you roll it out, it can become sticky and unmanageable. To prevent this, I recommend chilling the crust in the refrigerator for at least 30 minutes before rolling it out. This helps achieve that flaky texture we all crave. (See the next page below to continue…)
Another error is filling the pie excessively. While it’s tempting to pack in as many apples as possible, overfilling can cause the pie to spill over as it bakes. I’ve learned the hard way to leave a little space at the top to allow for bubbling and expansion.
Also, don’t skip the cooling time after baking. I was initially tempted to dig right in, but a warm pie that hasn’t cooled enough can leave you with a soupy filling instead of the sliceable texture that you want. Allowing it to rest for at least two hours will pay off immensely.
Lastly, remember to check for doneness! The top crust might look wonderfully golden, but it’s essential that the apples are tender and the juices are bubbling. I stick a knife into a slit to check, and if it goes through easily, I know it’s ready!
Serving Suggestions
There’s nothing quite like a slice of warm apple pie fresh from the oven, but I love to serve mine with a scoop of vanilla ice cream or a dollop of whipped cream on top. The cold creaminess melts slightly over the warm pie, creating a blissful contrast that elevates each bite.
Sometimes, I like to add a sprinkle of cinnamon sugar over the ice cream for an extra layer of flavor—a little touch that makes a big difference! And if I’m feeling fancy, I’ll drizzle a bit of caramel sauce over it. It adds a sweet richness that pairs wonderfully with the tart apples.
For gatherings, I love serving my apple pie alongside a rich cheddar cheese platter. The savory notes of the cheese balance out the sweetness of the pie, creating a lovely combination of flavors that guests adore. It’s always fun to see their surprised faces when they take that first bite!
Variations & Customizations
While I adore the classic apple pie, I occasionally like to shake things up a bit! One of my favorite variations is adding a scoop of raisins or cranberries to the apple filling. This adds a lovely chewy texture and a deep flavor that complements the apples beautifully.
I also experiment with spice combinations from time to time. While cinnamon and nutmeg are traditional, I’ve played with ginger or allspice for a unique twist. Just a pinch can create a whole new depth of flavor that surprises and delights my family!
For those who enjoy a crumb topping, I sometimes opt for a streusel topping instead of a second crust. The contrast between the crunchy topping and the soft apple filling is divine, plus it’s an easy way to save time on the crust preparation!
How to Store, Freeze & Reheat
If by some miracle there are leftovers, I usually store my apple pie tightly covered in the refrigerator, where it can last for about four days. Just make sure it’s fully cooled before covering, so it maintains that perfect texture. When I crave a slice later on, I love to reheat it in the oven for a bit—it really brings back that fresh-out-of-the-oven experience!
For longer storage, I recommend freezing. I wrap the unbaked pie tightly in plastic wrap and then in aluminum foil. This way, it can last up to three months in the freezer. When I’m ready to bake it, I simply take it out, let it thaw in the fridge overnight, and then bake as instructed. Having an apple pie ready to go is an absolute win in my book!
If I have a slice or two left after baking, I place them in an airtight container to keep them fresh. I like to reheat individual slices in the microwave for about 30 seconds or so, which is quick and brings back that delightful warmth and aroma.
Conclusion
Baking a classic American apple pie isn’t just about the food; it’s about creating memories and experiencing the joy of sharing it with loved ones. With this recipe in hand, I hope you feel inspired to fill your kitchen with the warm scent of apples and spices. Every slice tells a story, and I can’t wait for you to make your own. Happy baking!