
Step-by-Step Instructions
First, I preheat my oven to 375°F (190°C) and line my baking sheet with parchment paper. Then, I get my station ready. In my small bowl, I melt the butter until it’s just liquid. In another bowl or my zip-top bag, I combine the white sugar, brown sugar, cinnamon, and that all-important pinch of salt. I use a fork to break up any lumps in the brown sugar until the mixture is uniform and smells amazing—like the essence of fall and comfort in a bowl.
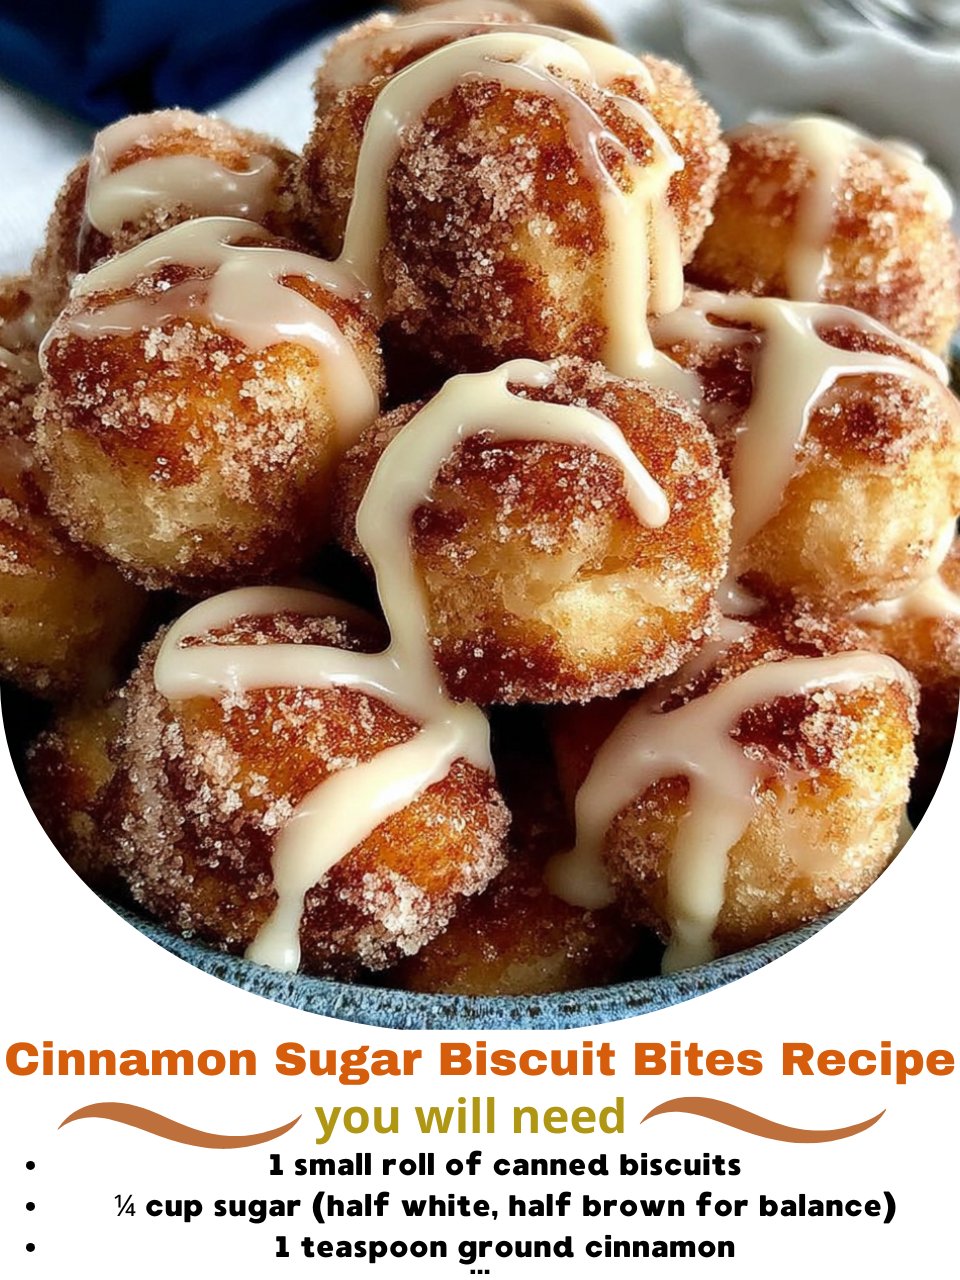
Next, I open the can of biscuits (that pop! never gets old). I separate each biscuit and then, using my hands, I tear or cut each one into four rough, uneven pieces. I’ve tried cutting them neatly with a knife and just tearing them, and trust me, tearing is better. The craggy, uneven edges create more surface area for butter and sugar to cling to, leading to more delicious crunch in every bite. The pieces should be about the size of a large cherry or a small walnut.
Now, for the fun, slightly messy part. I place all the biscuit pieces into the bowl with the melted butter. I toss them gently with a spoon or my hands until every single piece is lightly and evenly coated. This butter layer is the glue for our cinnamon sugar. Then, I transfer the buttered pieces directly into the bag or bowl with the cinnamon sugar. I seal it shut and shake, shake, shake! I aim for a vigorous but not violent shake—I want them thoroughly coated, not smashed. When I open the bag, the transformation is incredible: pale dough is now completely encased in a fragrant, sandy, spiced sugar armor.(See the next page below to continue…)