
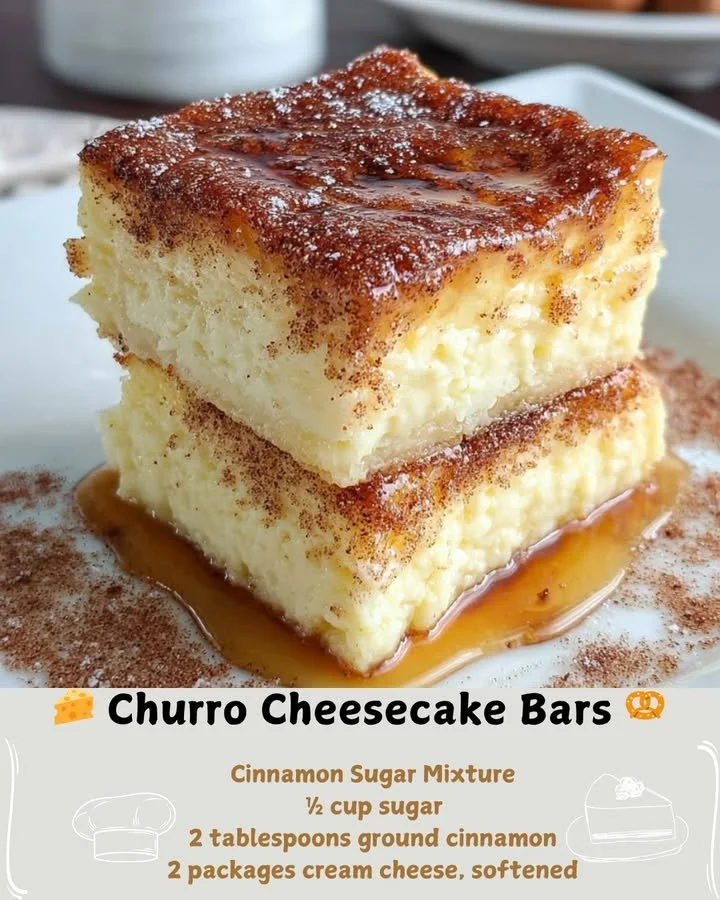
Oh, how I adore a good dessert, and let me tell you, Churro Cheesecake Bars have become one of my absolute favorites! These delightful treats combine the warm, cinnamon-sugar goodness of churros with the creamy, dreamy texture of cheesecake. Just imagining the sweet aroma wafting through my kitchen makes my heart skip a beat. They are perfect for every occasion, or honestly, anytime you need a little something sweet in your life!
Why You’ll Love This Recipe
There’s nothing quite like indulging in a dessert that perfectly balances rich and sweet flavors, and these Churro Cheesecake Bars do exactly that! With a buttery crust, velvety cheesecake filling, and that irresistible cinnamon-sugar topping, they capture the essence of churros in an easy-to-serve bar form. They are great for parties, potlucks, or just to keep you company on a cozy evening at home. Trust me, once you taste one, you’ll be hooked! (See the ingredients in the next page below…)
Ingredients
– 1 ½ cups graham cracker crumbs
– ½ cup unsalted butter, melted
– 2 tablespoons granulated sugar
– 2 teaspoons ground cinnamon
– 16 ounces cream cheese, softened
– 1 cup granulated sugar
– 1 teaspoon vanilla extract
– 3 large eggs
– 1 cup sour cream
– 2 tablespoons all-purpose flour
– ½ teaspoon salt
Equipment Needed
– 9×13 inch baking pan
– Mixing bowls
– Electric mixer or whisk
– Measuring cups and spoons
– Rubber spatula
– Parchment paper (optional)
– Cooling rack
Step-by-Step Instructions
To kick off this delicious endeavor, I first preheat my oven to 350°F (175°C). Then, in a mixing bowl, I combine the graham cracker crumbs, melted butter, sugar, and one teaspoon of cinnamon until it’s all nicely blended. I use a rubber spatula to press this mixture into the bottom of my greased baking pan, making sure it’s an even layer. This creates a solid foundation for our dreamy cheesecake. Oh, the scent of graham crackers baking is just divine! It’s a magical moment in my kitchen. (See the next page below to continue steps…)
Next, I whip up my cheesecake filling. In a separate bowl, I beat the softened cream cheese until it’s nice and creamy, sometimes adding a splash of vanilla extract for that extra pizzazz. Then, I gradually mix in the sugar, ensuring there are no lumps. After that, I add in the eggs one at a time, making sure to mix well after each addition. Finally, I fold in the sour cream, flour, and a dash of salt to balance out the sweetness. The filling should be smooth and luscious, and I can hardly resist stealing a spoonful!
Now comes the fun part! I pour the cheesecake mixture over the prepared crust, spreading it evenly to cover the graham cracker base. Before sliding it into the oven, I sprinkle a little more cinnamon-sugar mixture on top to give it that true churro flair. I bake it for 30 to 35 minutes, keeping an eye on it. Once it’s set around the edges but still slightly jiggly in the center, I know it’s just about perfect.
After taking it out, I let my cheesecake bars cool at room temperature before transferring them to the fridge to chill for at least two hours. The anticipation almost kills me, but I know it’s worth the wait when those bars are chilled and ready to slice!
Pro Tips for Best Results
One thing I’ve found is the importance of letting the cream cheese come to room temperature. It makes blending so much easier and results in a creamier cheesecake! I used to skip this step, thinking it wouldn’t make a difference, but trust me, you’ll want to give it the time it needs.
Another tip I can’t stress enough is to avoid overmixing the batter after adding the eggs. This can incorporate too much air, leading to cracks in your cheesecake when it bakes. I learned this the hard way on my first attempt. Now, I mix just until everything is combined, leaving me with a glorious, crack-free surface!
Lastly, if you’re short on time, you can skip the chilling time after baking, but I recommend letting those bars cool in the refrigerator. The flavors meld together beautifully, giving you that ultimate melt-in-your-mouth experience. You won’t regret it!
Common Mistakes to Avoid
One of the most common mistakes I used to make was not properly measuring the ingredients. Baking is a precise science, and even a little too much sugar can change the entire profile of your dessert. I’ve learned to take my time measuring to ensure the perfect balance of flavors. (See the next page below to continue…)
Another thing to watch out for is rushing the cooling process. I know it’s tempting to dig right in, but these bars need time to set and chill. If you cut into them too soon, the filling can be too soft and messy, rather than beautifully sliced. Patience is key here!
Also, don’t be afraid of the chilling part! I know it can feel like forever, but those few hours in the refrigerator seriously elevate the flavors and texture of your cheesecake bars. When I skip this step, I always end up wishing I hadn’t—you really don’t want to miss out on the creamy texture that comes from chilling!
Serving Suggestions
When it comes to serving these Churro Cheesecake Bars, I like to slice them into small squares for easy sharing. They’re rich enough that a small piece goes a long way! I often dust a little extra cinnamon sugar on top just before serving to really bring out that churro vibe.
They pair perfectly with a scoop of vanilla ice cream or a dollop of whipped cream. You can even drizzle some chocolate sauce or caramel over the top for an extra special treat! Each bite is a sweet paradise, and the contrasts in temperatures and textures are simply delightful.
If you’re entertaining, consider serving these bars along with some fruity dessert options, like a berry compote or fresh fruit. The refreshing element balances the richness of the cheesecake and keeps your guests coming back for more!
Variations & Customizations
If you want to mix things up, adding chocolate chips to the cheesecake filling can create a delicious twist! I’ve experimented with semi-sweet and even peanut butter chips—they add a whole new layer of flavor that’s simply irresistible.
For a hint of citrus, try incorporating some lemon zest into the filling. It brightens up the dessert and adds a refreshing contrast to the sweetness. In my opinion, the touch of lemon zest works wonders for those warmer days when you want something that feels a bit lighter.
If you’re a fan of nuts, consider adding finely chopped pecans or walnuts to the crust. It adds a lovely crunch and can complement the cinnamon flavor beautifully. Just be cautious not to overpower the cheesecake filling with the nuttiness!
How to Store, Freeze & Reheat
To store my Churro Cheesecake Bars, I simply cover them tightly with plastic wrap or place them in an airtight container. They can last in the refrigerator for up to a week (if they last that long!). Just make sure to cut them into bars before covering, as this makes them easy to grab and enjoy!
If you decide to make a larger batch or have leftovers, these bars freeze wonderfully! Just wrap each bar individually in plastic wrap and then place them in a freezer-safe container. They should be good for about two to three months. When the craving hits, you can pop them in the fridge to thaw overnight or let them sit at room temperature for about an hour.
Reheating isn’t usually necessary, but if you want them warm, you can microwave them for about 10-15 seconds. Just be careful not to overheat them, or you might lose that delightful texture we all love!
Conclusion
I hope you’re as excited to try these Churro Cheesecake Bars as I was when I first baked them! They truly bring the best of both worlds together and will leave everyone asking for seconds. With each step in the recipe, I feel the warmth and love of home baking. So gather your ingredients, roll up your sleeves, and dive into this delectable treat. Happy baking!