
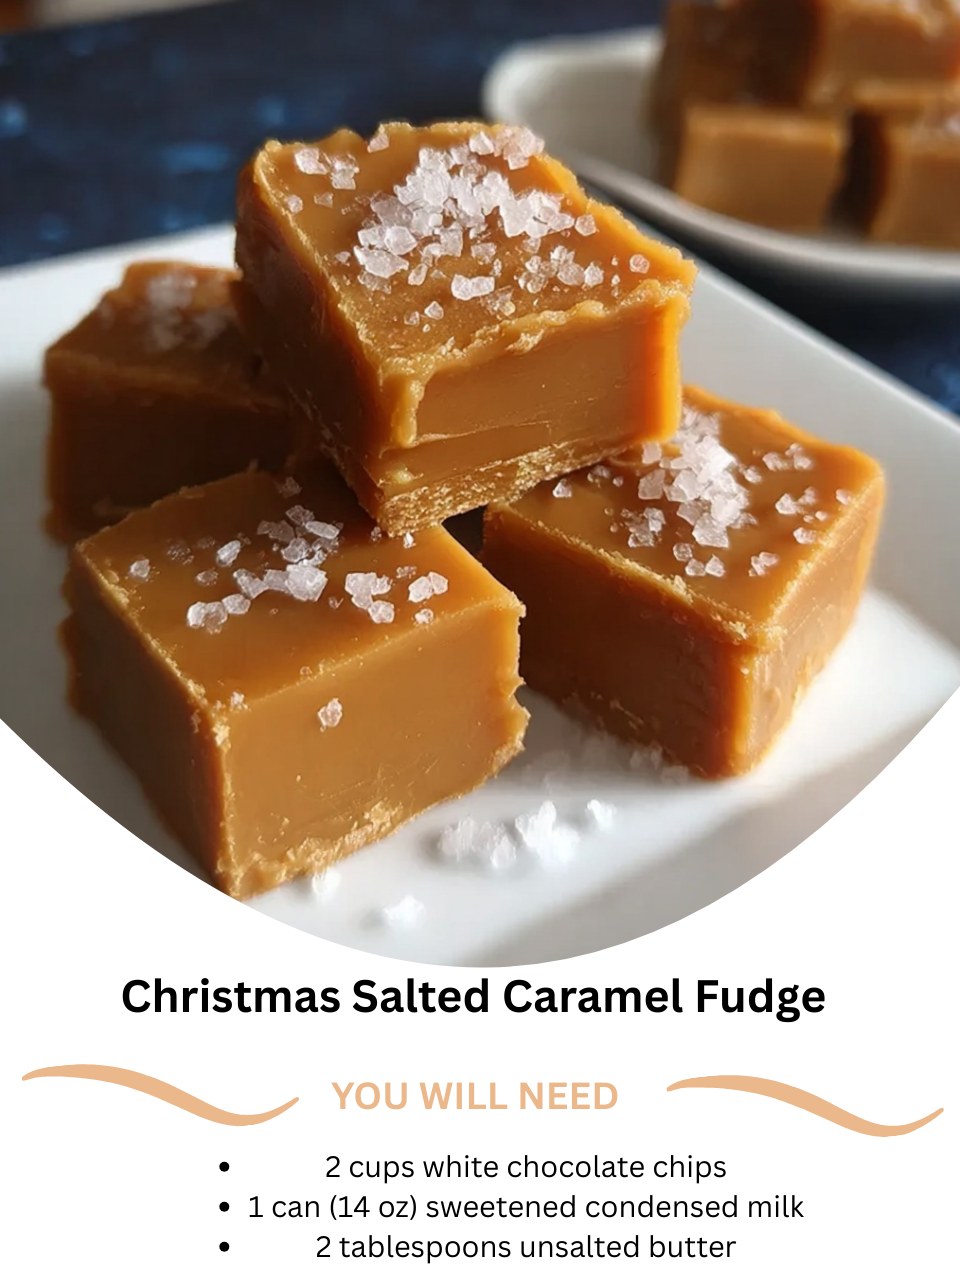
I first crafted this Christmas Salted Caramel Fudge during a snowy evening, with twinkling lights as my only kitchen companions. I wanted to create a treat that embodied the season’s magic: sweet, luxurious, and with a hint of sparkle. As the white chocolate melted into the sweetened condensed milk, I swirled in a rich, homemade salted caramel, and my kitchen was instantly wrapped in the most heavenly, buttery, toffee-like aroma. The final sprinkle of flaky sea salt and festive sanding sugar made each square look like a tiny, edible snow globe. This fudge became my ultimate holiday gift, a decadent bite of pure Christmas cheer.
Why You’ll Love This Recipe
You are going to adore this recipe because it’s the perfect blend of elegant and easy, delivering a confection that looks and tastes like it came from a specialty chocolatier. That sweet-and-salty combination is utterly addictive and feels incredibly festive. From my experience, this is the treat that disappears first from any holiday platter, making everyone feel indulged and joyful. It’s a simple, no-fuss way to create something breathtakingly delicious that truly captures the spirit of the season.
Ingredients
- 2 cups high-quality white chocolate chips
- 1 (14 oz) can full-fat sweetened condensed milk
- 2 tablespoons unsalted butter
- 1 teaspoon pure vanilla extract
- ½ cup thick salted caramel sauce (store-bought or homemade), slightly cooled
- ¼ teaspoon flaky sea salt (like Maldon), for topping
- Optional: Red or white sanding sugar, for garnish
(See the next page below to continue…)
Equipment Needed
- An 8×8 inch baking pan
- Parchment paper
- Medium-sized, heavy-bottomed saucepan
- Rubber spatula
- Spoon or squeeze bottle for caramel
- Small bowl for optional sugar
Step-by-Step Instructions
First, let’s set the stage for a beautiful, clean presentation. I always line my 8×8 inch pan with parchment paper, leaving generous overhangs on two sides to create a sling. This is a step I will never skip again after a batch stubbornly stuck to the pan—trust me, this one works better. Now, in your heavy-bottomed saucepan, combine the white chocolate chips, the entire can of sweetened condensed milk, and the butter. Place this over the lowest heat setting your stove offers. Gentle warmth is our goal for a perfectly smooth base.
This is the stage that requires your full, patient attention. I stand by the stove with my spatula, stirring almost constantly and making sure to scrape the bottom and corners thoroughly. White chocolate is delicate and will seize into a grainy mess if it gets too hot. You’re watching for it to melt into a completely smooth, glossy, and thick mixture. When there isn’t a single chip left and it looks like a pot of vanilla silk, I immediately remove it from the heat. Off the heat, I stir in the pure vanilla extract.
Now, for the festive, flavorful swirl. I pour about two-thirds of this luscious white base into your prepared pan and smooth it into an even layer. I take my slightly cooled, thick salted caramel sauce—if it’s too thick, I warm it for just 5 seconds until it’s pourable but not hot. I drizzle about half of the caramel over the first layer in long, deliberate lines. Then, I carefully spoon the remaining third of the white fudge over the top. Finally, I finish with the rest of the caramel.(See the next page below to continue…)
Here comes the artistic part. With a knife or toothpick, I gently drag it through the layers in wide, swirling motions, aiming for a beautiful marbled effect. My first time, I over-swirled and lost the gorgeous contrast—a gentle hand is key. Immediately after swirling, I sprinkle the top evenly with the flaky sea salt. If I’m using sanding sugar for extra sparkle, I sprinkle a little of that on now, too. I then let the pan cool completely on the counter before covering and refrigerating it for at least 4 hours, or ideally overnight, to set firm.
Pro Tips for Best Results
I tested the caramel consistency three different ways, and here’s the golden rule: you need a thick, spoonable caramel. A thin, runny ice cream topping will bleed into the white chocolate, creating a soft, homogenous layer instead of distinct, beautiful swirls. I recommend a good quality store-bought dulce de leche or a homemade salted caramel that you’ve cooled slightly. The thickness is non-negotiable for that perfect layered texture and visual wow factor.
Here’s what I learned the hard way about the salt: the type and timing matter immensely. Table salt will dissolve and taste harsh. Flaky sea salt, like Maldon, adds a delicate crunch and bursts of salinity that elevate the entire treat. And you must add it immediately after swirling, while the surface is still soft, so the crystals adhere beautifully. If you wait, the salt just bounces right off the set surface.
For those stunning, clean-cut squares that look professional, your knife technique is everything. After the full overnight chill, I lift the entire block out using the parchment sling. I run my sharpest chef’s knife under very hot water, wipe it completely dry, and make my first cut. I re-heat and dry the knife after every two or three cuts. This little trick melts through the fudge just enough to prevent it from dragging or cracking, revealing those gorgeous, sharp layers and caramel ribbons in every single piece.
Common Mistakes to Avoid
My biggest initial mistake was using medium heat to melt the base. Impatience leads to scorched milk and seized, grainy chocolate. I had to throw away my first attempt. Don’t do what I did! The lowest possible heat is your friend. If you’re nervous, use a double boiler. It takes a few extra minutes, but it’s a foolproof way to guarantee that silky-smooth texture we’re after without any risk of burning.(See the next page below to continue…)
Don’t use a thin, cheap caramel syrup. This error results in a fudge that never fully sets properly and has weepy, wet pockets. You need a rich, thick caramel. The quality of your caramel is the star of the show, so it’s worth using the good stuff. I’ve tried this step both ways, and trust me, a thick caramel makes a huge difference in both texture and taste.
Another common error is swirling too enthusiastically. I used a chopstick on my second batch and got carried away, essentially mixing the two layers into a single, beige layer. You want beautiful, distinct ribbons of caramel running through the white chocolate. Use a knife for broad, gentle swirls, and don’t go over the pan more than four or five times. Think of it as gentle marbling, not stirring.
Finally, don’t skip the parchment paper liner. I thought a well-buttered pan would be fine. It was not. The fudge bonded to the corners, and I had to chisel it out in broken pieces, ruining the beautiful top. The parchment sling is what guarantees you can lift out a perfect, intact block for flawless slicing. It’s the simplest step that guarantees the most beautiful final product.
Serving Suggestions
I love serving this fudge at a cool room temperature as the grand finale on my holiday dessert board. I take it out of the fridge about 15 minutes before guests arrive and arrange the squares on a white platter or a piece of slate. The contrast of the white chocolate, caramel swirl, and sparkling sugar against the dark slate looks incredibly elegant and festive.
For a cozy Christmas Eve pairing, I like to serve it with a mug of strong coffee or a hot chocolate spiked with a hint of peppermint. The bitterness of the coffee or the cool mint perfectly cuts through the sweet, rich fudge. It’s also divine with a small glass of dessert wine, like a late-harvest Riesling, making it feel like a truly special occasion treat.
When gifting, which is half the joy, I layer the squares in a clear holiday cookie tin or a cellophane bag tied with a big gold or red ribbon. I always include a cute tag that says “Christmas Salted Caramel Fudge.” It’s a heartfelt, homemade gift that feels personal, luxurious, and wonderfully festive for teachers, neighbors, hostesses, and friends.
Variations & Customizations
For a stunning “Peppermint Bark” twist, add ¼ teaspoon of peppermint extract to the white chocolate base along with the vanilla. After swirling and salting, sprinkle the top with finely crushed candy canes instead of sanding sugar. The combination of cool peppermint, rich caramel, and salty crunch is an unforgettable holiday flavor trio.
You can create a decadent “Salted Caramel Pretzel” fudge by pressing mini pretzel twists or pieces into the top of the fudge immediately after swirling, before the salt. The sweet, salty, and crunchy combination is absolutely addictive. You could even fold ½ cup of crushed pretzels into the fudge base itself for texture in every single bite.
For a “Chocolate Salted Caramel” version, simply replace the white chocolate chips with an equal amount of high-quality semi-sweet chocolate chips. The deep, rich chocolate base with the caramel swirl and sea salt is like a gourmet candy bar. It’s incredibly rich and perfect for the dark chocolate lovers on your list.
How to Store, Freeze & Reheat
For storing during the busy season, I keep the fudge in an airtight container in the refrigerator, with sheets of parchment between the layers to protect the topping. It stays fresh and maintains its perfect firm-yet-creamy texture for up to two weeks. The fridge is essential for keeping it firm, especially if your kitchen is warm from all the holiday baking.
This fudge freezes brilliantly, which is a lifesaver for getting ahead on holiday gifting. I wrap the whole block (or individual squares) very tightly in plastic wrap, then seal them in a heavy-duty freezer bag, pressing out all the air. It will keep beautifully for up to 2-3 months. The texture and flavor remain perfect after thawing.
To thaw, I transfer the wrapped fudge from the freezer directly to the refrigerator and let it thaw slowly overnight. This prevents any condensation from forming on the surface, which can dissolve the salt and make the topping sticky. There’s no need to reheat it. Once thawed, it’s ready to add to your gift boxes or serve on your platter, tasting just as divine as the day it was made.
Conclusion
This Christmas Salted Caramel Fudge is more than just a recipe to me; it’s a little edible piece of holiday magic. The process of creating those beautiful swirls feels joyful, and the result never fails to spread cheer. I hope this recipe becomes a cherished part of your holiday traditions, bringing delicious smiles and simplifying your season with its effortless elegance. Now, go warm that caramel—your own batch of creamy, swirled, salty-sweet Christmas joy is waiting to be made.