
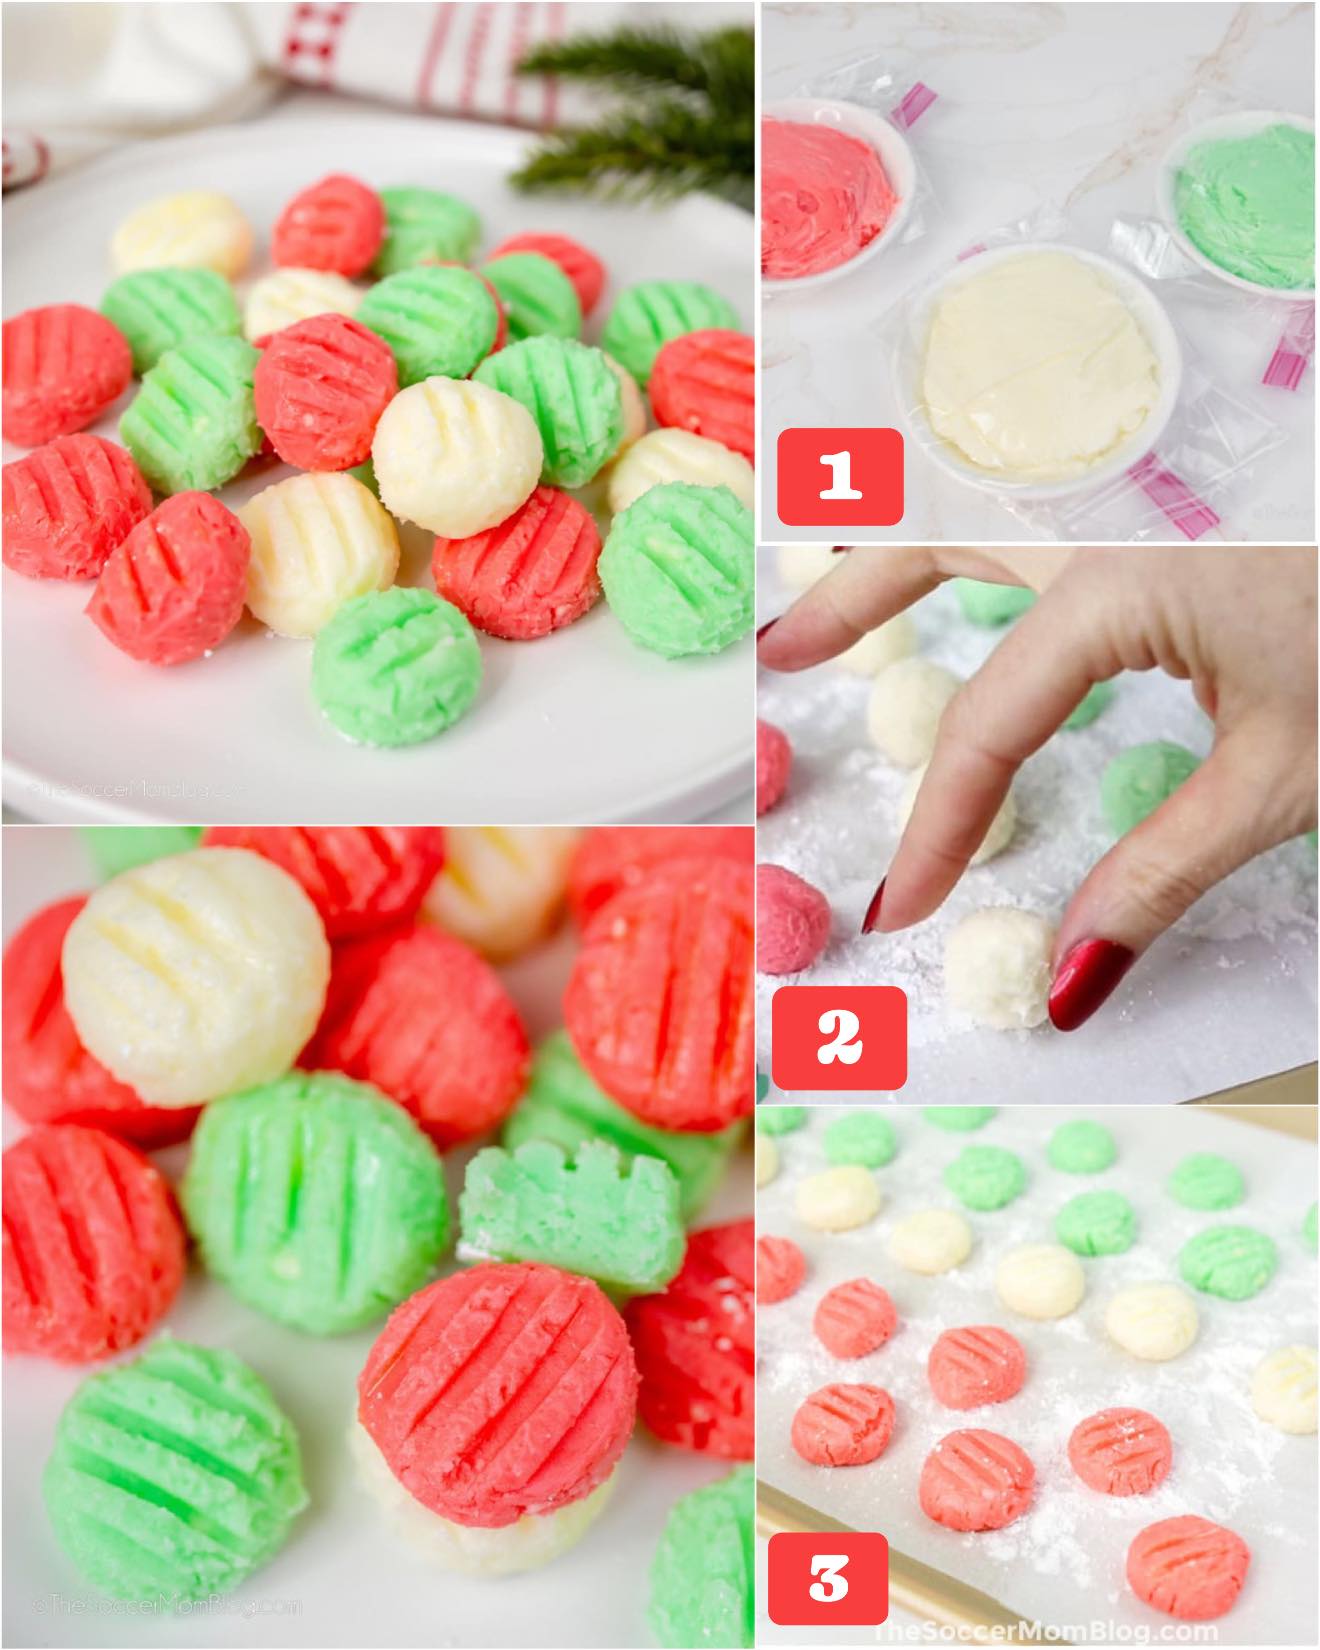
Next, I stir in the peppermint extract. I’ve made the mistake of adding too much in the past, and the mints ended up tasting more like toothpaste than a holiday treat. Now I always start small, mixing thoroughly and tasting a tiny pinch before adjusting. Once the flavor is perfect, I divide the dough into three bowls: one for white, one for red, and one for green. Adding the gel food coloring is one of my favorite parts, because it feels like painting with edible clay.
Then comes the shaping. I lightly dust my hands with powdered sugar to keep the dough from sticking, pinch off small pieces, and roll them into smooth little balls. The dough should feel soft but firm enough to hold its shape. If it sticks too much, a sprinkle of powdered sugar fixes it instantly. After rolling each ball, I place it on a parchment-lined baking sheet. This part always feels relaxing, almost meditative, especially with holiday music playing in the background.
Finally, I take the back of a fork and gently press it into each mint to create those signature ridges. You don’t need to push very hard—just enough to leave a pretty imprint. The mints then rest at room temperature for several hours or overnight until they firm up. When they’re dry to the touch on the outside but still soft inside, they’re ready. And honestly, resisting the urge to taste five of them in a row is the hardest part of the entire recipe.
Pro Tips for Best Results
One tip I learned early on is to use room-temperature butter and cream cheese. Cold ingredients make the dough lumpy, while overly warm ingredients make it sticky. When everything is softened just right, the dough blends easily into the perfect smooth texture.
I also discovered that powdered sugar behaves differently depending on humidity. On damp winter days, I sometimes add an extra few tablespoons to firm up the dough. On drier days, I reduce the amount slightly so the mixture doesn’t become crumbly. Adjusting slowly makes all the difference.
Another tip: If you want perfectly uniform mints, use a small cookie scoop to portion the dough before rolling. It keeps each mint the same size, which looks beautiful on cookie trays and makes gifting extra polished. I used to eyeball the size, but switching to a small scoop has elevated my presentation tremendously.
And lastly, don’t rush the drying process. I once tried chilling them in the fridge to speed things up, and they became too firm on the outside and cracked when I handled them. Letting them dry naturally at room temperature keeps that tender interior that makes these mints irresistible.
Common Mistakes to Avoid
One of the easiest mistakes to make is adding too much peppermint extract. It’s powerful, and even a splash too much completely overwhelms the mints. Always add gradually and taste as you go.
Another common issue is making the dough too wet. If you add liquid food coloring or over-softened cream cheese, the dough becomes sticky and difficult to roll. That’s why I always use gel color and soften my dairy ingredients gently—not in the microwave where they can melt too fast.(See the next page below to continue…)