
Once the dough is ready, I divide it into two portions, flatten each into a disc, and chill them for at least 30 minutes. I’ve tried skipping chilling in the past, and trust me, it’s not worth it—the cookies spread too much and lose their perfect edges. Once chilled, I roll the dough out on a lightly floured surface until it’s about ¼ inch thick. Cutting out the shapes is my favorite part because each cookie feels like a tiny blank canvas waiting for its lights.
After placing the cookies on baking sheets lined with parchment paper, I bake them until the edges are just beginning to turn the slightest golden color. The trick is not to overbake them; they continue to firm up as they cool. When I transfer them to a cooling rack, I always let them cool completely before icing. Warm cookies will melt icing instantly, and I learned that the hard way years ago when every design I piped slid right off the cookie.
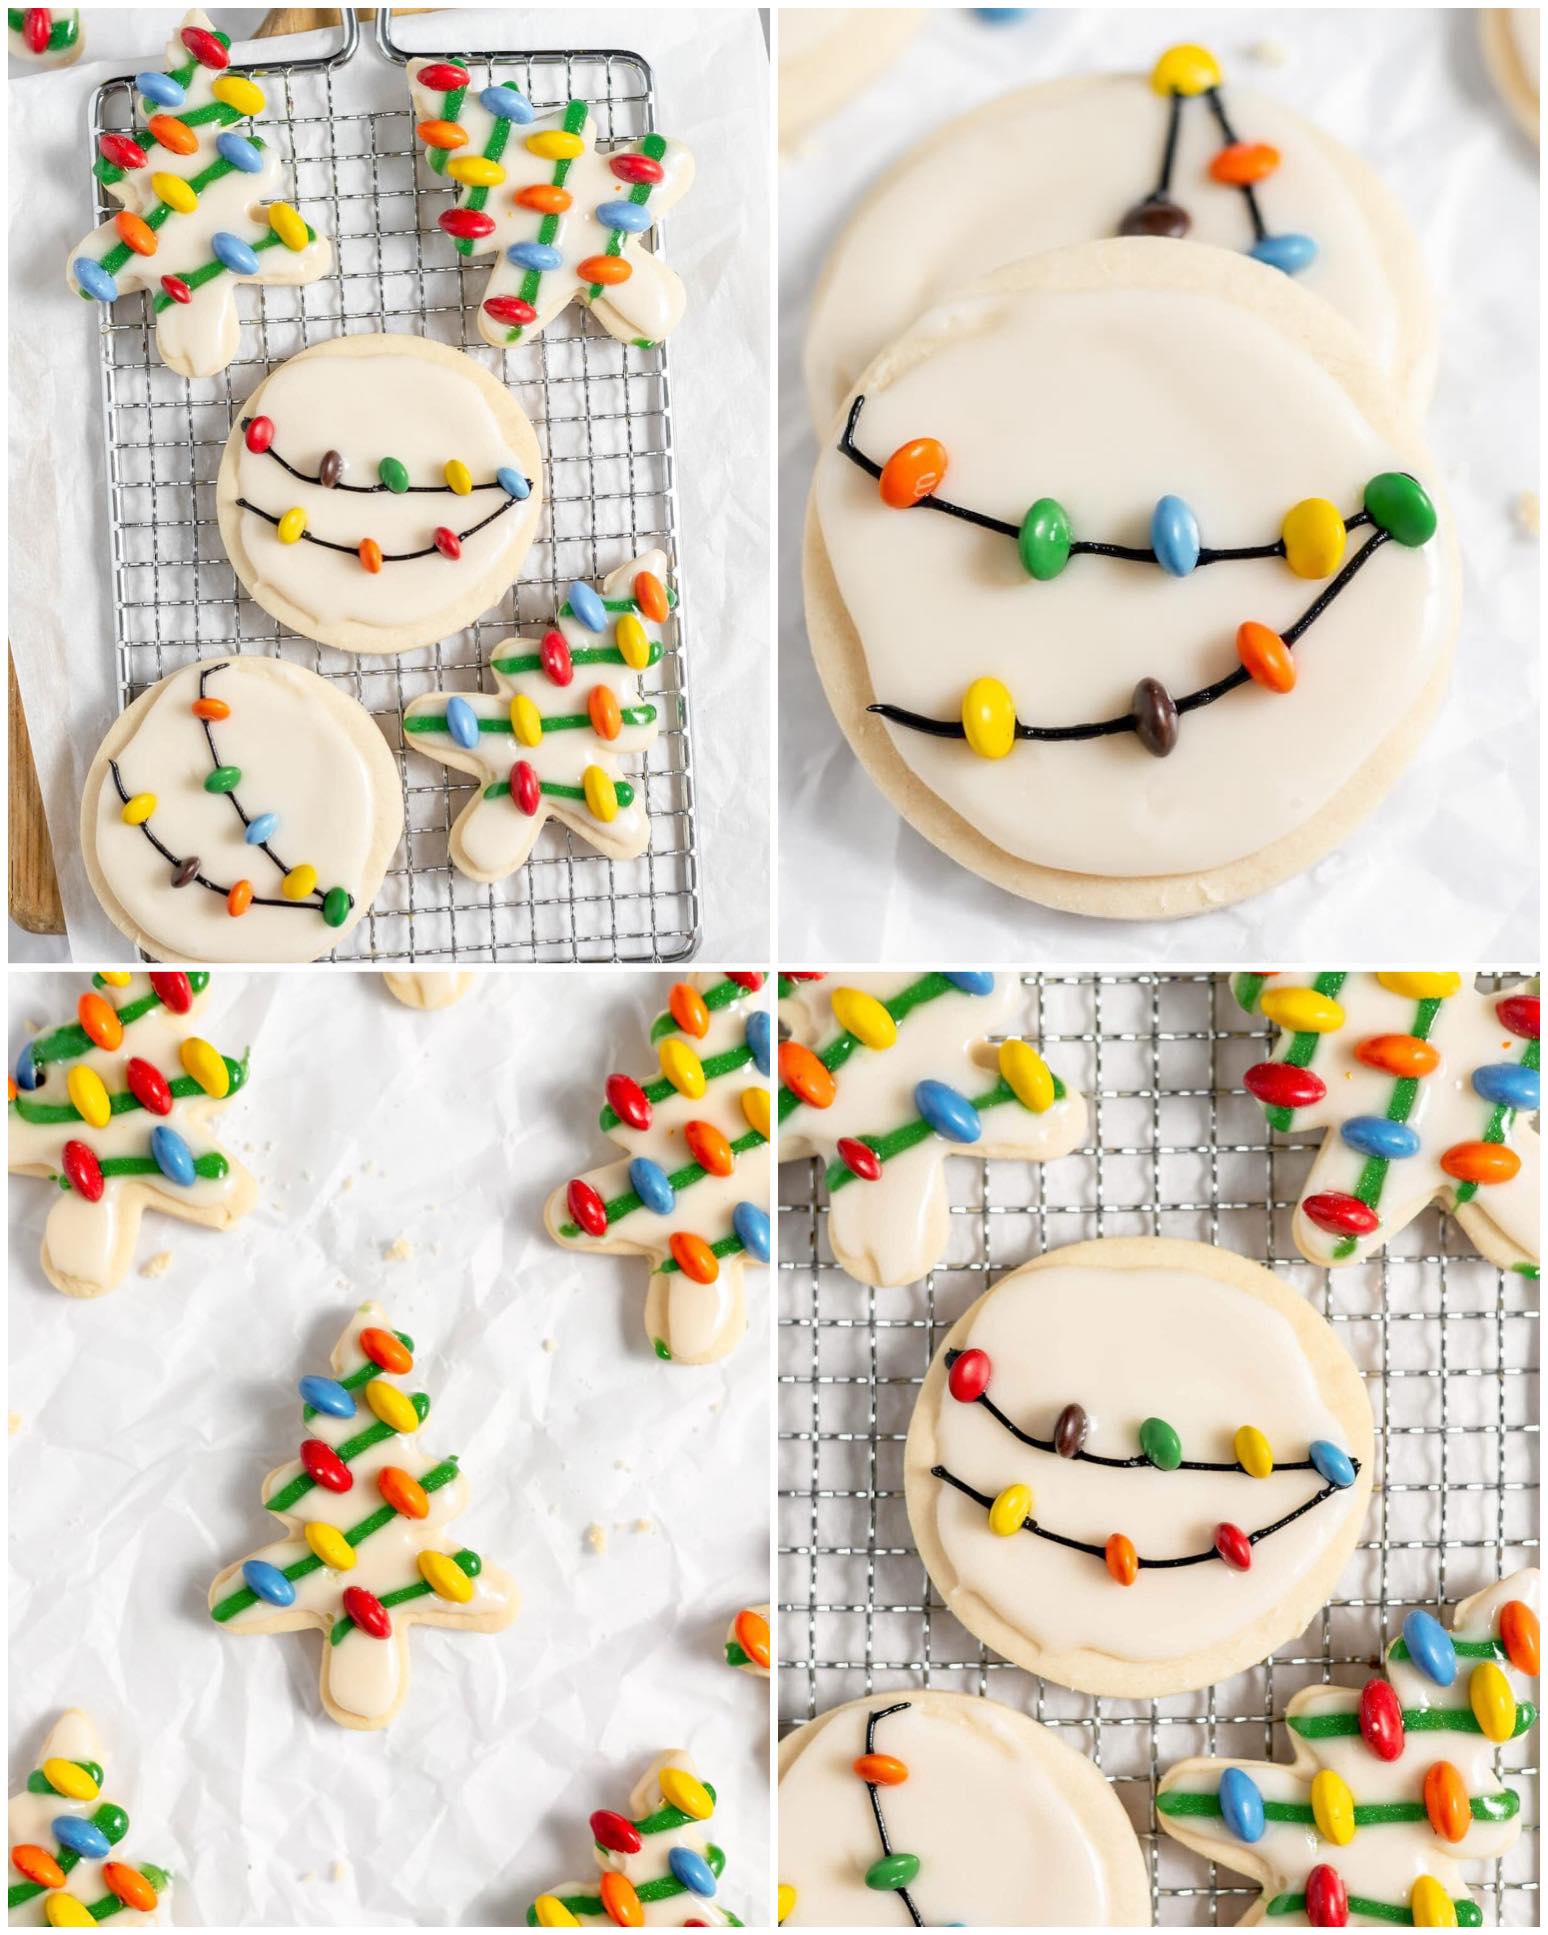
Once they’re cool, I outline each cookie with royal icing and flood the centers using slightly thinner icing. I let the icing dry just enough to create a smooth matte finish—usually 30 to 45 minutes. Then comes the magic: piping the black lines like strands of Christmas lights, letting them dry for a few minutes, and gently pressing colorful mini M&Ms along the lines. Every time I add the “bulbs,” the cookies spring to life in the most festive way.
Pro Tips for Best Results
One thing I’ve tested extensively is icing consistency. For outlining, I use icing with the thickness of toothpaste; for flooding, it should flow like honey. If the icing is too runny, it will spill over the edges; too thick, and it won’t settle into a smooth surface. Mixing in tiny amounts of water or powdered sugar helps you adjust the texture perfectly.
Another important lesson: chill the dough before AND after cutting the shapes. I chill the cut cookies on the baking sheet for about 10 minutes before baking. This extra step helps them maintain their sharp edges and avoids cookies that puff or warp in the oven. When I started doing this, my cookies instantly looked more professional.
I also recommend piping the black “light string” after the base icing has mostly dried but not hardened completely. This gives you a slightly tacky surface that grips the icing and prevents sliding. But the candies should always be added when the black icing is still wet. Otherwise, they don’t stick well and can pop off during storage.
Finally, give yourself time. These cookies aren’t difficult, but they’re a joyful, artistic process. I like to make the cookies one day and decorate the next. It allows the icing to set without rushing, and I enjoy the decorating much more when I’m not racing the clock.
Common Mistakes to Avoid
I made the mistake once of rolling the dough too thin, and my cookies ended up crispy instead of soft. Stick to the ¼-inch thickness—it’s the sweet spot for cookies that are sturdy enough to decorate but still soft when you bite into them.
Another common mistake is adding too much water to the icing. It’s incredibly tempting because thinner icing seems easier to work with, but if it’s too runny, it won’t hold its shape and your lights will look like blurry little puddles instead of adorable bulbs. Always thin icing slowly—just a few drops at a time.
A big decorating mistake is not letting the base icing dry long enough before piping the light strings. If it’s still too wet, the black icing will sink into the white and feather out, ruining the crisp look of the lights. I know waiting is hard when the cookies look so blank and ready, but patience makes a stunning difference.(See the next page below to continue…)