
The very first time I made Christmas Lights Sugar Cookies, my whole kitchen lit up with that unmistakable buttery-sweet aroma that only a good sugar cookie can bring. I remember rolling out the dough on a cold December morning, humming along to Christmas music while tiny flecks of flour dusted my sweater sleeves. Decorating them with bright, candy-like lights made me feel like a kid playing with edible art supplies, and I instantly fell in love with both the process and the final result. These cookies are warm, whimsical, and full of holiday spirit.
Why You’ll Love This Recipe
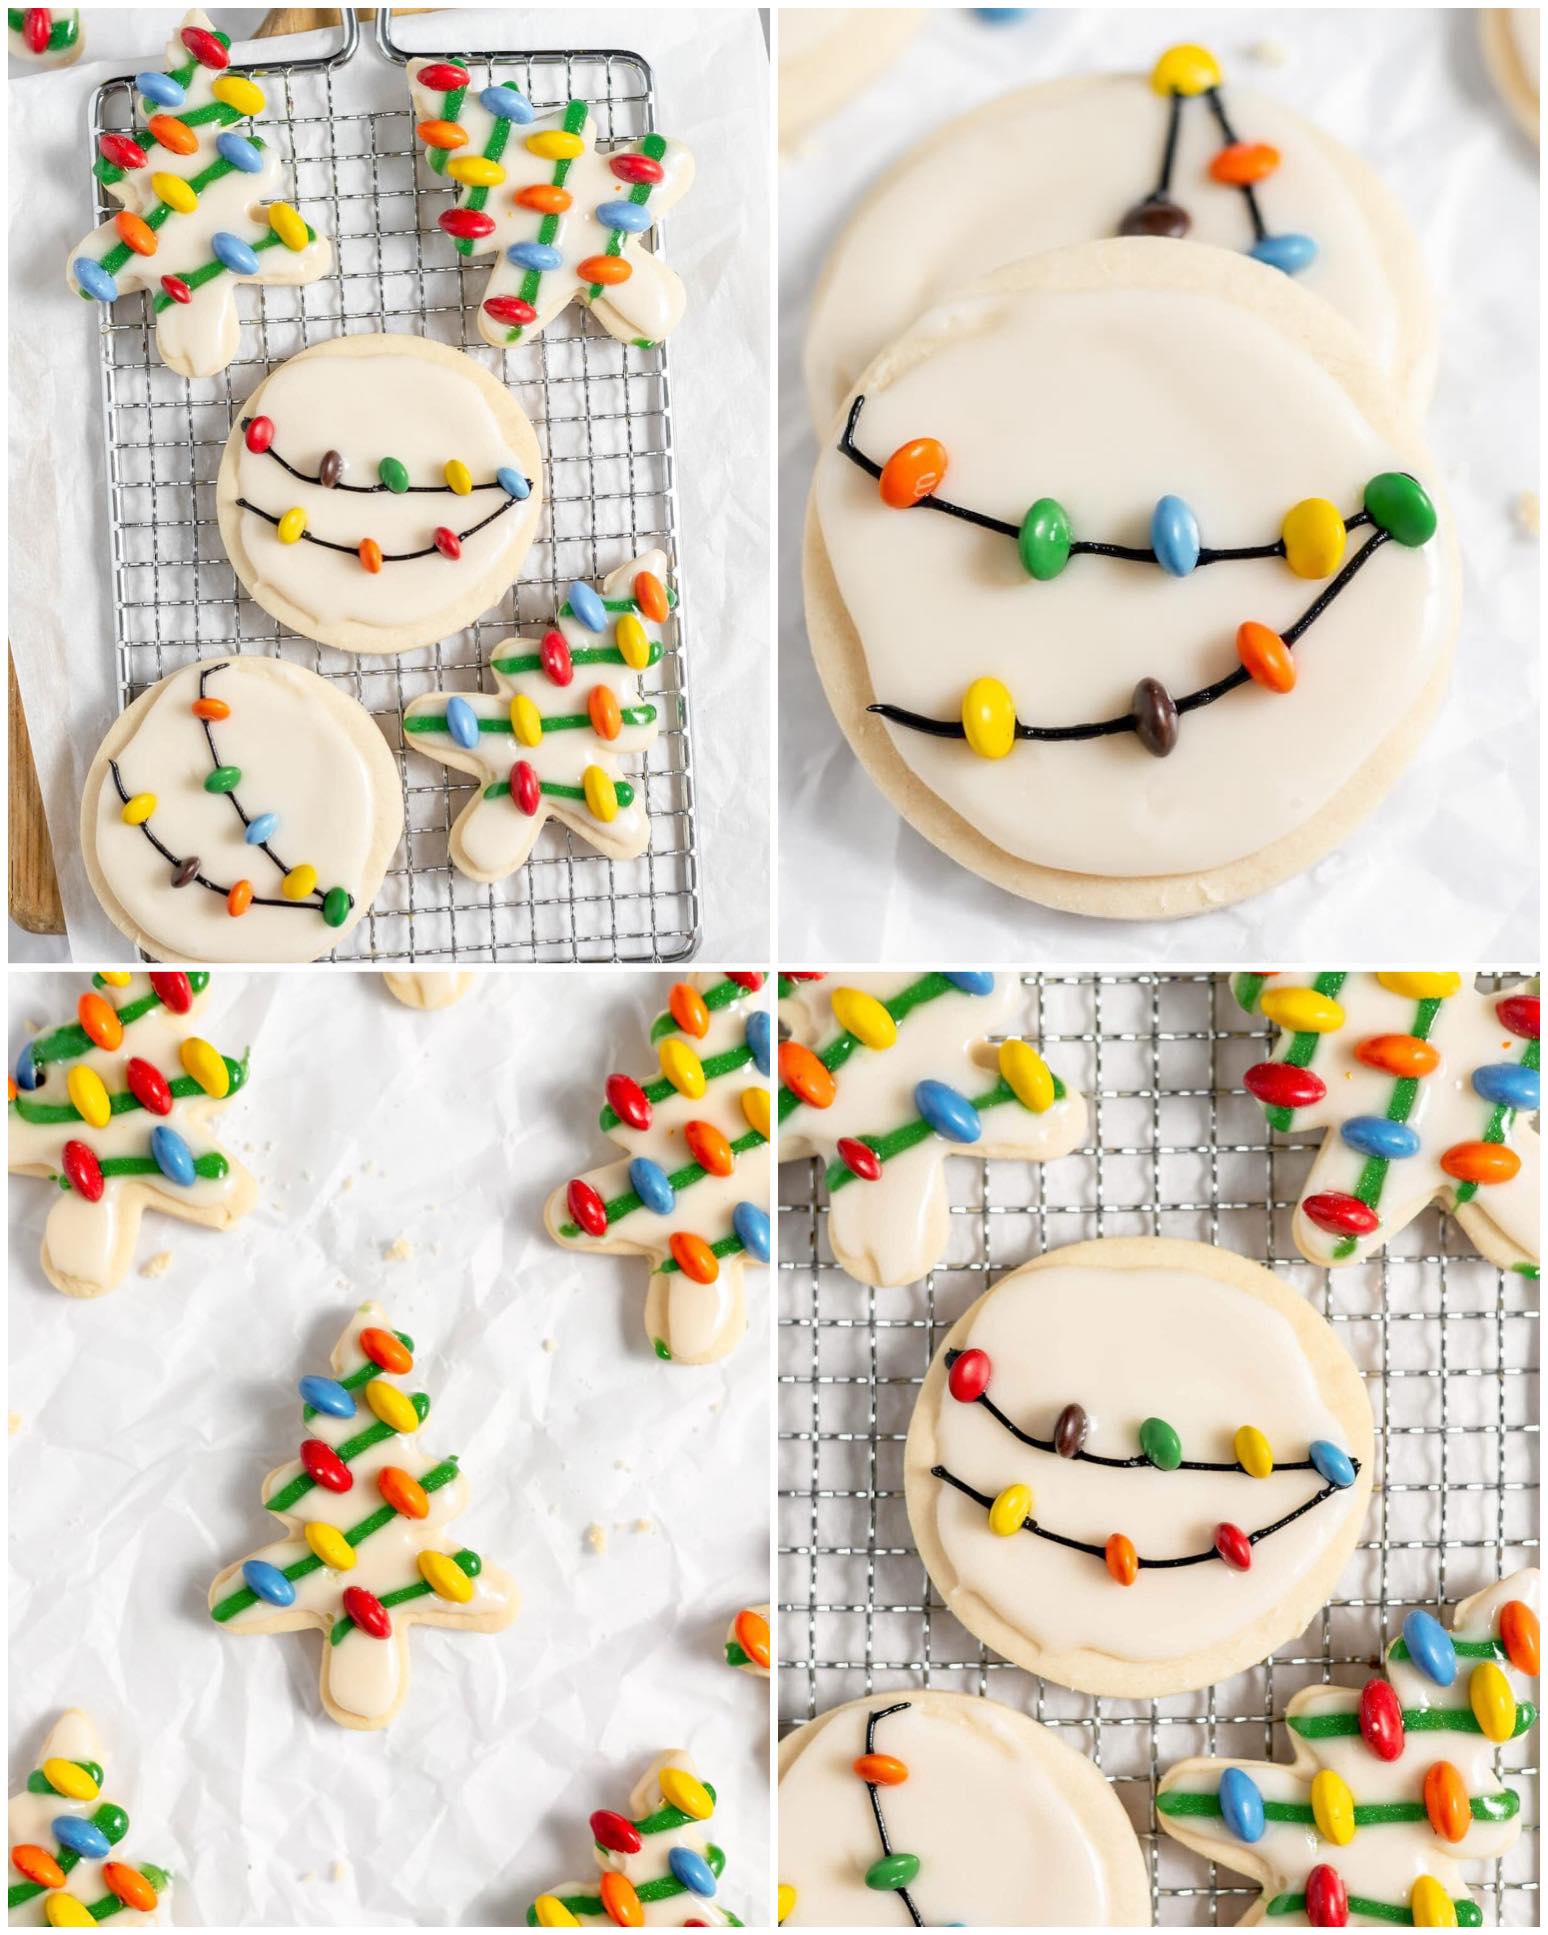
You’ll love this recipe because it gives you classic sugar cookies with a magical, festive twist—adorable, colorful “lights” made from candies that transform simple cookies into joyful little works of Christmas art with minimal effort but maximum charm.
Ingredients
- 2 ¾ cups all-purpose flour
- 1 cup unsalted butter, softened
- 1 ½ cups granulated sugar
- 1 large egg
- 2 teaspoons vanilla extract
- ½ teaspoon almond extract (optional but amazing)
- 1 teaspoon baking powder
- ½ teaspoon salt
- Royal Icing:
- 3 cups powdered sugar
- 2–3 tablespoons meringue powder
- 4–6 tablespoons water
- 1 teaspoon vanilla extract
- Black decorating gel or royal icing tinted black (for the “light strings”)
- Mini colorful M&Ms or colorful chocolate-coated candies (the “bulbs”)
What I adore about this ingredient list is how easy it is to work with. The almond extract is optional, but trust me, do not skip it unless you absolutely have to—it gives the cookies that bakery-style edge you taste before you even realize what makes them so good. Meringue powder is the simplest way to make royal icing that pipes beautifully and dries perfectly. As for the “light bulbs,” I’ve tried several candies over the years, and mini M&Ms hold their shape and color best without bleeding into the icing.
Equipment Needed
- Mixing bowls
- Electric mixer
- Rolling pin
- Cookie cutters (round and Christmas tree shapes)
- Baking sheets
- Parchment paper
- Cooling rack
- Piping bags
- Small round piping tip (#2 or #3 for outlining)
- Toothpicks (for perfect candy placement)
Every tool on this list has earned its place through many holiday seasons in my kitchen. Cookie cutters are your chance to get creative, but round cookies and tree shapes always highlight the light designs best. Parchment paper keeps the cookies from spreading unevenly, and I swear by a small piping tip for clean icing lines. A toothpick might seem trivial, but it’s the secret to placing tiny M&Ms exactly where you want them without smudging the icing.
Step-by-Step Instructions
When I start making Christmas Lights Sugar Cookies, I always begin by creaming together the butter and sugar until the mixture is pale and fluffy. This step transforms everything—when done right, it guarantees cookies that bake up soft and tender instead of dense. I add the egg, vanilla, and almond extract next, letting the mixer run until everything smells like vanilla frosting and holiday warmth. Then I slowly stir in the dry ingredients, watching the dough come together into a soft, buttery ball that’s smooth enough to roll beautifully.(See the next page below to continue…)