
I also used to rush the final setting stage, thinking I could speed things along by placing the cups directly in the freezer. While they hardened quickly, the chocolate developed white streaks from temperature shock. Now I let them cool naturally first, then chill only if I’m short on time or need to transport them. The difference in appearance is huge.
And finally, using liners that are too thin can cause the chocolate to stick or tear when removing the cups. I once bought a cheap pack of liners, and half my treats ended up stuck to the paper. Ever since then, I’ve only used sturdy mini liners, and removal has been effortless.
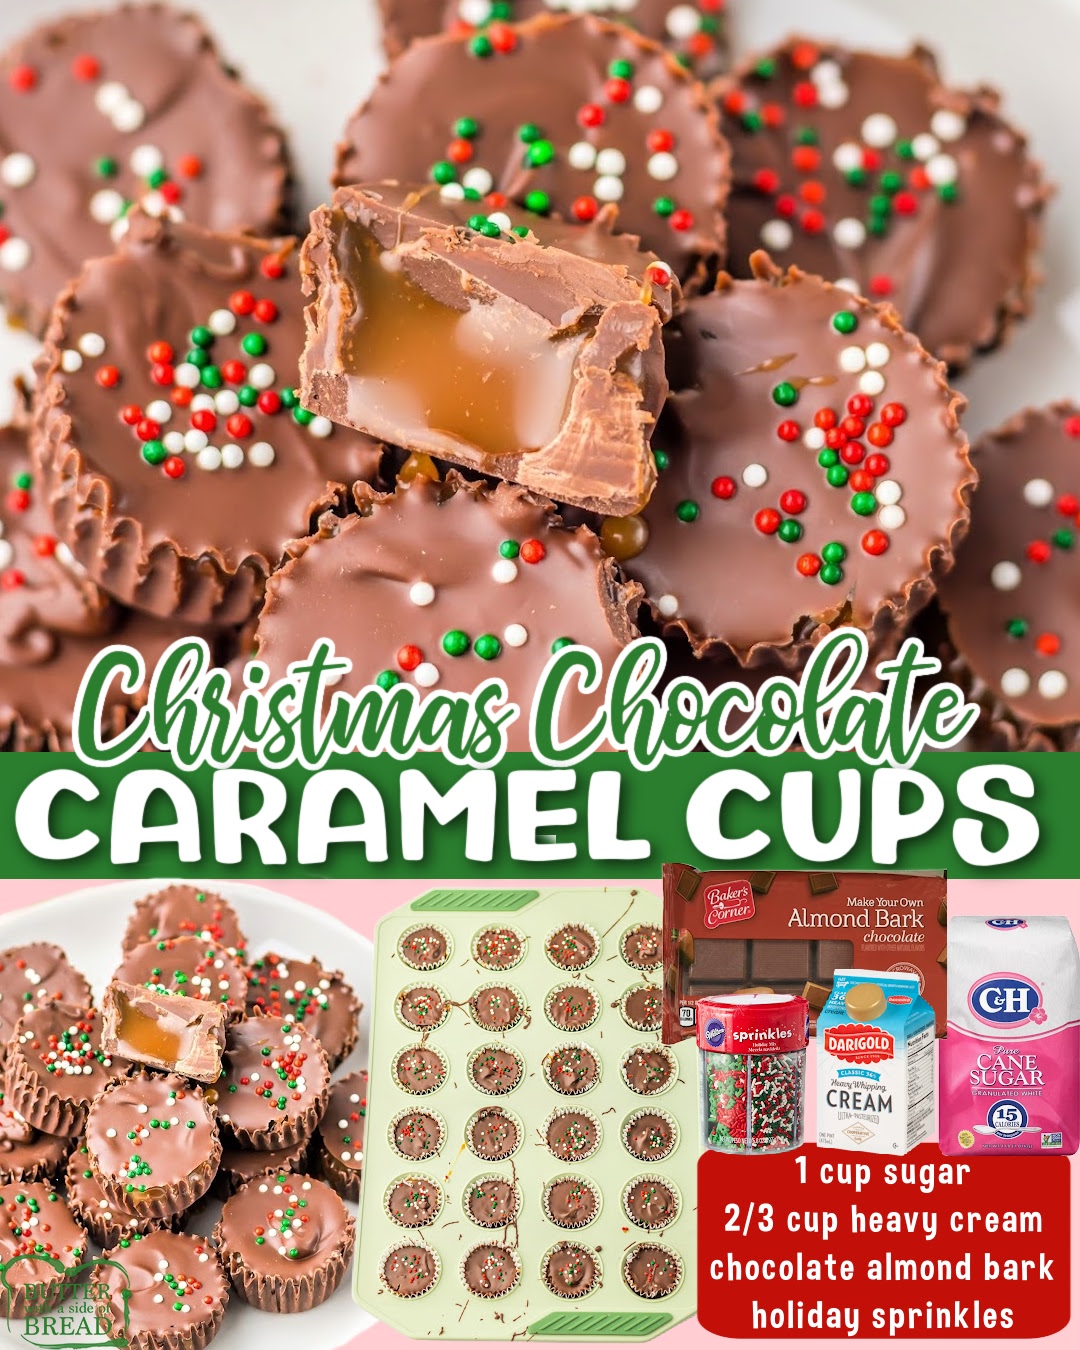
Serving Suggestions
When I serve these Christmas Chocolate Caramel Cups, I love arranging them on a holiday platter surrounded by sprigs of pine or fresh cranberries for a festive touch. Their glossy chocolate tops and colorful sprinkles make them look like tiny ornaments, and guests always gravitate toward them first. They’re the perfect finger-food dessert at holiday parties because they’re tidy, bite-sized, and stand up well on dessert tables.
Another fun way I like serving them is by placing a few cups in clear cellophane bags tied with ribbon. These make adorable neighbor gifts, teacher treats, or stocking stuffers. I’ve even included them in cookie boxes, and they add such a professional-looking touch that people assume they came from a candy shop. They hold their shape nicely and travel extremely well.
I’ve also found that they pair beautifully with warm drinks. When I put out a tray next to a pot of hot cocoa or coffee, people can’t resist combining the two. The caramel melts slightly when held in warm fingers, making each bite even more luscious. It’s exactly the type of cozy holiday treat I enjoy sharing during December gatherings.
At home, I like to keep a small container in the pantry for when my family wants a quick sweet bite after dinner. They’re rich enough that you only need one or two, but delicious enough that it’s hard to stop reaching for more. They’ve become part of our holiday after-dinner ritual, and I truly love that.
Variations & Customizations
One of the easiest variations is switching up the chocolate. I’ve tried these cups with dark chocolate, and the flavor becomes deeper and more intense, perfect for grown-up palates. Milk chocolate gives them a classic candy-bar taste, while white chocolate creates a pretty snowy appearance that looks lovely on holiday platters.
You can also play with the caramel itself. Once, I stirred a pinch of sea salt into the caramel before spooning it into the cups, and the result was a salted caramel version that disappeared almost instantly. A tiny pinch goes a long way, and the contrast between sweet chocolate and salty caramel is absolutely irresistible.
For a fun decorative twist, try using themed sprinkles or edible glitter. I’ve made these cups for Valentine’s Day using pink sprinkles, and even for birthday celebrations with rainbow nonpareils. They adapt well to any event, making them a versatile treat year-round. The holiday sprinkles are still my favorite because they give everything that classic Christmas charm.
Another idea is to stir finely chopped nuts into the caramel. I tried pecans once, and the added crunch created a delightful texture that felt almost like a gourmet candy-bar filling. Walnuts or toasted almonds would work beautifully too, so you can customize based on personal preference.
How to Store, Freeze & Reheat
When storing these chocolate caramel cups, I always keep them in an airtight container at room temperature for the first few days. The chocolate stays smooth and firm without getting too hard, and the caramel stays perfectly soft. I prefer to separate layers with parchment paper to prevent any accidental sticking.
If I need to make them ahead for a party, I refrigerate them, but I let them come back to room temperature before serving. When they’re too cold, the caramel firms up more than I like, but softens beautifully after 10–15 minutes on the counter. The texture becomes just right—smooth, creamy, and easy to bite.
These cups freeze exceptionally well too. I place them on a baking sheet first to freeze individually, then store them in freezer bags. Doing it this way prevents them from sticking together and keeps their shape intact. They’ll stay fresh for up to two months, making them an excellent make-ahead treat for busy holiday seasons.
Reheating isn’t usually necessary, but if someone prefers a slightly softer caramel bite, a cup can be microwaved for about five seconds. I caution not to go longer than that, because the chocolate melts quickly. A few seconds warm creates a lovely gooey center without compromising the cup.
Nutrition Information
While these treats are definitely indulgent, I like to think of them as the kind of holiday dessert meant to be enjoyed joyfully and without guilt. Each cup contains a balance of sugar, chocolate, and cream—classic holiday candy ingredients. They are rich and satisfying, so one small cup often feels like enough to satisfy a sweet craving.
Because almond bark tends to be sweeter than pure chocolate, the cups have a pleasantly creamy flavor that appeals to kids and adults alike. The heavy cream in the caramel adds fat that helps make each bite feel silky and luxurious. Even though they’re decadent, the portion size keeps the richness from feeling overwhelming.
If you’re curious about the nutritional breakdown, most of the calories come from the chocolate and sugar, which is expected in a caramel candy. These cups are naturally gluten-free as long as you check your sprinkles and almond bark labels carefully. That makes them a great option when serving guests with varied dietary needs.
I like to enjoy these cups in moderation, but during the holiday season, I really focus on savoring the experience rather than counting numbers. Sharing them with friends and family always brings more joy than thinking about the nutritional specifics, and to me, that’s what makes them worth making.
FAQ Section
Can I double the recipe?
Absolutely. I often double the recipe when I’m preparing holiday treat boxes, and it works perfectly. The caramel cooks the same way, though you may need a slightly larger pan for melting the chocolate. Everything scales smoothly, and the cups still set beautifully.
Why did my caramel turn grainy?
Grainy caramel usually happens when sugar crystals form along the sides of the pot. To prevent this, I avoid stirring until the sugar is fully melted and sometimes brush the sides of the saucepan with a damp pastry brush. Slow, steady heating keeps everything smooth.
Can I use silicone molds instead of liners?
Yes, silicone molds work really well for this recipe. They release cleanly and create beautifully shaped cups. I still prefer liners for gifting because they look more festive, but silicone is a great option for home use.
How do I keep the chocolate from cracking?
Cracking usually happens when the cups chill too fast. Let them cool at room temperature before refrigerating, and avoid placing them in the freezer to set. Gradual cooling keeps the chocolate smooth and intact.
Can I make these with store-bought caramel sauce?
I don’t recommend it because caramel sauce is too thin and won’t firm up inside the cups. Making the caramel from scratch gives you a thick, buttery filling that stays soft but solid enough to bite without leaking.
Conclusion
Making these Christmas Chocolate Caramel Cups has become one of my favorite holiday traditions because they combine everything I love about December: warm kitchen moments, irresistible sweets, and the joy of sharing something homemade. Every time I prepare a batch, I’m reminded of how simple ingredients can become something magical with just a little patience and creativity. I hope these cups bring the same happiness to your celebrations, whether you’re gifting them, serving them at gatherings, or savoring them quietly with a mug of cocoa. Enjoy every chocolatey, caramel-filled moment!