
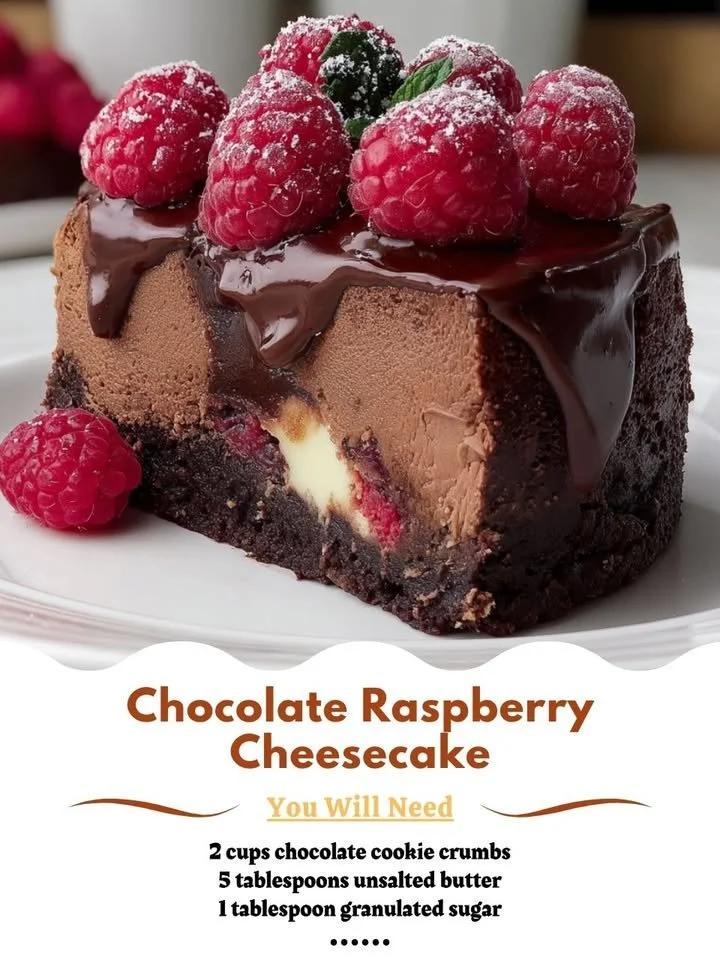
Chocolate Raspberry Cheesecake is one of those desserts that always brings a smile to my face. There’s something about the rich, creamy texture of cheesecake paired with the tartness of fresh raspberries and the indulgence of chocolate that feels like a hug on a plate. Every time I make this cake, my kitchen fills with the divine aroma of baking chocolate and the sweet, fruity scent of raspberries, creating a cozy atmosphere that I adore.
Why You’ll Love This Recipe
I can tell you right now, this Chocolate Raspberry Cheesecake isn’t just any cheesecake—it’s a showstopper! The combination of flavors is heavenly, and it’s surprisingly easy to whip up despite its impressive appearance. Plus, it’s the perfect dessert for any occasion—birthdays, holidays, or just a sweet treat to enjoy at home. I always get compliments whenever I serve it! You’ll find that the chocolate crust, velvety filling, and fresh raspberries make this dessert truly irresistible. (See the ingredients in the next page below…)
Ingredients
– 1 ½ cups chocolate cookie crumbs
– ½ cup unsalted butter, melted
– 3 (8-ounce) packages of cream cheese, softened
– 1 cup granulated sugar
– ¼ cup all-purpose flour
– 3 large eggs
– 1 teaspoon vanilla extract
– 1 cup sour cream
– 1 cup fresh raspberries
– ½ cup dark chocolate chips (optional, for topping)
Equipment Needed
– 9-inch springform pan
– Mixing bowls
– Electric mixer or whisk
– Rubber spatula
– Measuring cups and spoons
– Baking sheet
– Parchment paper
Step-by-Step Instructions
To start, preheat your oven to 325°F (163°C). In my kitchen, the first step is always about making that crumbly, delectable crust. In a bowl, combine the chocolate cookie crumbs with melted butter and mix until the texture resembles wet sand. Press this mixture firmly into the bottom of your springform pan, making sure to pack it tightly for a sturdy base. I like to prebake the crust for about 10 minutes—it adds a lovely crunch! (See the next page below to continue steps…)
Next, while the crust is cooling, it’s time to prepare the cheesecake filling. In a large mixing bowl, beat the softened cream cheese with an electric mixer until it’s smooth and creamy. Gradually add in the sugar and flour, mixing well. You can smell the sweetness starting to emerge! Then, add the eggs, one at a time, ensuring each is fully integrated before adding the next. Finally, stir in the vanilla extract and sour cream until the mixture is smooth, and you can see that luscious texture forming.
Now, for the fun part! Gently fold in the fresh raspberries, being careful not to mash them too much. You want those beautiful bursts of red in every slice! Pour the filling over the crust, spreading it evenly, and pop it into the oven. Bake for about 55-60 minutes, or until the center is set but still slightly jiggly. This is where the magic happens—your kitchen will smell heavenly!
Once baked, turn off the oven but leave the cheesecake inside with the door ajar for about an hour. This helps prevent cracks by gently cooling down the cake’s temperature. When it’s cool, refrigerate for at least four hours (or overnight if you can wait). Once set, I love to sprinkle some dark chocolate chips on top for an extra touch of decadence!
Pro Tips for Best Results
First off, make sure your cream cheese is truly at room temperature. I learned the hard way that if it’s too cold, you end up with lumps in your cheesecake, which is not a pleasant texture. Nobody wants cloudy cream cheese lumps in their dessert!
Secondly, if you’re looking for a richer flavor, consider using a mix of dark and milk chocolate in your crust. I tested this three ways, and the added depth really makes a difference in balancing the sweetness of the raspberries. You might find yourself liking it even more!
Lastly, patience is key. Letting the cheesecake chill overnight will improve the flavors exponentially. I once rushed this step and ended up with a chewy texture rather than the rich, creamy perfection I was going for. Trust me; the wait is worth it!
Common Mistakes to Avoid
One of the biggest pitfalls I see with cheesecakes is overmixing once the eggs are added. I made this mistake a couple of times, thinking it would make my cheesecake fluffier, but instead, it added unwanted air that turned into cracks once baked. Mixing just until combined after adding the eggs is your best bet for a smooth, crack-free cheesecake. (See the next page below to continue…)
Another common oversight is failing to properly prepare your springform pan. Always line the bottom with parchment paper, even if it’s non-stick. I’ve had a fair share of cheesecake disasters where it would stick, leaving chunks behind. Trust me, using parchment paper saves you from headache later!
Lastly, don’t forget to check on your cheesecake as it bakes. Every oven is different, and you may need to adjust the baking time. You want to pull it out when it’s still slightly jiggly in the center—not a pudding, but just a subtle wobble. If you bake it too long, it will be dry, and that would be such a shame!
Serving Suggestions
When it comes time to serve this delicious cheesecake, I love to top each slice with a few fresh raspberries and a drizzle of chocolate sauce. It makes it look so elegant and inviting. You can also dust some powdered sugar on top for a simple yet elegant touch.
I often serve it alongside a dollop of whipped cream for that added creamy goodness. The cool, fluffy texture of whipped cream against the rich chocolatey cheesecake is pure bliss! Plus, you can never go wrong with more berries; they add a lovely tartness that balances out the sweetness.
If I’m feeling extra fancy, I’ll make a raspberry coulis by blending fresh raspberries with a bit of sugar and lemon juice and pouring it over the cheesecake. This adds a delightful tangy flavor and beautiful color contrast that makes the dessert pop!
Variations & Customizations
One of the reasons I adore this cheesecake recipe is how versatile it is! You can easily swap out the raspberries for strawberries or cherries if you prefer. I’ve tried it with various fruits, and each version comes out differently yet deliciously! The key is to match the sweetness of the fruit with your sugar levels in the filling.
For chocolate lovers, consider adding a layer of chocolate ganache on top before serving. Just heat some heavy cream and pour it over chocolate chips. Stir until it’s smooth, then pour it over your chilled cheesecake. Talk about indulgence!
And if you’re looking for a lighter option, you can substitute half of the cream cheese with Greek yogurt. It changes the texture slightly but keeps that creamy inspired cheesecake goodness without feeling too heavy.
How to Store, Freeze & Reheat
Storing your leftover cheesecake is straightforward! Simply cover it tightly with plastic wrap or foil and keep it in the refrigerator for up to a week. I like to keep mine in an airtight container to prevent it from absorbing any fridge odors.
If you happen to have leftover slices (which is rare in my house!), you can freeze them as well. Just wrap each slice individually in plastic wrap and then place them in a freezer-safe container. They’ll stay good for up to three months! When you’re ready to enjoy them, just thaw in the fridge overnight and indulge.
Reheating isn’t typically needed since cheesecake is best enjoyed cold, but if you prefer it a bit warm, pop it in the microwave for about 10-15 seconds. Be careful to not overdo it or you risk a rubbery texture—nobody wants that!
Conclusion
I hope you feel inspired to try making this Chocolate Raspberry Cheesecake in your own kitchen. It’s a delightful treat that brings joy to anyone who tastes it. With just a bit of love and patience, you’ll create a stunning dessert that’s sure to impress your friends and family. Trust me; every bite is worth the effort, and the smiles you’ll get in return are priceless! Enjoy baking!