
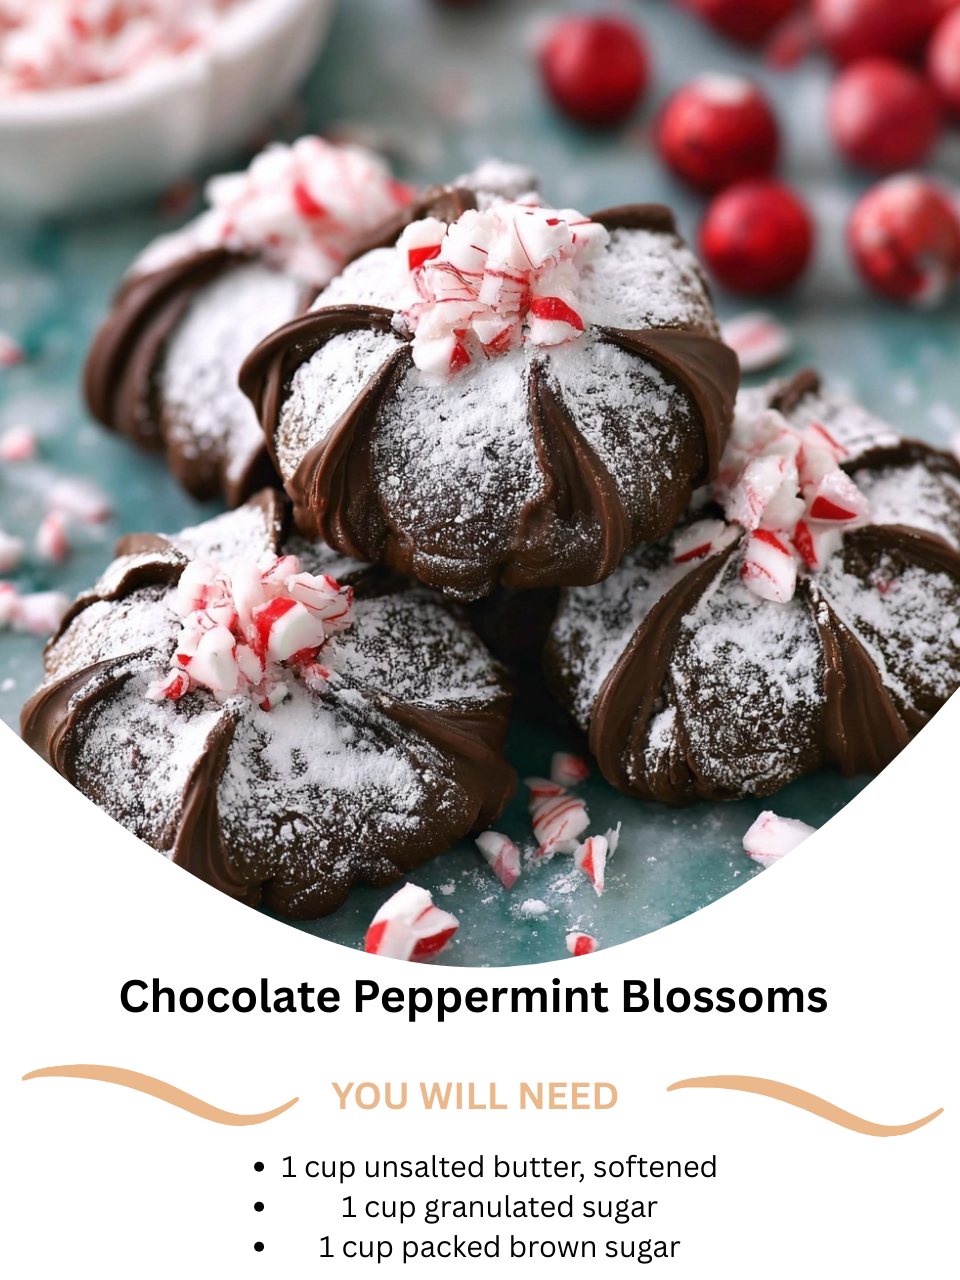
The idea for these cookies came to me one December, staring at a bowl of classic peanut butter blossoms and a candy cane. I wondered what would happen if I married the festive, cool burst of peppermint with the deep comfort of chocolate. The first time I creamed the butter and sugars, the air in my kitchen grew sweet. But the real magic began when I stirred in the peppermint extract—the scent was instantly, joyfully Christmassy. Rolling the rich chocolate dough into balls, baking them, and then pressing a bright white peppermint candy into the center felt like finishing an ornament. That first warm bite, with the soft cookie and the slowly melting candy, was pure holiday magic in an instant.
Why You’ll Love This Recipe
You will adore this recipe because it takes the familiar, beloved concept of a blossom cookie and gives it a spectacular wintery makeover. The rich double-chocolate dough is soft and fudgy, creating the perfect base for the cool, sweet peppermint kiss that melts just slightly in the center. They are incredibly fun and simple to make, especially with little helpers eager to press in the candies. Visually stunning and packed with festive flavor, these cookies are guaranteed to become a new holiday tradition on your cookie tray, wowing guests and family alike.
Ingredients
- 1 cup (2 sticks) unsalted butter, softened
- 1 cup granulated sugar
- 1 cup packed light brown sugar
- 2 large eggs, at room temperature
- 2 teaspoons pure vanilla extract
- 1 ½ teaspoons peppermint extract (use pure, not mint, for the best flavor)
- 2 ¾ cups all-purpose flour, spooned and leveled
- 1 cup unsweetened cocoa powder (Dutch-process or natural, but use a good quality one)
- 2 teaspoons baking soda
- 1 teaspoon salt
- ½ cup granulated sugar, for rolling
- 48-60 white chocolate peppermint kisses or classic peppermint candy kisses, unwrapped (See the next page below to continue…)
Equipment Needed
- Electric hand mixer or stand mixer
- Large and medium mixing bowls
- Baking sheets
- Parchment paper or silicone baking mats
- Measuring cups and spoons
- Whisk
- Wire cooling rack
Step-by-Step Instructions
I start by preheating my oven to 350°F (175°C) and lining my baking sheets with parchment paper. Then, in my large mixing bowl, I beat the softened butter, granulated sugar, and brown sugar together on medium-high speed. I let it go for a good 3-4 minutes, until the mixture is incredibly light, fluffy, and pale in color. This step is crucial for a soft, tender cookie. Next, I beat in the eggs, one at a time, ensuring each is fully incorporated before adding the next. Then come the extracts: I add the vanilla and peppermint, beating just until combined. The moment the peppermint hits the bowl, the whole kitchen smells like a holiday party.
In a separate, medium bowl, I whisk together the flour, cocoa powder, baking soda, and salt. I make sure to break up any lumps in the cocoa powder. This dry mixture looks beautifully dark and promises intense chocolate flavor. With my mixer on low speed, I gradually add the dry ingredients to the wet butter mixture. I mix only until the last streaks of flour disappear—overmixing is the enemy of a soft cookie! The dough will be thick, rich, and intensely chocolatey. I sometimes finish mixing with a spatula to be safe.
Now, I place the ½ cup of granulated sugar for rolling in a small bowl. I scoop the dough, about 1 tablespoon per cookie, and roll it between my palms into smooth balls. I roll each ball in the granulated sugar until it’s fully coated, giving it a lovely sparkle and a hint of extra sweetness. I place the sugared dough balls about 2 inches apart on my prepared baking sheets. They need a little room to spread. I bake them, one sheet at a time on the center rack, for 8-10 minutes. The cookies are done when they have puffed up and the tops are slightly cracked, but the centers still look soft. They will firm up as they cool.(See the next page below to continue…)
This next step requires perfect timing. The moment I pull the baking sheet from the oven, I work quickly. I take an unwrapped peppermint kiss and firmly press it straight into the center of each warm cookie. I’ve learned that if you wait even a minute, the cookie surface starts to set and the candy won’t stick as well or might crack the cookie. I press down until the candy is nestled in and the cookie cracks beautifully around the edges. I then let the cookies cool on the baking sheet for 5 minutes before transferring them to a wire rack to cool completely. As they cool, the candy softens slightly into a perfect, melty blossom.
Pro Tips for Best Results
The temperature of your dough balls before baking makes a difference. I tested this by baking some right away and chilling some for 15 minutes first. The chilled cookies held a slightly thicker, more defined shape, while the room-temperature ones spread a bit more. For a slightly puffier cookie, a quick 15-minute chill on the baking sheet is a great trick, especially if your kitchen is warm.
The quality of your cocoa powder truly matters. I’ve made these with standard grocery store cocoa and with a higher-quality Dutch-process cocoa. The Dutch-process cocoa gave the cookies a deeper, richer, almost fudgier chocolate flavor that stood up brilliantly to the strong peppermint. It’s worth using the best cocoa you have for this recipe.
When pressing in the candies, have them all unwrapped and ready to go before the cookies even go in the oven. That oven-to-candy window is short, and fumbling with wrappers can mean missing the perfect moment. Also, press straight down—don’t twist. Twisting can cause the cookie to break. A firm, direct press gives you the classic, beautiful blossom look.
Common Mistakes to Avoid
The biggest mistake is pressing the candy into completely cooled cookies. The kiss needs the residual heat from the warm cookie to soften its base and adhere properly. If the cookie is cold, the candy will just sit on top and fall off when you pick it up. I learned this the hard way when I got distracted and came back to a cooled tray—don’t do what I did! Have those candies ready and act fast.(See the next page below to continue…)
Don’t over-measure your flour. The most common way to do this is by scooping the measuring cup directly into the flour bag, which packs it in. Too much flour will make your cookies dry and cakey, not soft and fudgy. Always spoon the flour lightly into your measuring cup and level it off with a knife for the most accurate, perfect texture.
Another error is over-baking. These cookies continue to cook on the hot baking sheet. If you leave them in until they look completely set in the center, they will be dry and hard once cooled. Pull them out when they are puffed and the tops are cracked, but they still look soft and underdone in the middle. They will set up perfectly as they cool.
Finally, avoid using “mint” extract instead of “peppermint” extract. Mint extract is often a blend that includes spearmint, which can give a flavor more reminiscent of gum or toothpaste. Pure peppermint extract delivers that clean, crisp, candy-cane flavor we all associate with the holidays. Trust me, do not swap these; it makes a huge difference in the final taste.
Serving Suggestions
I love piling these cookies high on a vibrant red or green holiday platter. Their dark chocolate color and bright white candy centers look stunning and festive. They are the star of any cookie swap or holiday dessert table, and I always get asked for the recipe.
For a truly decadent treat, I sometimes serve them slightly warm with a scoop of vanilla bean ice cream on the side. The contrast of the warm, soft cookie and cold ice cream is heavenly, and the flavors are a perfect match. A tall glass of cold milk is, of course, the classic and perfect pairing for these rich cookies.
These also make wonderful edible gifts. I place a stack in a clear cellophane bag tied with a ribbon, or arrange them in a festive tin lined with parchment. They travel well and are such a personal, homemade touch that truly captures the spirit of the season.
Variations & Customizations
For a different look and flavor, try using dark chocolate or milk chocolate peppermint kisses instead of the classic white chocolate ones. You can also experiment with other seasonal candy shapes—I’ve used miniature candy canes or even peppermint patties chopped in half, pressed into the center.
If you love a little texture, fold ½ cup of crushed peppermint candies or mini chocolate chips into the dough along with the dry ingredients. This gives you extra bursts of peppermint and chocolate throughout the cookie itself, not just in the center.
For a chocolate-orange twist, replace the peppermint extract with 1 tablespoon of finely grated orange zest and press a chocolate orange segment into the center instead of a peppermint kiss. It’s a wonderfully sophisticated and delicious variation for those who might not be peppermint fans.
How to Store, Freeze & Reheat
Once completely cooled, I store these cookies in a single layer in an airtight container at room temperature. They will stay soft and delicious for up to 5 days. If I need to stack them, I place a sheet of parchment paper between the layers to protect the candy blossoms. I do not recommend refrigerating, as it can dry out the cookies.
Both the baked cookies and the unbaked dough freeze beautifully. To freeze baked cookies, layer them in an airtight container with parchment between layers. Thaw at room temperature. To freeze unbaked dough, roll into balls (don’t roll in sugar yet) and freeze on a tray before transferring to a bag. When ready to bake, roll the frozen balls in sugar and bake, adding 1-2 minutes to the baking time.
To refresh cookies or serve them warm, place them on a baking sheet in a 300°F (150°C) oven for 4-5 minutes. This gently re-softens the cookie and slightly melts the candy again. Avoid the microwave, as it can over-soften the candy and make the cookie tough.
Conclusion
These Chocolate Peppermint Blossoms have become the highlight of my holiday baking season. They perfectly capture the joyful, festive spirit in a single, delicious bite. I hope you’ll give them a try in your own kitchen, filling it with that wonderful peppermint-chocolate aroma and creating a new tradition. They’re proof that with a little twist on a classic, you can create something that feels both wonderfully familiar and excitingly new. Happy baking, and may your holidays be sweet!