
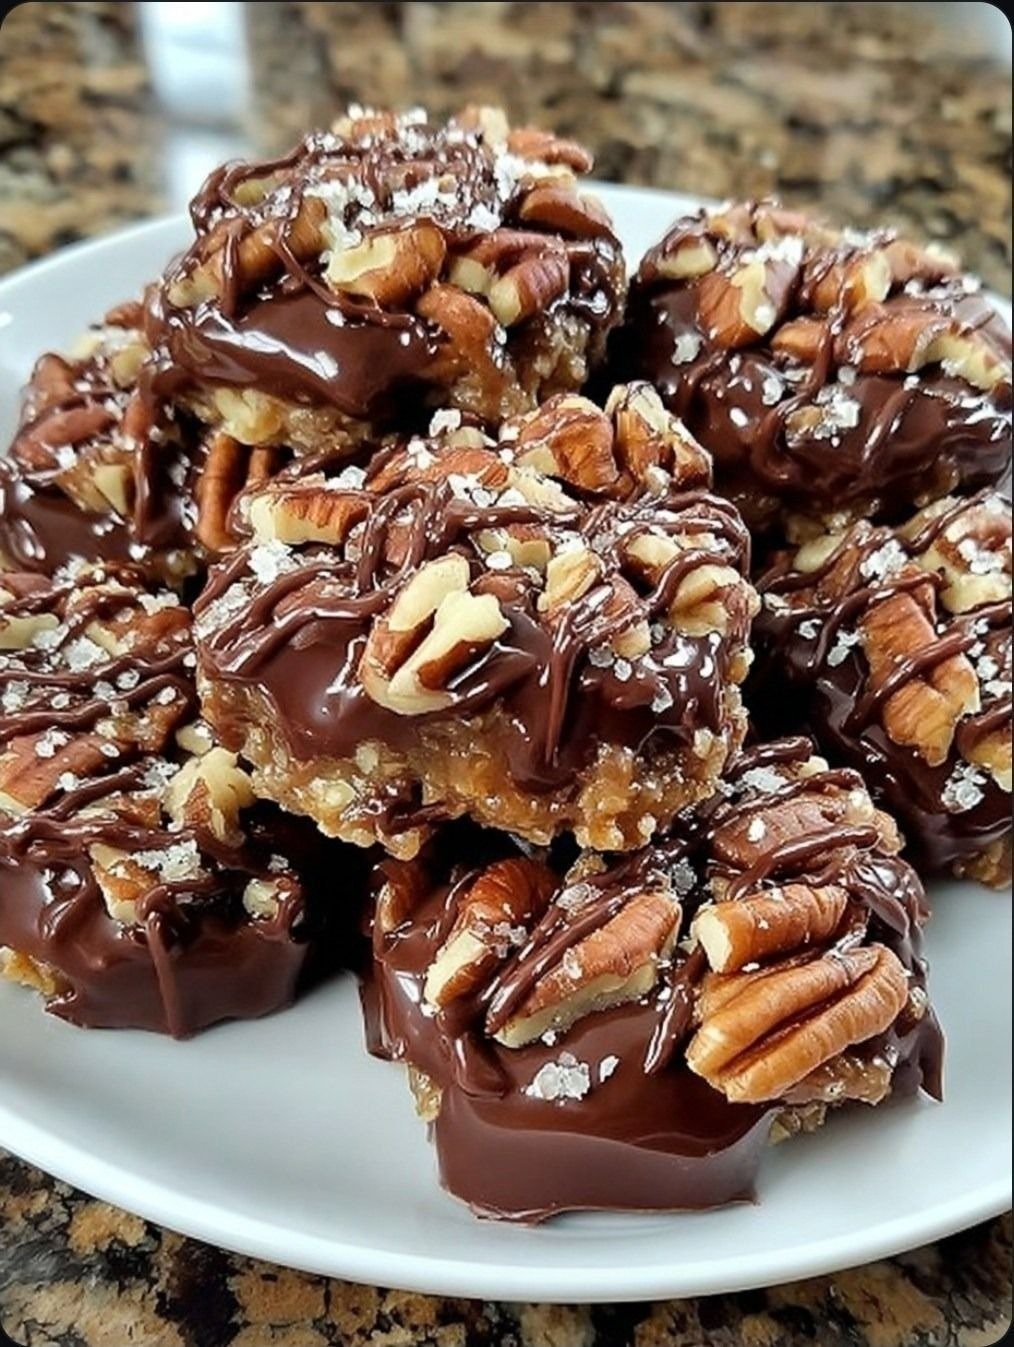
I first made these Chocolate Pecan Turtle Clusters during a frantic holiday season, needing a last-minute homemade gift that screamed “special” without demanding hours of my time. The moment I began toasting the pecans in my dry skillet, my kitchen filled with a warm, nutty, buttery aroma that felt like a cozy hug. Watching the sugar and butter melt into a golden caramel, then hearing the satisfying crackle as I stirred in the toasted nuts, was pure kitchen magic. Dipping those sticky, nutty clusters into a bowl of silky dark chocolate was the final, irresistible step. Setting them on parchment paper to harden felt like placing little edible treasures. That first bite—the snap of dark chocolate giving way to chewy caramel and a crunchy, salty pecan—was a perfect symphony of texture and flavor. They’ve been my secret weapon for gourmet gifting and indulgence ever since.
Why You’ll Love This Recipe
You are going to love this recipe because it transforms just four simple ingredients into the most decadent, impressive, and addictive candy you can imagine. It captures the iconic flavor of a classic turtle candy—salty, buttery pecans, rich caramel, and smooth chocolate—in a fun, cluster form that’s even easier to make. There’s no candy thermometer needed, and the entire process takes less than 30 minutes of active time. They are perfect for holiday cookie trays, edible gifts, or satisfying your own serious sweet tooth with something that tastes like it came from a fancy chocolatier. It’s the ultimate proof that simple can be spectacular.
Ingredients
- 2 cups pecan halves
- 1 cup granulated sugar
- 1/2 cup unsalted butter
- 1/3 cup heavy cream
- 1/4 teaspoon sea salt, plus more for sprinkling
- 1 teaspoon pure vanilla extract
- 8 ounces high-quality dark chocolate (60-70%), chopped, or high-quality dark chocolate chips
- Optional: 1 teaspoon flaky sea salt for finishing
(See the next page below to continue…)
Equipment Needed
- Heavy-bottomed medium saucepan
- Baking sheets
- Parchment paper or silicone baking mats
- Dry skillet for toasting nuts
- Wooden spoon or heatproof spatula
- Heatproof bowl (for melting chocolate)
- Spoons or forks for dipping
Step-by-Step Instructions
My process always starts with the pecans. I place them in a single layer in a dry skillet over medium-low heat. I toast them for 5-7 minutes, stirring often, until they become fragrant and take on a slightly deeper color. I can smell the nutty perfume filling my kitchen, and I listen for a faint crackling sound. I immediately pour them onto a cutting board to cool completely. Once cool, I roughly chop about half of them—this creates different textures in the cluster. I leave the other half as whole halves for a beautiful presentation on top. This little step of partial chopping is a trick I learned after my first batch, which had only whole pecans that didn’t bind together as well.
Now, for the caramel, which is the heart of the turtle. In my heavy-bottomed saucepan, I combine the granulated sugar, butter, and heavy cream. I cook this over medium heat, stirring constantly with my wooden spoon. The key here is patience and constant stirring to prevent the sugar from scorching. At first, it will look separated and grainy, but after about 5-7 minutes, it will suddenly come together into a smooth, golden sauce. I let it bubble gently for one more minute, then I immediately remove it from the heat. I stir in the sea salt and vanilla extract—the vanilla adds a wonderful warmth. Then, I quickly stir in all of my toasted pecans (both chopped and whole), making sure every nut is thoroughly coated in that glossy, heavenly caramel.
Working quickly but carefully (the caramel is hot), I use two spoons to drop small clusters of the caramel-coated pecans onto parchment-lined baking sheets. I aim for little mounds, about 1-2 tablespoons each, and I make sure each cluster has a nice mix of pieces and a whole pecan or two on top. I leave space between them as they will spread slightly. I let these clusters cool and set completely at room temperature. This can take about 30-45 minutes. Rushing this will result in melted, messy chocolate later.(See the next page below to continue…)
Once the pecan caramel clusters are firm and cool to the touch, I melt the chocolate. I chop my dark chocolate bar and place it in a heatproof bowl over a pot of barely simmering water (a double boiler), making sure the bowl doesn’t touch the water. I stir gently until it’s just melted and smooth. Then, using a fork or a dipping tool, I carefully dip the bottom of each cluster into the chocolate, letting the excess drip off, and place it back on the parchment. For a fully enrobed look, I sometimes spoon a little chocolate over the top, too. While the chocolate is still wet, I might sprinkle a tiny pinch of flaky sea salt over each one for that perfect sweet-salty finish. I let the chocolate set completely at room temperature, which gives it a beautiful snap.
Pro Tips for Best Results
I tested the caramel method three different ways: with a candy thermometer (aiming for 245°F or firm ball stage), without a thermometer but using the cold water test, and simply cooking by sight and time until thickened. For ease and reliability, the sight-and-time method worked perfectly for these clusters. You’re looking for the mixture to thicken noticeably, coat the back of your spoon, and leave a clear trail when you run your finger through it on the spoon. It should be a rich golden brown. This takes about 6-8 minutes of steady stirring once it comes together.
Here’s what I learned the hard way about the chocolate: do not overheat it. Chocolate is delicate. If you microwave it or get it too hot over the double boiler, it can “seize” and become a grainy, unusable lump. The best method is gentle, indirect heat. I bring my pot of water to a simmer, then turn it off and place the bowl of chocolate on top, letting the residual heat melt it slowly, stirring occasionally. This preserves the chocolate’s smooth texture and glossy finish.
For the most professional-looking clusters and to avoid a “foot” of pooled chocolate, use a fork or a specialized dipping tool to lift the cluster from the melted chocolate. Gently tap the fork against the side of the bowl to shake off excess chocolate before placing it back on the parchment. If you want a decorative drizzle on top, wait until the base chocolate layer is fully set, then use a spoon or a piping bag with melted chocolate to make thin lines over the clusters.
Common Mistakes to Avoid
My biggest first-time mistake was not stirring the caramel constantly. I got distracted for maybe 30 seconds, and the sugar on the bottom of the pan scorched, giving my entire batch a bitter, burnt taste. I had to start over. Constant, gentle stirring from the moment you turn on the heat is the only way to ensure an even, smooth caramel without any burnt bits. This is not a step you can walk away from.(See the next page below to continue…)
Another error is adding the vanilla extract while the caramel is still on the heat. The high alcohol content can cause it to splatter violently. Always remove the pot from the heat source before stirring in the vanilla and salt. This is a safety tip I learned from a scary (but thankfully minor) splatter incident early on. It also preserves the vanilla’s delicate flavor.
Do not try to move or dip the clusters before the caramel has fully set. If the caramel is still warm and soft, it will squish when you try to pick it up, and the hot caramel will melt the chocolate upon contact, creating a gooey mess. Let the clusters harden completely at room temperature. You can speed this up slightly by popping the tray in the fridge for 15 minutes, but room temperature setting prevents condensation on the chocolate later.
Finally, avoid storing the finished turtles in a warm place. The chocolate can bloom (develop white streaks) or become soft and sticky. An airtight container in a cool, dry pantry or in the refrigerator is ideal. If you must refrigerate them, let them come to room temperature for a few minutes before serving for the best texture and flavor release.
Serving Suggestions
I love arranging these clusters in mini paper candy cups and piling them into a festive tin or a clear cellophane bag tied with a ribbon. They make the most thoughtful, impressive homemade gift for teachers, neighbors, or hostesses. I always include a little note that says “Keep in a cool place,” because they are precious!
For a stunning dessert platter, I arrange them alongside other homemade candies like peppermint bark, truffles, and toffee. They add a beautiful, rustic touch with their pecan halves peeking through. They’re also fantastic served with after-dinner coffee or a glass of port; the rich chocolate and caramel pair beautifully with bitter or fortified drinks.
While they are perfect as a standalone treat, I sometimes crumble one over a scoop of vanilla bean ice cream for an over-the-top sundae. The combination of cold ice cream, chewy caramel, crunchy nuts, and hard chocolate is absolutely divine.
Variations & Customizations
While dark chocolate is classic, you can use any chocolate you love. Milk chocolate makes them sweeter and more nostalgic, while semi-sweet is a great middle ground. For a truly decadent twist, use a mixture—dip in dark chocolate, then drizzle with white chocolate. You can also roll the caramel-nut clusters in crushed pretzel pieces before the chocolate sets for an added salty crunch.
You can change up the nut, too. While pecans are traditional, walnuts work beautifully. For a nut-free version, use large, toasted pumpkin seeds (pepitas) for a similar crunch. You can also add a tablespoon of bourbon to the caramel along with the vanilla for a grown-up, boozy kick.
If you love a mix-in, try adding a tablespoon of finely ground coffee to the caramel as it cooks, or stir in a handful of dried cranberries or cherries with the pecans for a tart contrast. The basic formula is wonderfully adaptable.
How to Store, Freeze & Reheat
To store, place the clusters in a single layer in an airtight container, separating layers with parchment paper. They will keep at cool room temperature (away from heat sources) for up to 2 weeks. In the refrigerator, they will keep for up to 3 weeks; the caramel may become firmer.
These clusters freeze exceptionally well, making them a fantastic make-ahead gift. Place them in a single layer on a baking sheet to flash freeze until solid, then transfer to a freezer-safe bag or container. They will keep for up to 3 months. Thaw, still wrapped, in the refrigerator overnight or at room temperature for an hour.
There is no need to reheat these. They are meant to be enjoyed at room temperature or cool. If they have been in the fridge, let them sit out for 10-15 minutes to take the chill off so the caramel has its perfect chewy texture. Never microwave them, as this will melt the chocolate and make the caramel dangerously hot.
Conclusion
These Chocolate Pecan Turtle Clusters are more than just candy to me; they’re little edible tokens of generosity and craftsmanship. They’ve saved me during busy holidays, delighted my friends and family, and provided countless moments of pure, simple indulgence. I hope this recipe brings the same joy to your kitchen, giving you the confidence to create something truly special with just a saucepan and a spoon. Now, go toast those pecans—your new favorite homemade treat is just a caramel stir away.