
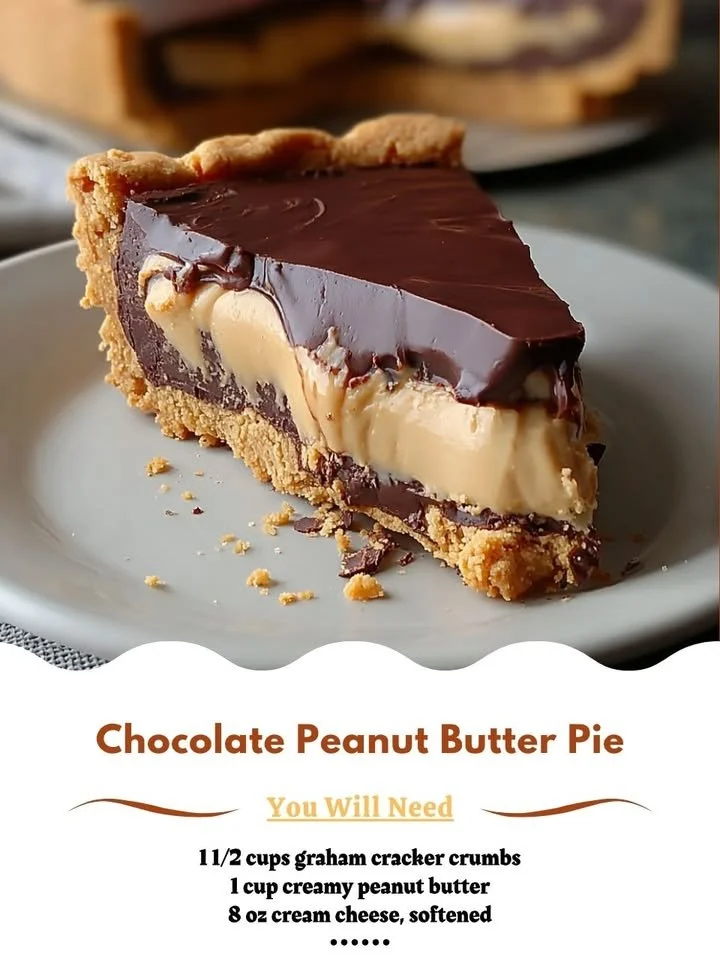
I can confidently say that Chocolate Peanut Butter Pie is one of my all-time favorite desserts to whip up in my kitchen. It combines the magic of rich chocolate and creamy peanut butter, all nestled in a deliciously crumbly crust. The moment that first bite hits your taste buds, it’s like a sweet symphony playing just for you. Whether it’s a special occasion or just a Sunday afternoon craving, this pie has a way of making everything just a bit brighter.
Why You’ll Love This Recipe
What’s not to love about this dessert? The balance of flavors and textures is absolutely divine. The creamy peanut butter filling complements the rich chocolate, while the crunchy crust holds it all together perfectly. Plus, this pie is surprisingly easy to make, which leaves plenty of time for you to bask in praise at your next gathering. Once you take a slice, I guarantee you’ll be hooked! (See the ingredients in the next page below…)
Ingredients
– 1 ½ cups chocolate cookie crumbs
– ½ cup unsalted butter, melted
– 1 cup creamy peanut butter
– 1 cup powdered sugar
– 1 cup heavy whipping cream
– 1 teaspoon vanilla extract
– ½ cup semi-sweet chocolate chips (for drizzle)
Equipment Needed
– Mixing bowls
– Electric mixer
– Measuring cups and spoons
– 9-inch pie pan
– Rubber spatula
– Double boiler or microwave-safe bowl (for melting chocolate)
Step-by-Step Instructions
First, I start by preheating my oven to 350°F (175°C), which is crucial for achieving that perfect crust. I mix the chocolate cookie crumbs and melted butter in a bowl until it’s all combined, and it should have a consistency similar to wet sand. Then, I press this mixture firmly into the bottom of a 9-inch pie pan to form an even layer. Baking it for about 8 minutes makes it crispy, which is perfect for holding the filling. I literally can’t resist taking a whiff of those warm, chocolatey scents wafting through my kitchen while it bakes! (See the next page below to continue steps…)
Next, while the crust is cooling, I combine the creamy peanut butter and powdered sugar in a mixing bowl. I use my electric mixer to beat these two together until it’s smooth and creamy. The aroma of the peanut butter filling is so inviting; it makes it hard not to sneak a taste! Then, in another bowl, I whip the heavy cream and vanilla extract until the mixture forms soft peaks. I gently fold one-third of the whipped cream into the peanut butter mixture to lighten it, then fold in the rest slowly, ensuring I keep that lovely airy texture.
Once that’s done, I pour the fluffy peanut butter filling into the cooled crust and spread it out evenly. Then, I place the pie in the refrigerator to chill for at least four hours—this is where the magic really happens! I recommend letting it set overnight if you can, as it gives the flavors time to meld together beautifully.
The final step is melting the semi-sweet chocolate chips for a drizzle on top. You can do this over a double boiler or in the microwave; just make sure to do it in 30-second intervals, stirring in between. Once the chocolate is melted and smooth, I drizzle it over the chilled pie like a little piece of artisan magic. This extra touch not only looks incredible but adds a rich finish to each bite.
Pro Tips for Best Results
I’ve tested this pie three ways regarding the crust, and I truly prefer the chocolate cookie crumbs for their rich flavor. However, if you’re looking for a gluten-free option, you could replace them with crushed gluten-free cookies. It’s surprisingly just as delicious!
Another tip I picked up along the way is to use room temperature peanut butter for a smoother filling. If it’s too cold, it can be a bit challenging to blend it nicely with the powdered sugar, leading to lumps that just won’t cooperate.
Lastly, if you love a bit of texture, feel free to add in some chopped peanuts or even mini chocolate chips into the filling. It gives an extra crunch that makes each bite even more delightful!
Common Mistakes to Avoid
One common mistake I’ve made in the past is not allowing the crust to cool completely before adding the filling. If the crust is warm, it can cause the filling to melt slightly, leading to a more soupy pie—definitely not what we want! (See the next page below to continue…)
Another mistake I see is over-whipping the cream. It’s easy to do, but if the cream turns into butter, it can ruin that lovely smooth texture we’re aiming for in the filling. Just whip until those soft peaks form and stop there!
I’ve also learned that skipping the chilling time is a no-go. It might be tempting to taste this pie as soon as it’s made, but the flavors really need that time to develop, and the filling needs to solidify for easier slicing. Patience is definitely a virtue here!
Lastly, don’t forget the drizzle of melted chocolate! This step is not only aesthetically pleasing but adds an extra layer of flavor that ties the pie together. Skipping this step might mean missing that perfect finishing touch.
Serving Suggestions
When it comes to serving, I love to garnish each slice with a dollop of whipped cream and a sprinkle of crushed peanuts. It elevates the presentation and provides an extra little burst of flavor and texture—trust me, it’s worth it!
If you’re feeling a bit indulgent, a scoop of vanilla ice cream on the side takes things to another level. I often set it out when I serve this pie, and the combination of cold ice cream with the creamy pie is just heavenly.
For a fun twist, you could also drizzle some caramel sauce or top with fresh berries. The sweetness of the caramel or the tartness of the berries pairs remarkably well with the rich chocolate and peanut butter, adding surprising depth to each bite.
Variations & Customizations
One of the best things about this recipe is how customizable it is! If you’re a fan of flavors, try swapping the peanut butter for nutella for a chocolate-hazelnut twist—just as delicious! You could also add a pinch of sea salt to the filling for a salted chocolate peanut butter pie; it’s a game-changer!
For an even richer chocolate experience, consider adding a layer of chocolate ganache on top of your peanut butter filling. It’s as simple as heating up some heavy cream and pouring it over chocolate chips until melted; it adds a beautiful look and amazing flavor boost.
Finally, you could also switch up the crust! I’ve made this pie with crushed graham crackers or even oatmeal cookies for a different flavor profile. It’s a great way to mix things up and adjust the pie to fit whatever ingredients you have on hand.
How to Store, Freeze & Reheat
This pie is best stored in the refrigerator, covered tightly with plastic wrap or a lid, for up to five days. If you can resist eating it all in one sitting, this will stay fresh and delicious for quite some time.
If you’re looking to make it ahead of time, you can freeze it! Just wrap the pie tightly in plastic wrap and then in aluminum foil. It can be frozen for up to two months. When you’re ready to enjoy, simply transfer it to the refrigerator to thaw overnight before serving.
Reheating isn’t necessary unless you prefer a softer texture. You can serve this pie cold or at room temperature, but if you want just a hint of warmth, a quick 10-second zap in the microwave can help soften it just a bit. Just be careful not to overdo it—you want to avoid melting it completely!
Conclusion
There you have it, my go-to recipe for Chocolate Peanut Butter Pie! It’s a labor of love that’s always worth every minute spent in the kitchen. I hope you enjoy making this dessert as much as I do, and that it brings as many smiles to your table as it does to mine. Happy baking!