
Another common pitfall is rushing to cut the bars before they’re completely chilled. When I’ve been too hasty in the past, I ended up with a gooey mess instead of perfect squares. The refrigeration process solidifies everything, making for nice, neat pieces that you’ll be proud to serve.
Also, ensure you’re measuring your ingredients with precision. Too much peanut butter or chocolate can throw off the balance of flavors and textures. I learned this the hard way once, mixing too much chocolate and having a thick layer that overwhelmed everything else.
Lastly, it’ll be tempting to modify the recipe on a whim—it happens to the best of us! However, if you swap out ingredients without careful thought, you might not get the results you’re hoping for. It’s always best to stick to the recipe, especially the first time around, to see how the flavors combine.
Serving Suggestions
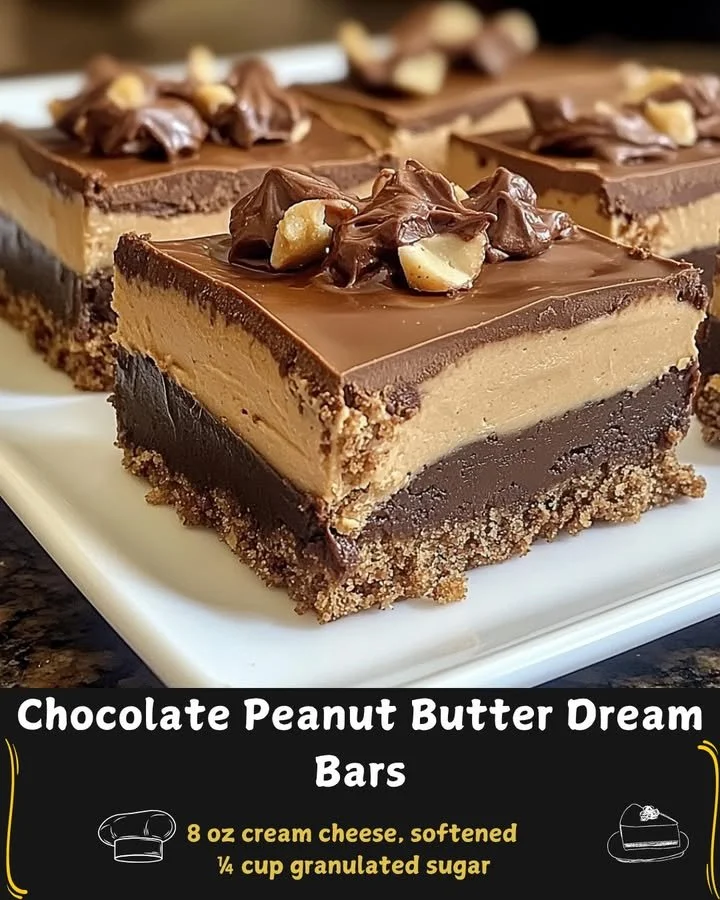
When it comes to serving these Chocolate Peanut Butter Dream Bars, I love to cut them into bite-sized pieces. They’re perfect for sharing at parties or for a cozy night in with loved ones. A sprinkle of chopped peanuts on top adds a lovely crunch and a little extra flair!
I also enjoy serving them with a dollop of whipped cream or a scoop of vanilla ice cream on the side. The creamy texture of the ice cream complements the richness of the bars beautifully, giving that extra indulgent experience. It’s like bringing a bit of a sundae right to my dessert plate!
For days when I’m feeling a little extra, I drizzle some melted chocolate on top before serving. It adds an irresistible touch that makes these bars even more special. A little chocolate drizzle goes a long way and impresses anyone who gets to enjoy it.
Variations & Customizations
If you want to experiment a bit, one of my favorite variations is swapping out the graham cracker crumbs for crushed Oreos, creating a delicious cookie crust instead! This twist gives the bars an extra chocolatey flavor that I absolutely love.
For those who may want to lighten the recipe, I’ve also played around with using natural peanut butter and honey instead of powdered sugar. While it alters the flavor slightly, it’s a fun way to take a healthier approach while still satisfying that sweet craving.
Lastly, I’ve tried adding a layer of sliced bananas before the chocolate layer for a delightful banana-peanut butter twist. The fruity flavor blends surprisingly well with the chocolate, and if you’re a fan of that combo, I highly recommend giving it a go!
How to Store, Freeze & Reheat
Once your bars are fully chilled and set, you can store them in an airtight container in the refrigerator for up to a week. I’m always excited to grab a piece when the craving hits throughout the week, and they hold their flavor well.
If you want to prepare ahead for an event, I’ve found that these bars freeze beautifully! Just wrap them tightly in plastic wrap or put them in a freezer-safe container layered with parchment if you’re stacking, and they can last for up to three months. This has saved me on more than one occasion when I’ve needed a last-minute treat.
When it’s time to enjoy from frozen, simply take them out of the freezer and place them in the fridge the night before. They’ll defrost beautifully, and you won’t even notice they were frozen—perfect for a stress-free dessert when company is on the way!
Conclusion
I hope you find as much joy in making (and tasting) these Chocolate Peanut Butter Dream Bars as I have! They’re a delicious treat that’s perfect for any occasion, and I can’t wait for you to share them with your friends and family. Happy baking, and remember—every layer is a little piece of love!