
Another mistake I made was skipping the oil. The coating looked dull and streaky, and the texture wasn’t smooth. It didn’t affect the flavor, but aesthetically, it wasn’t what I wanted. A small amount of oil transforms the finish beautifully.
Lastly, don’t make the patties too large. Oversized candies are harder to dip and take much longer to set. Keeping them uniform ensures even coating and a satisfying bite.
Serving Suggestions
I love serving these candies chilled because the contrast between the crisp chocolate shell and the creamy peanut butter center is heavenly. When I have guests, I arrange them on a platter with a sprinkle of gold sugar or crushed peanuts for added flair. They always look like something from a specialty chocolate shop.
For holiday gatherings, I place them inside mini cupcake liners. It makes serving easier and keeps them from sticking together on a dessert tray. Plus, they look extra polished and festive. People always grab them quickly!
If I’m packing them as gifts, I layer them in a tin with parchment between each layer. Every time I’ve given them as holiday gifts or hostess treats, the reaction is the same: pure delight. They’re the kind of homemade candy that feels luxurious without being complicated.
Sometimes, when I want something decadent after dinner, I pair one candy with a cup of hot coffee. The bitterness of the coffee next to the sweet, salty candy is an unexpectedly perfect match.
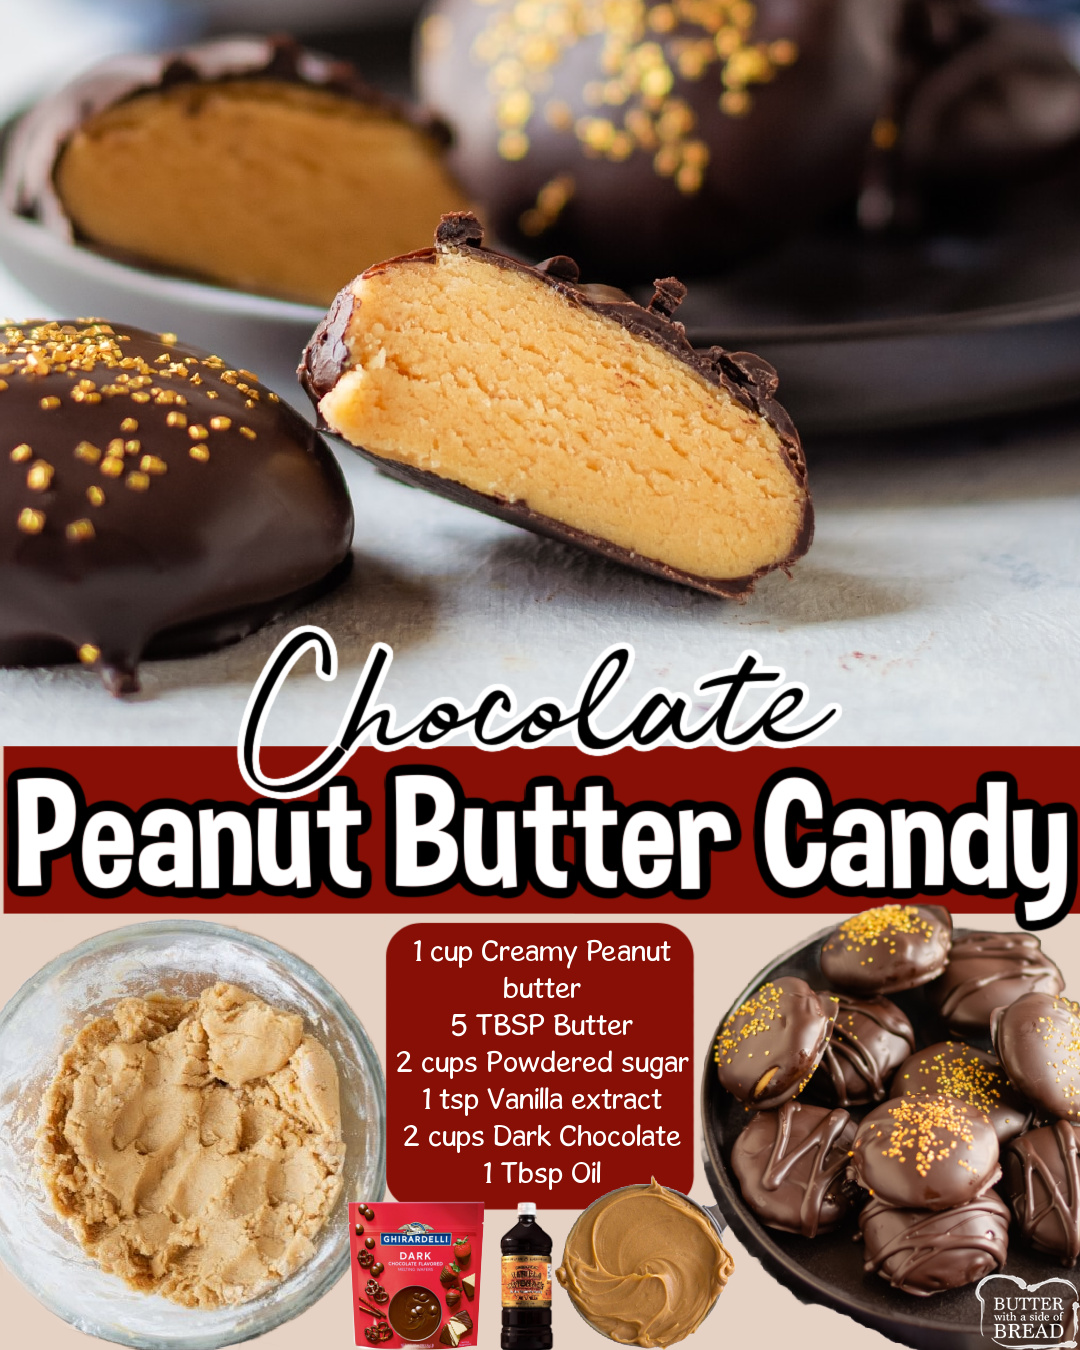
Variations & Customizations
One of my favorite variations is to mix crushed graham crackers into the peanut butter dough. It adds a slightly nutty, crunchy texture that reminds me of buckeyes but with more depth. Every time I make this version, people ask what the secret ingredient is.
For a fun twist, I’ve added mini chocolate chips to the filling. They stay firm inside the dough, giving tiny bursts of chocolate flavor with every bite. If you’re a chocolate lover, this variation is a must-try.
You can also play around with the chocolate coating. Milk chocolate gives a sweeter flavor, while white chocolate creates a creamy, almost fudge-like coating. I once drizzled melted white chocolate over the dark-coated candies, and they looked incredible—perfect for a party platter.
If you like a little crunch, try adding chopped peanuts or pretzel pieces to the peanut butter mixture. The salty crunch makes the candy even more addictive. I tried it once on a whim and instantly fell in love.
How to Store, Freeze & Reheat
These candies store beautifully. I keep them in an airtight container in the fridge, where they stay fresh for up to two weeks. The chocolate firms up nicely, and the filling stays smooth and delicious. I’ve also left them at room temperature when serving at parties, and they hold their shape well.
Freezing is another great option. When I make large holiday batches, I freeze the dipped candies in layers separated by parchment. They can be frozen for up to three months. To enjoy, I let them thaw in the fridge for about an hour. They taste just as good as freshly made.
If the chocolate ever loses its shine during storage, it doesn’t affect flavor at all. But if you want to refresh them, serving them chilled helps them look glossy again.
There’s no reheating needed for this recipe, of course, but if your home is warm and they soften too much, popping them back into the fridge for 10 minutes firms them right back up.
Nutrition Information
While these candies are definitely indulgent, they’re made from simple, familiar ingredients—peanut butter, chocolate, powdered sugar, and butter. Peanut butter offers protein and healthy fats, which give the candies a satisfying richness that keeps you from overindulging too quickly. I love that even small portions feel satisfying.
Dark chocolate contains antioxidants, and using high-quality chocolate gives you a deeper flavor that doesn’t require oversized pieces. I find that one or two candies are plenty to satisfy a sweet craving. They’re decadent but controlled in size.
The powdered sugar adds sweetness and structure, creating that classic peanut butter filling texture. Yes, it adds calories, but it also creates the nostalgic, melt-in-your-mouth quality that makes this recipe so beloved.
While these treats aren’t “health food,” I appreciate knowing exactly what’s in them—no preservatives, no strange additives, and nothing artificial. Just real ingredients combined into something wonderful.
FAQ Section
Can I use natural peanut butter?
I’ve tried it several times, and it never works well. Natural peanut butter separates and creates an oily dough that doesn’t hold its shape. Stick with a classic creamy peanut butter for best results.
How do I make the chocolate coating smoother?
Adding a tablespoon of oil works wonders. It thins the chocolate slightly, helps it coat more evenly, and gives it a shiny finish. I’ve used vegetable oil and coconut oil—both work great.
Can I make these candies ahead of time?
Absolutely. In fact, I prefer making them a day ahead because the flavors meld beautifully. Store them in the fridge until ready to serve.
What if my dough is too sticky?
This usually means your peanut butter is softer than average. I simply add another tablespoon or two of powdered sugar until the dough becomes workable again. Don’t add too much at once—adjust slowly.
Can I dip them in chocolate more than once?
Yes! I’ve done double-dipped versions when I wanted a thicker chocolate shell. Just chill the candies between dips so the first layer sets properly.
Conclusion
Every time I make these Chocolate Peanut Butter Candies, I’m reminded of why I love homemade sweets so much—they’re simple, heartfelt, and unbelievably delicious. From the first swirl of peanut butter to the final chocolate coat, the process feels comforting and joyful. I hope this recipe brings just as much happiness to your kitchen as it has to mine, and that you enjoy every decadent, creamy, chocolate-covered bite.