
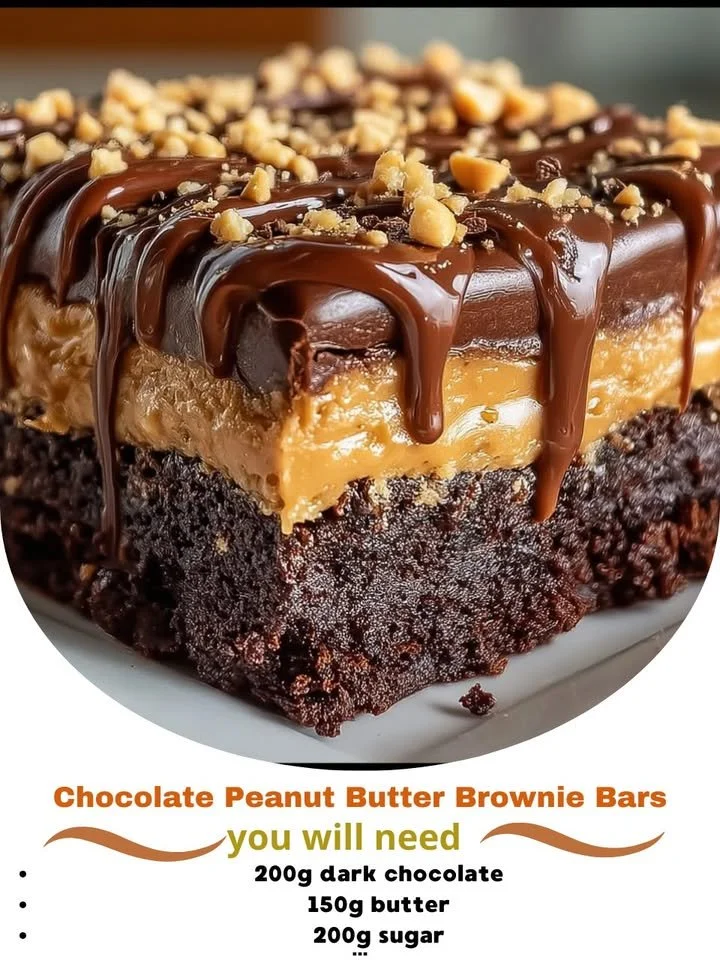
There’s something truly magical about the combination of chocolate and peanut butter. It never fails to transport me back to my childhood, when I would eagerly await my mom making us a sweet treat after school. One of my absolute favorites has become a staple in my kitchen: Chocolate Peanut Butter Brownie Bars. These bars are rich, fudgy, and have that delightful peanut butter swirl that makes every bite feel indulgent. Today, I’m excited to share this recipe with you!
Why You’ll Love This Recipe
What I adore about these Chocolate Peanut Butter Brownie Bars is how easy they are to make, yet they taste like you slaved away in the kitchen for hours. They’re perfect for satisfying a sweet tooth or bringing to a gathering, where they’re sure to impress everyone. Plus, they keep well, so I can enjoy them throughout the week without feeling guilty about baking too much. (See the ingredients in the next page below…)
Ingredients
– ½ cup unsalted butter
– 1 cup granulated sugar
– 2 large eggs
– 1 teaspoon vanilla extract
– 1 cup all-purpose flour
– ⅓ cup unsweetened cocoa powder
– ¼ teaspoon salt
– ½ cup creamy peanut butter
– ½ cup chocolate chips (optional, for extra chocolatey goodness)
Equipment Needed
– 8×8 inch baking pan
– Mixing bowls
– Whisk or electric mixer
– Rubber spatula
– Measuring cups and spoons
– Parchment paper (optional for easy removal)
Step-by-Step Instructions
First things first, preheat your oven to 350°F (175°C). I always find this step makes a world of difference in ensuring even baking. While that’s warming up, I like to melt the butter in a large mixing bowl. Once it’s melted, stir in the granulated sugar until the mixture is smooth and shiny. Then, beat in the eggs and vanilla extract until it’s all well combined and lovely. This is when the delightful scent starts wafting through my kitchen, making it hard to resist not taking a taste! (See the next page below to continue steps…)
Next, sprinkle the flour, cocoa powder, and salt into the wet ingredients. Mix everything together until just combined—be careful not to overmix; we want those lovely brownie bars to be chewy with a little fudginess. Now comes my favorite part: pouring half of the brownie batter into your prepared pan and smoothing it out. I usually use a rubber spatula for this, ensuring it’s even.
Now, it’s time to dollop the creamy peanut butter on top of that delicious brownie base. I like to warm my peanut butter slightly in the microwave (about 15 seconds) to make it easier to spread. After you’ve added the peanut butter, spoon the remaining brownie batter over the top, and with a knife, gently swirl it in. This creates those beautiful marbled patterns you’ll love to see once they’re baked. Bake for about 25-30 minutes, or until a toothpick comes out mostly clean—there’s nothing worse than overbaking brownies!
When it’s all done, let those gorgeous bars cool slightly in the pan before lifting them out (if you used parchment paper). I usually let them cool completely on a wire rack because there’s nothing like warm brownies. The smell alone is heavenly, and waiting is always the hardest part!
Pro Tips for Best Results
I’ve made these bars a few times, and I’ve learned that using room temperature eggs makes a huge difference in how well they mix into the batter. If your eggs are cold, they can cause the batter to seize up a bit. Also, I found that if you let the brownies cool completely, they slice much cleaner, making it easier to show off those beautiful layers. And if you’re like me and can’t resist test-baking, it’s totally fine to take a small slice while they’re still warm—you’re going to love it!
Another tip I always share is to measure your flour correctly. I use the spoon-and-level method, where I spoon the flour into the measuring cup and level it off with a knife. This ensures I don’t end up with dense brownies due to too much flour—nobody wants that! Finally, I sometimes throw in some chocolate chips for extra gooeyness, and I have to say, it takes these bars to a whole new level of deliciousness.
Common Mistakes to Avoid
One mistake I made early on was baking the brownies too long because I thought they wouldn’t be set in the middle. It’s crucial to remember that they continue to cook in the pan even after removing them from the oven. I’d recommend checking for doneness a minute or two before the recommended bake time. This helps retain that gooey texture that everyone loves! (See the next page below to continue…)
Another common pitfall is not greasing the pan or using parchment paper. I learned this the hard way when I had to wrestle a batch out of a pan that refused to give them up. Trust me; saving yourself some potential heartache is worth the small effort to line the pan.
Using cold ingredients instead of room temperature can also affect the batter’s consistency. That’s why I always take my butter and eggs out ahead of time, ensuring they mix smoothly without any lumps! Last but not least, don’t rush the cooling process. I know it’s tempting to dig in when the smell is that intoxicating, but allowing them to cool helps you achieve that perfect sweet treat texture.
Serving Suggestions
Once these Chocolate Peanut Butter Brownie Bars are cool, I love to cut them into squares or rectangles, depending on my mood and the occasion. They make a fantastic dessert for a casual gathering or a cozy movie night at home. If I’m feeling a bit fancy, I serve them warm with a scoop of vanilla ice cream on the side. The contrast of hot brownie and cold ice cream is a treat that never disappoints!
For a little extra flair, I sometimes drizzle melted chocolate on top or sprinkle some chopped nuts for added crunch. It’s amazing how a little presentation can elevate a simple dessert into something special for friends or family. I always enjoy bringing them out and seeing smiles light up the room!
Another serving option I love is enjoying these bars with a cup of coffee or tea. The chocolate and peanut butter flavors pair beautifully with a warm drink, making it the perfect afternoon pick-me-up. Honestly, it’s the simple pleasures like this that make my week feel a little more special.
Variations & Customizations
While I adore the classic recipe, there are so many ways to customize these brownie bars to suit your taste! For instance, I sometimes swap the creamy peanut butter for crunchy peanut butter for added texture. You could also experiment with different nut butters, like almond or cashew, depending on what you have on hand and enjoy.
Another fun variation I’ve tried is adding a layer of jam or jelly in place of some peanut butter, providing a delightful fruity twist. Raspberry or strawberry pairs wonderfully with the chocolate and creates a surprise flavor that guests love. Sometimes, I also fold in some chopped nuts or dried fruit for an unexpected crunch.
For those who like a bit of a kick, I’ve added a sprinkle of sea salt on top after baking. The sweet and salty combination creates a flavor explosion that makes these bars even more irresistible. It’s amazing how small changes can bring a whole new life to a beloved recipe!
How to Store, Freeze & Reheat
To store your delicious Chocolate Peanut Butter Brownie Bars, I usually place them in an airtight container at room temperature. They tend to stay fresh for about 3 to 5 days. However, I can assure you they won’t last that long in my house!
If you find yourself with a batch that you can’t finish in time, these bars freeze beautifully. Just cut them into squares, wrap each one individually in plastic wrap, and then place them in a freezer-safe container or bag. They can last up to three months in the freezer. Whenever I have a sweet craving, I simply take one out to thaw for a delightful little treat.
When it comes to reheating, a quick 10-15 seconds in the microwave does the trick! I find that this restores that lovely gooey texture. Just be sure to watch carefully so you don’t overdo it. There’s nothing quite like enjoying a warm brownie bar once again!
Conclusion
I hope you’re as excited to make these Chocolate Peanut Butter Brownie Bars as I am to share the recipe with you! They’re not only delicious but also a fantastic way to create warm, delicious memories in your kitchen. So grab your ingredients and let the aroma of chocolate and peanut butter fill your space. Happy baking!