
Using cold cream cheese is another issue. I once tried to rush the recipe and pulled the cream cheese straight from the refrigerator. It stayed lumpy no matter how long I mixed, leaving little bits throughout the dough. Softening the cream cheese slightly makes everything blend into that smooth, dough-like consistency you want. And while we’re on the topic, don’t use whipped cream cheese—the texture isn’t firm enough and leads to sticky dough.
Another mistake is skipping the chilling step. I know I already mentioned it, but it makes such a dramatic difference that it’s worth emphasizing again. Chilled dough dips beautifully; unchilled dough melts and warps. The final pitfall is overheating the chocolate. If it gets too hot, it thickens and becomes unusable for dipping. Stir after every short burst and pull it out as soon as it’s smooth.
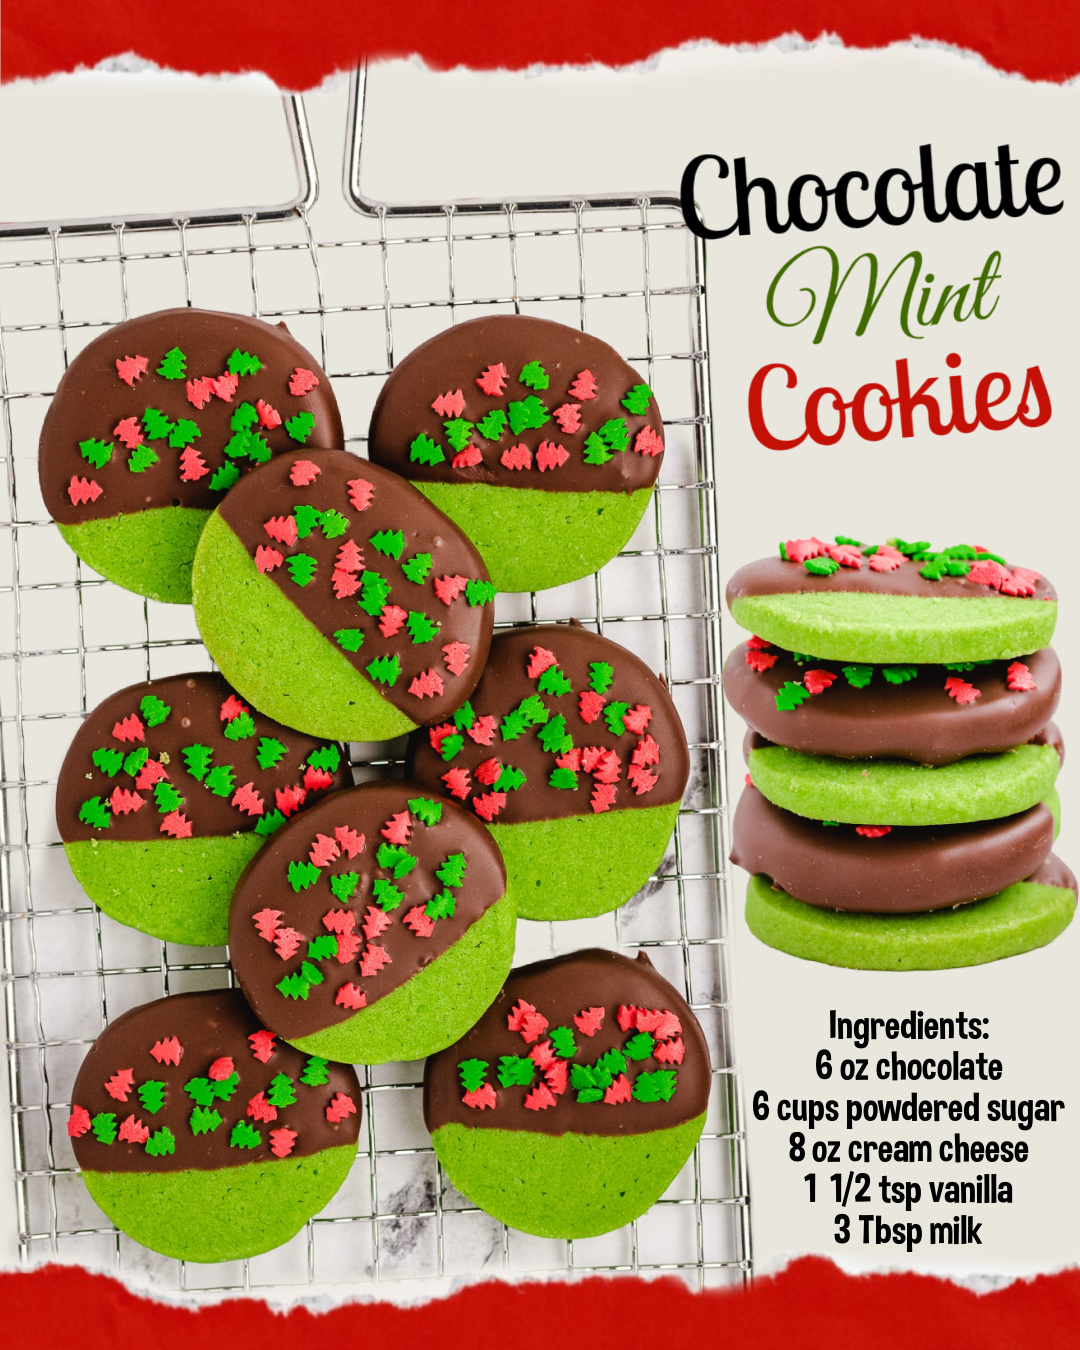
Serving Suggestions
I like serving these Chocolate Mint Cookies chilled slightly because the dough firms up into a soft, melt-in-your-mouth mint center while the chocolate stays crisp. When friends come over during the holidays, I’ll pile these cookies on a large platter surrounded by candy canes or crushed peppermint pieces. The presentation instantly makes everyone smile, and the bright green cookies look stunning on any holiday dessert table.
Another fun way I like to serve them is alongside hot cocoa. There’s something delightful about pairing a minty cookie with a warm, chocolatey drink—the contrast of temperature and flavor feels cozy and indulgent. When I serve these at parties, guests often ask for the recipe before they’ve even finished their first cookie. That’s always a sign of a winner.
If I want to dress up the cookies a bit more, I’ll drizzle leftover melted chocolate across the tops in thin zigzags once the base layer has set. It gives them a fancy finishing touch without extra effort. I’ve also served them wrapped in clear cellophane bags tied with ribbon as party favors, and they always make the sweetest little gifts.
When I’m enjoying them at home, I sometimes crumble one over a scoop of vanilla ice cream. The mint flavor mixed with cold ice cream and crisp chocolate creates a dessert that tastes like a gourmet sundae. It’s such a simple idea, but it transforms a cookie into a whole experience.
Variations & Customizations
One version I’ve made that people absolutely love is adding ¼ teaspoon peppermint extract to the dough. This boosts the mint flavor while still keeping it smooth and creamy. If you prefer a milder mint, you can leave the extract out entirely—the cookies will still have a lovely flavor from the vanilla and chocolate.
Another variation is changing the color. Although the classic green is festive and recognizable, you can tint the dough any color you like. I’ve made pastel pink ones for Valentine’s Day and light blue ones for winter parties. The food coloring is completely customizable, and the dough takes color beautifully.
If you want a richer chocolate flavor, you can dip the entire cookie instead of just half. I’ve done this when I’m craving something extra decadent, and the full chocolate coating gives the cookie a truffle-like texture. You can also sprinkle crushed peppermint candies on top instead of holiday sprinkles for more crunch.
For a fun twist, try using white chocolate instead of regular chocolate for dipping. The contrast between white chocolate and green dough looks elegant and wintry. You can even drizzle both types of chocolate for a marbled effect that looks bakery-quality with zero effort.
How to Store, Freeze & Reheat
Storing these cookies is incredibly simple. At room temperature, they last about four to five days in an airtight container. I place parchment paper between layers so the chocolate coating stays smooth and doesn’t stick. If your home runs warm, you can refrigerate them, and they’ll stay firmer while still tasting delicious.
Freezing works exceptionally well with this recipe. I freeze the shaped, undipped dough discs on a tray until firm, then store them in a freezer bag for up to three months. When I’m ready to make a batch, I thaw them in the refrigerator for about an hour, dip them in chocolate, and let them set as usual. They come out tasting as fresh as the day I made them.
You can also freeze the fully finished cookies, which is great if you like prepping holiday treats early. Place them in layers separated by parchment, seal tightly, and freeze for up to two months. When you want to enjoy one, just let it sit at room temperature for about 15 minutes—no reheating needed since these are no-bake cookies.
If the chocolate looks frosty after freezing, don’t panic—that’s normal. It’s just a bit of bloom and won’t affect the flavor. Letting them rest at room temperature for a while usually helps the chocolate regain some shine. I’ve learned that storing them in airtight containers with minimal temperature changes reduces chocolate bloom significantly.
Nutrition Information
These cookies are definitely a treat, but they’re made with simple, familiar ingredients that feel far more wholesome than store-bought options. The cream cheese adds a bit of richness and a small amount of protein, while the powdered sugar provides the sweetness that makes the dough so irresistible. Even though they’re indulgent, I believe in enjoying holiday cookies without stress—balance and enjoyment go hand in hand.
Compared to traditional baked cookies, these are actually denser and more filling due to the cream cheese base. I find that one or two cookies satisfy my sweet tooth perfectly, especially when paired with coffee or cocoa. The portion size feels just right—decadent but not overwhelming.
If you want to lighten them slightly, you can use reduced-fat cream cheese, though the texture becomes softer. I’ve tested it, and while the cookies still taste good, the full-fat version definitely holds its shape better. Another small nutritional adjustment is using dark chocolate for dipping, which adds antioxidants and reduces overall sugar content.
These cookies are also naturally egg-free, which is a wonderful bonus if you’re baking for someone with egg allergies. It’s nice having a cookie recipe that feels inclusive without needing any complicated substitutions. They’re rich, sweet, minty, and satisfying, and I truly believe every dessert menu needs something like this.
FAQ Section
1. Can I add peppermint extract to make them more minty?
Yes! I’ve done this many times. Add ¼ teaspoon peppermint extract to the dough when mixing the cream cheese and vanilla. Just be careful not to add too much—peppermint can become overpowering fast.
2. Can I make the dough ahead of time?
Absolutely. I often prepare the dough the night before, shape the cookies, and refrigerate them until I’m ready to dip. Overnight chilling actually improves the firmness and makes dipping even easier.
3. Why is my dough too sticky to shape?
This usually means the cream cheese was too soft or the powdered sugar wasn’t enough. Add an extra ½ cup powdered sugar gradually until the dough becomes firmer and easier to handle. A quick 10-minute chill helps too.
4. Can I use white chocolate for dipping?
Yes, and it looks beautiful! White chocolate pairs wonderfully with mint. I recommend adding a teaspoon of coconut oil to help it melt smoothly and avoid burning.
5. How do I keep the chocolate from cracking when I store the cookies?
Let the chocolate fully set at room temperature before moving the cookies. Storing them too soon—especially in the fridge—can cause cracks. I learned this after ruining a whole batch by chilling them too fast.
Conclusion
These Chocolate Mint Cookies have quickly become one of my favorite festive treats to make, not just because they’re delicious but because they bring such joy to anyone who tries them. Their bright color, smooth minty center, and perfect chocolate shell make them irresistible, and the recipe is simple enough to whip up even during the busiest holiday rush. I hope they fill your kitchen with the same happiness they bring to mine, and that you enjoy every sweet, refreshing bite.