
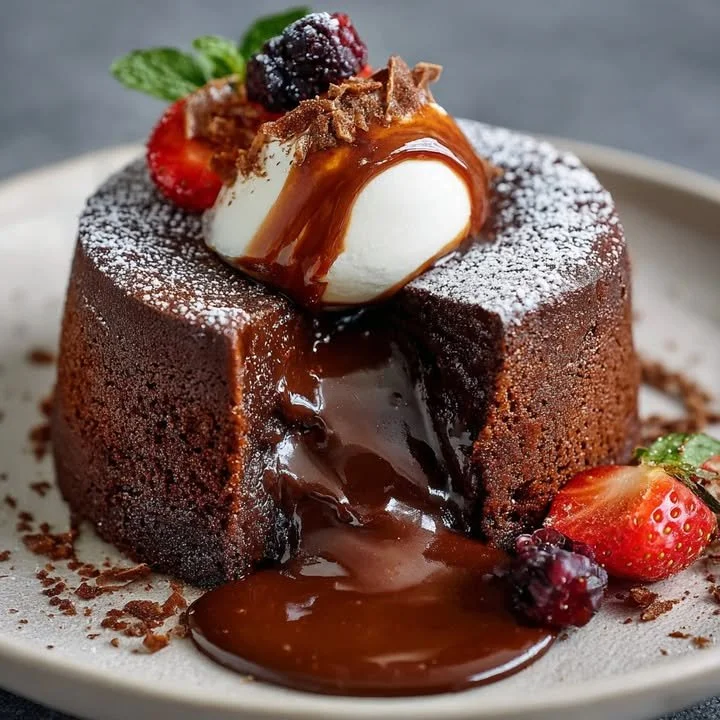
Ah, chocolate lava cakes! The moment you dig your spoon into that seemingly innocent cake and molten chocolate flows out is simply heavenly. I remember the first time I tried one in a quaint little restaurant, and I was instantly smitten. Since then, I’ve been on a quest to create that same rich, gooey experience in my very own kitchen. Today, I’m excited to share my treasured recipe with you; it’s a perfect dessert for any occasion or even a cozy night in.
Why You’ll Love This Recipe
I love this particular recipe because it strikes the right balance between rich chocolate flavor and that delightful molten center that just oozes goodness. The best part? The ingredients are simple and the process is straightforward, making it a fantastic treat whether you’re a seasoned baker or a kitchen novice. The joy of serving these little delights to friends and family is truly rewarding. Trust me, once you take that first bite, you’ll be hooked! (See the ingredients in the next page below…)
Ingredients
– 1/2 cup (115g) unsalted butter
– 1 cup (170g) semisweet chocolate chips or chopped chocolate
– 2 large eggs
– 2 large egg yolks
– 1/4 cup (50g) granulated sugar
– 2 tablespoons all-purpose flour
– 1 teaspoon vanilla extract
– A pinch of salt
– Optional: powdered sugar for dusting
Equipment Needed
– Ramekins (4 oz size)
– Baking sheet
– Microwave-safe bowl
– Whisk
– Mixing bowl
– Pastry brush (optional)
– Oven
Step-by-Step Instructions
To get started on these delectable chocolate lava cakes, the first thing I do is preheat my oven to 425°F (220°C). While the oven is warming up, I prepare my ramekins. I like to grease them with a little butter, and then dust them with flour, shaking off the excess. This step ensures that my cakes slide out perfectly when they’re done. Once the ramkins are ready, it’s time to melt the butter and chocolate together. I usually do this in a microwave-safe bowl in 30-second intervals, stirring in between until they’re smooth and glossy. (See the next page below to continue steps…)
After that, in a separate mixing bowl, I whisk together the eggs, egg yolks, and sugar until they’re light and fluffy. This usually takes about two minutes, and I love how the mixture transforms in color! Once that’s done, I gently fold in the melted chocolate mixture, making sure not to deflate those lovely air bubbles. Next, I add the flour, vanilla extract, and a pinch of salt, stirring just until everything is combined. Overmixing can lead to tougher cakes, so a gentle hand is key here.
Now comes the fun part! I ladle the batter into the prepared ramekins, filling them about 3/4 full to allow for that perfect rise. I then place the ramekins on a baking sheet and pop them into the oven. I usually set a timer for 12-14 minutes. When they’re done, the edges will be firm, but the center will still be soft and jiggly. This is my indicator that they are ready! Don’t forget to let them cool for about a minute before serving.
To serve, I like to run a small knife around the edges of each cake to help loosen them. Then, I carefully invert the ramekin onto a plate and let gravity do its thing. As I lift the ramekin, I always hold my breath in anticipation, and when the cake tumbles down, the molten chocolate center often flows out. It’s such a rewarding moment! I usually dust them with powdered sugar or serve them with a scoop of vanilla ice cream on top. They’re the perfect ending to any meal!
Pro Tips for Best Results
One tip I’ve gathered from my years of experimenting is to always use good-quality chocolate. It makes a world of difference in taste and texture! I once tried making these with less expensive chocolate chips, and while it worked, the flavor just wasn’t as rich.
Another little trick I learned is to underbake them slightly. I know it sounds risky, but trusting that gooey center is essential! If they seem a bit too jiggly when they come out, just let them sit for a minute. They’ll continue cooking slightly from residual heat. The joy of that melty chocolate center is worth it.
Lastly, if you’re baking for a special occasion, I’ve found that these little cakes can be made ahead of time. You can prepare the batter, pour it into the ramekins, cover them, and refrigerate. Just remember, if you’re baking them straight from the fridge, you’ll need to add a couple more minutes to the bake time for them to set just right.
Common Mistakes to Avoid
One common mistake I’ve made in the past is overbaking. It can be so tempting to leave them just a tad longer if you’re unsure, but even one or two minutes can turn that lovely molten center into a solid chocolate cake. I learned this the hard way and had to eat very delicious, but very dense, chocolate muffins instead! (See the next page below to continue…)
Another oversight is not properly greasing the ramekins. Trust me, I had a couple of cakes that decided to stay behind in the dish rather than elegantly fall onto my plate. It was a chocolate tragedy! So definitely take your time to ensure they are well-coated.
Don’t forget to pay attention to your oven temperature as well. Every oven can be a little different, and some may run hotter than others. For me, my oven is quite accurate, but I’ve found that if you’re using a convection oven, you may need to reduce the baking time slightly. Testing with a toothpick is a good idea to see how close you are to that perfect gooey center.
Lastly, if you’re prepping the batter in advance, make sure to cover the ramekins well. I once had a disaster with a film forming on the top of the batter after chilling overnight. It still worked out, but it took an extra minute to smooth the texture out before baking.
Serving Suggestions
I love serving my chocolate lava cakes warm, right out of the oven, but they are also divine with a scoop of vanilla ice cream on top. The combination of warm chocolate and cold ice cream creates a blissful contrast that’s hard to resist! You can even drizzle a bit of chocolate or caramel sauce over the top for an extra sweet touch.
If I’m feeling fancy, I might whip up some homemade whipped cream to serve alongside it. A little sprinkle of sea salt on top balances the sweetness beautifully and adds a sophisticated touch. It’s surprisingly delightful!
For special occasions, I also enjoy garnishing the dessert with fresh berries. Their tartness cuts through the richness of the chocolate, and they look absolutely stunning on the plate. It really makes my heart happy to see everyone enjoying the fruits of my labor.
Variations & Customizations
While I cherish the classic chocolate lava cake, I have experimented with different flavors as well! One of my favorites is adding a hint of espresso powder to the chocolate mixture before melting. It enhances the chocolate flavor and gives a lovely depth. Chocolate and coffee are a match made in dessert heaven!
Sometimes, I’ll swap out some of the semisweet chocolate for white chocolate to create a unique variation. It’s fun to bake these in heart-shaped ramekins for special occasions like Valentine’s Day or anniversaries. And who says you can’t mix in some orange zest or peppermint oil for a seasonal twist? It’s all about having fun in the kitchen!
Lastly, for my friends with dietary restrictions, I’ve tried making a gluten-free version by substituting almond flour for regular flour, and it turned out fabulous. So there are really endless possibilities to explore with these delightful little cakes!
How to Store, Freeze & Reheat
If you find yourself with leftover lava cakes (which is rarely the case in my house!), you can store them in an airtight container in the fridge for up to two days. Simply pop one in the microwave for about 15-20 seconds to warm it up again, and you’ll be transported back to that first fantastic bite.
For longer storage, you can freeze the batter before baking. Just portion it into the greased ramekins, cover tightly with plastic wrap or foil, and pop them in the freezer. When you’re ready to bake, you can either bake from frozen (just adding a couple of minutes to the cook time) or thaw them in the refrigerator overnight before baking.
For a baked lava cake, wrap the cooled cake tightly in plastic wrap and then in foil before freezing. When you want to enjoy it, thaw it overnight in the refrigerator and reheat it in the microwave or in a 350°F (175°C) oven until warmed through.
Conclusion
There’s something incredibly satisfying about baking and sharing chocolate lava cakes with friends and family. The smiles and the oohs and ahhs when that chocolate center flows out make all the effort worth it. I hope this recipe becomes a favorite in your kitchen as it has in mine. Happy baking, and may your kitchen always be filled with the sweet smell of chocolate!