
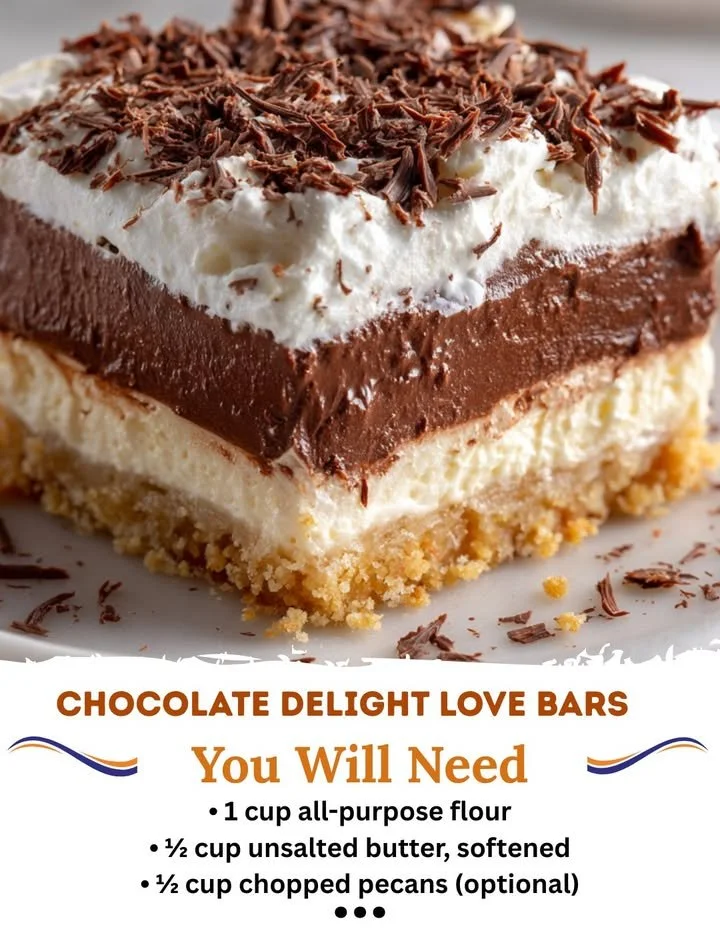
Chocolate Delight Love Bars. These gorgeous bars are not just a feast for the eyes; they are a celebration of rich chocolate flavors combined with a crunchy base and creamy layers that will give your taste buds a delightful dance. Whenever I whip these up, my kitchen fills with the intoxicating aroma of melted chocolate and buttery goodness. It’s no surprise that they quickly become a family favorite!
Why You’ll Love This Recipe
You’ll adore these bars not just for their luscious taste but also for how simple they are to prepare. They are perfect for any occasion, be it a cozy family gathering or a potluck with friends. The combination of textures from the creamy filling to the crisp topping makes every bite a joy. Trust me, even the pickiest of eaters won’t resist! I promise you, this recipe is a keeper! (See the ingredients in the next page below…)
Ingredients
– 1 cup graham cracker crumbs
– 1/2 cup unsweetened cocoa powder
– 1/2 cup granulated sugar
– 1/2 cup unsalted butter, melted
– 1 (8 oz) package cream cheese, softened
– 1 cup powdered sugar
– 1 cup whipped topping
– 1 cup semi-sweet chocolate chips
– 3 tablespoons milk
– 1 teaspoon vanilla extract
Equipment Needed
– Mixing bowls
– 9×13 inch baking pan
– Electric mixer
– Rubber spatula
– Measuring cups and spoons
– Saucepan
– Parchment paper (optional)
Step-by-Step Instructions
To start, I like to preheat my oven to 350°F (175°C) so that it’s nice and hot once we’re ready to bake. In my mixing bowl, I combine the graham cracker crumbs, cocoa powder, granulated sugar, and melted butter. I mix it all until everything is well blended; the mixture should resemble damp sand. Next, I press it firmly into the bottom of the greased baking pan to form an even layer. This provides a deliciously crunchy base that contrasts beautifully with the creamy layers on top. (See the next page below to continue steps…)
For the next layer, I grab my electric mixer and beat the softened cream cheese in a new mixing bowl until it’s nice and smooth. To this, I add the powdered sugar and one cup of whipped topping, carefully folding it together until it’s light and fluffy. This layer brings a lovely richness that is simply irresistible! Once it’s ready, I spread the cream cheese mixture evenly over the graham cracker base, making sure to smooth it out.
Now it’s time to make the chocolate topping! I place the semi-sweet chocolate chips and milk into a saucepan over low heat, stirring gently until everything is melted and combined into a silky chocolate mixture. The smell is heavenly—just the thought of it makes my mouth water! After removing it from the heat, I add in the vanilla extract, combining it until it’s fully incorporated. Then, I pour this luscious chocolate layer over the cream cheese layer, using a spatula to spread it evenly for that picture-perfect finish!
Once I’ve assembled the layers, I pop the baking pan into the preheated oven. I allow it to bake for about 25 to 30 minutes until the chocolate is set and a little firm. After baking, I let it cool completely, but I can hardly wait to slice it up and serve. These bars are great on their own, but they’re even better when enjoyed with a scoop of vanilla ice cream.
Pro Tips for Best Results
First, I found that using room temperature cream cheese really helps achieve a smooth texture in your cheese layer. I often leave it out for about an hour before I start baking. Trust me, it makes the mixing process so much easier!
Secondly, if you’re a fan of chocolate, consider adding a sprinkle of sea salt on top after pouring the chocolate layer. The contrast of salty and sweet is something I never knew I needed until I tried it! It elevates the flavors beautifully.
Lastly, I experimented with using different types of chocolate for the topping. Dark chocolate gives a richer flavor while milk chocolate adds a sweeter touch. You can even mix the two for a delightful combination that pleases everyone in the family.
Common Mistakes to Avoid
One mistake I often see is not letting the bars cool completely before slicing. I learned this the hard way when my first batch ended up as a gooey mess! Patience is key, and I recommend allowing at least a couple of hours for them to cool and set adequately. (See the next page below to continue…)
Another pitfall to watch out for is overbaking the chocolate layer. Keep an eye on it in the oven; it’s best to take it out when it’s just set. Overbaking can lead to dry bars, and nobody wants that!
Also, be cautious when pouring the chocolate layer over the cream cheese. Pouring it too quickly can disrupt the layer beneath. Take your time and gently spread it with a spatula to keep those layers distinct and beautiful. It’s all about patience and a gentle hand!
Finally, if you try to cut them too soon, they may crumble or stick to the knife. I recommend using a sharp knife and warming it slightly in hot water before slicing to avoid messiness.
Serving Suggestions
When it’s time to serve my Chocolate Delight Love Bars, I love to cut them into small squares, as a little piece goes a long way with these rich treats. A dusting of powdered sugar on top adds a lovely touch and makes them visually appealing too.
These bars are heavenly served with a dollop of whipped cream or a scoop of vanilla ice cream, which complements the chocolate perfectly. If I’m feeling a little extra, I might even drizzle some chocolate sauce over the top for that gourmet touch.
For gatherings, I like to present them on a decorative platter, sometimes garnished with fresh berries or mint leaves for a pop of color. It makes them look as good as they taste!
Variations & Customizations
One of the great things about these Love Bars is how easily you can customize them! If you’re feeling adventurous, you can swap out the graham cracker crumbs for crushed Oreos to give the base an entirely new twist. The chocolate flavor will be intensified, and who doesn’t love Oreos?
For a fruity touch, I’ve added some chopped strawberries or raspberries into the cream cheese layer. The tartness of the berries provides a wonderful contrast to the sweetness of the chocolate and cream layers. It’s a delightful surprise in every bite.
Finally, if you like a bit of crunch, consider tossing in some chopped nuts or even toasted coconut into the chocolate topping. It adds layers of flavor and texture that make the bars even more enjoyable!
How to Store, Freeze & Reheat
I usually store my Chocolate Delight Love Bars in an airtight container, where they can last in the fridge for about a week. The cold enhances the flavors, making them even more delectable with time, although they rarely last that long in my house!
If you want to freeze them, it’s super simple! Just cut them into squares, wrap each piece in plastic wrap, and place them in a freezer-safe bag. They’ll keep for up to three months. When you’re ready to enjoy them again, just let them thaw in the fridge overnight.
Reheating isn’t necessary, but if you prefer them warm, a few seconds in the microwave will do the trick. Just be careful not to overheat, or the chocolate may get too melty!
Conclusion
And there you have it! My Chocolate Delight Love Bars are truly a labor of love. They’re easy to make, delicious to eat, and sure to impress anyone who takes a bite. I hope you’ll give them a try and bring a little chocolate happiness to your kitchen. Enjoy making them, enjoying them, and sharing them with those you love! Happy baking!