
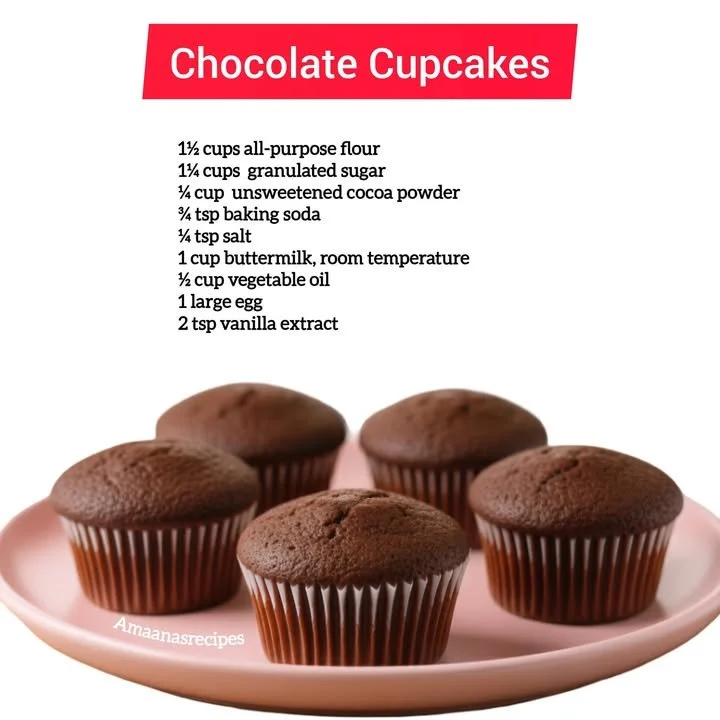
Welcome to my kitchen! Today, I’m excited to share one of my all-time favorite recipes: chocolate cupcakes. There’s something truly magical about the combination of rich cocoa, creamy frosting, and fluffy texture that makes these cupcakes a hit every time I bake them. Whether it’s for a birthday party, a special gathering, or just a cozy night in, these treats are bound to bring a smile to your face (and maybe a little chocolate on your fingers!).
Why You’ll Love This Recipe
What I adore about this chocolate cupcake recipe is how easy it is to whip up, even on the busiest days. The cupcakes turn out incredibly moist and rich, offering chocolate lovers a delightful experience in every bite. Plus, you can jazz them up with your favorite frosting and toppings! Spoiler alert: my go-to frosting is a smooth chocolate ganache that takes the cupcakes to the next level. Trust me, you won’t be able to resist having a second (or third!) cupcake. (See the ingredients in the next page below…)
Ingredients
– 1 ¾ cups all-purpose flour
– 1 ½ teaspoons baking powder
– 1 teaspoon baking soda
– ½ teaspoon salt
– ¾ cup unsweetened cocoa powder
– 1 cup granulated sugar
– ½ cup packed brown sugar
– 2 large eggs
– 1 cup buttermilk (or milk with a splash of vinegar)
– ½ cup vegetable oil
– 2 teaspoons vanilla extract
– 1 cup boiling water
Equipment Needed
– Mixing bowls
– Electric mixer or whisk
– Measuring cups and spoons
– Rubber spatula
– Cupcake liners
– Muffin tin
– Cooling rack
Step-by-Step Instructions
First, preheat your oven to 350°F (175°C) and line your muffin tin with cupcake liners. This little step makes clean-up a breeze and gives our cupcakes a lovely little home! In a large mixing bowl, whisk together the flour, baking powder, baking soda, salt, cocoa powder, and both sugars until everything is well combined. The smell of the cocoa is simply divine, just wait until you add the wet ingredients! (See the next page below to continue steps…)
Next, in a separate bowl, beat the eggs, buttermilk, vegetable oil, and vanilla extract together until frothy. Pour this mixture into the dry ingredients, and be careful not to overmix—just stir until you no longer see the flour. Now, here’s the fun part: slowly add in the boiling water. This may seem odd, but it’ll make our batter slightly runny, and that’s exactly what we want for moist cupcakes. Don’t worry; they’ll bake up beautifully!
Spoon the batter into the cupcake liners, filling each about one-third full. This allows room for them to rise without spilling over. Bake them in the preheated oven for about 18-20 minutes, or until a toothpick inserted in the center comes out clean. While they’re baking, my kitchen fills with the most mouthwatering chocolate aromas; it’s hard to resist a sneak-taste!
Once the cupcakes are done, allow them to cool in the tin for about 5 minutes before transferring them to a wire rack to cool completely. This step is important because letting them cool will ensure a good texture and make it easier to frost. I usually start dreaming about the frosting while I wait!
Pro Tips for Best Results
One of the most important things I learned is to use room temperature ingredients. When I first started baking, I didn’t realize how crucial this was. Taking the eggs and buttermilk out of the fridge ahead of time really helps everything blend together more smoothly for a better texture in your cupcakes.
Additionally, I suggest measuring your cocoa powder properly. It’s best to spoon the cocoa into the measuring cup and level it off with a knife, rather than scooping it directly from the container. I found that scooping can pack it in too tightly, making your cupcakes more bitter than sweet. No one wants that!
Lastly, resist the urge to overbake! I tested the timing multiple times and found that the sweet spot is around 18-20 minutes. Set your timer, and check them a minute or two early to avoid dry cupcakes. You want them moist and fudgy, not crumbly!
Common Mistakes to Avoid
One big mistake I see many people make is not properly measuring their flour. Too much flour can lead to dry, dense cupcakes instead of the fluffy treat we’re aiming for. I’ve been guilty of this in the past—trust me, use a kitchen scale or the spoon-and-level method for best results! (See the next page below to continue…)
Another pitfall is not letting the cupcakes cool enough before frosting. I remember trying to frost warm cupcakes and watching the frosting melt right off! It’s just heartbreaking! I know the temptation is real, but patience is key here—a bit of cooling time goes a long way in preserving the lovely frosting swirl.
Lastly, please don’t skip the boiling water step! Some might think it’s unnecessary, but I found that this step activates the cocoa powder, enhancing the chocolate flavor significantly. It also helps create a super moist batter that bakes up perfectly fluffy. You’ll thank me later!
Serving Suggestions
These chocolate cupcakes can shine on their own, but if you want to elevate them even further, think about serving them with a scoop of vanilla ice cream. The warm cupcake paired with cold ice cream is a match made in dessert heaven! Melted chocolate sauce drizzled over the top is also a perfect addition for chocolate lovers.
For special occasions, I like to add a sprinkle of colorful sprinkles on top of the frosting. They just make everything feel more festive and fun! And how about serving them with a cup of hot cocoa or coffee? The chocolatey goodness is delightful, especially on a chilly day!
Don’t forget to have fun with presentation! I often use pretty cupcake stands or arrange them on a colorful platter to make them extra inviting. It’s all about making that first bite even sweeter!
Variations & Customizations
One of the best parts about chocolate cupcakes is how versatile they are! For a fun twist, I often add chocolate chips to the batter. You’ll be surprised at how much the extra richness enhances the overall flavor! Chunks of bittersweet or even white chocolate can add a lovely surprise in every bite.
If you want to experiment a little further, try swapping out half of the cocoa powder for espresso powder. This will deepen the chocolate flavor without making your cupcakes taste like coffee—perfect for flavor experimentation!
For those who enjoy something fruity, try adding a filling to your cupcakes. Piping in some raspberry jam or whipped cream filling after they cool brings a delicious burst of flavor that complements the chocolate beautifully. Just slice off the top of the cupcake, fill, and replace the top—it’s a simple way to add a unique touch!
How to Store, Freeze & Reheat
If there are any leftovers (which is rare in my house!), I recommend storing your cupcakes in an airtight container at room temperature for up to 3 days. They’re best enjoyed fresh, but if you need them to last longer, storing them this way keeps them nice and soft.
To freeze cupcakes, let them cool completely after baking, then place them in a single layer in an airtight container, separated by parchment paper. They can last for up to 3 months in the freezer. When you’re ready to enjoy them again, simply thaw at room temperature for a few hours or pop them in the microwave for about 15-20 seconds for a quick reheat.
If you plan on frosting later, it’s best to freeze them without frosting. Once thawed, pipe on that delicious chocolate ganache (or your favorite frosting), and they’ll taste just like the fresh batch you just made!
Conclusion
I truly hope you enjoy these chocolate cupcakes as much as I do! They are perfect for any occasion, easy to make, and always impressive. Baking these cupcakes fills my kitchen with warmth and sweet aromas, igniting that cozy feeling we all cherish. So grab your mixing bowls, and let’s dive into some delicious chocolatey bliss together! Happy baking!