
The first time I made Chocolate Crinkle Cookies, my entire kitchen transformed into what I can only describe as a cozy little chocolate haven. As the dough chilled and the rich cocoa aroma lingered in the air, I kept sneaking back to the fridge just to smell that deep, fudge-like scent. When they baked, the cookies puffed up, cracked dramatically, and revealed that striking contrast between the dark chocolate centers and snowy powdered-sugar coating.
I remember pulling the first batch from the oven and thinking, “This… this is what holiday baking should feel like.” Every time I make them now, I get that same warm, joyful rush—almost like opening a present you already know you’re going to love.
Why You’ll Love This Recipe
You’ll love this recipe because it gives you all the richness of a gooey brownie wrapped in the festive appearance of a classic holiday cookie—warm, chocolatey, nostalgic, and guaranteed to impress with almost no complicated steps, and I say that after making countless batches through trial, error, and delicious success.
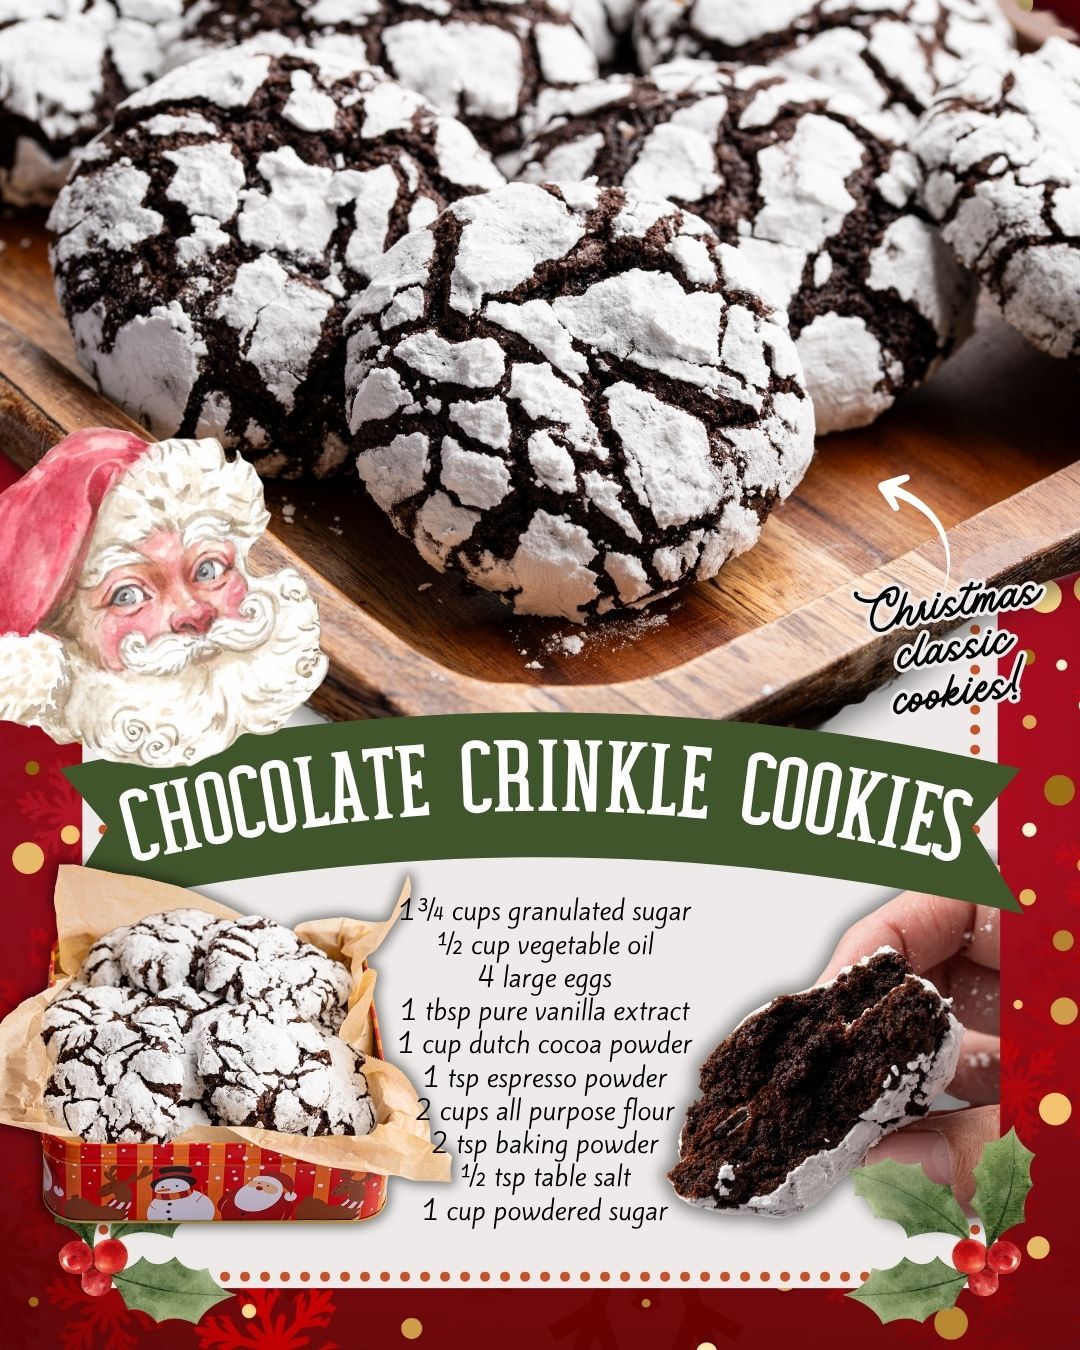
Ingredients
- 1 cup unsweetened cocoa powder
- 1 ½ cups granulated sugar
- ½ cup vegetable oil
- 4 large eggs
- 2 teaspoons vanilla extract
- 2 cups all-purpose flour
- 2 teaspoons baking powder
- ½ teaspoon salt
- 1 cup powdered sugar (for rolling)
When it comes to ingredients, I’ve learned a few things that really matter. First, use a good-quality cocoa powder—trust me, you’ll taste the difference. I once used an off-brand cocoa just to test it, and while the cookies were fine, they didn’t have that deep chocolate punch that makes these cookies unforgettable. Vegetable oil keeps them fudgy and moist, so don’t replace it with melted butter; I’ve tried that too, and the texture just isn’t the same. And when rolling the dough, powdered sugar is essential—don’t skip it or substitute granulated sugar, because you’ll lose that signature snowy effect.
Equipment Needed
- Mixing bowls
- Hand mixer or stand mixer
- Spatula
- Measuring cups
- Measuring spoons
- Baking sheets
- Parchment paper
- Cooling rack
- Plastic wrap
Every tool has its purpose here, and using them properly really does make a difference. A mixer helps fully combine the cocoa powder and oil, which can be stubborn at first. Parchment paper keeps the cookies from sticking and prevents burnt bottoms—I learned that the hard way when I once baked them directly on a pan and had to scrape the bottoms off. Plastic wrap is crucial because the dough needs to chill, and trust me, skipping the chilling step is the number-one way to ruin these cookies. And finally, cooling racks let the cookies set properly without getting soggy underneath.
Step-by-Step Instructions
Whenever I start this recipe, I begin by mixing the cocoa powder, granulated sugar, and vegetable oil in a large bowl. This step always feels like the start of something rich and indulgent because the mixture becomes thick and shiny, almost like brownie batter.
I mix until it’s fully blended before adding the eggs one by one. Don’t rush this part—each egg should be fully incorporated before adding the next. Then I add the vanilla, and immediately the mixture smells like chocolate heaven with a hint of sweetness.
In a separate bowl, I whisk together the flour, baking powder, and salt. Early on, I made the mistake of skipping this step and dumping everything straight into the wet mixture. Big mistake. I ended up with tiny pockets of baking powder in a few cookies—nothing dangerous, but definitely unpleasant.
Once the dry ingredients are mixed, I slowly fold them into the chocolate mixture. As the dough thickens, it becomes incredibly sticky—don’t panic, that’s exactly how it should be.
Now comes the most crucial step: chilling the dough. I cover the bowl tightly with plastic wrap and refrigerate it for at least 4 hours, but overnight is even better. The first time I ever made these cookies, I was impatient and baked them after only 30 minutes of chilling… and they spread into sad, thin chocolate puddles. Chilling the dough firms it up, intensifies the chocolate flavor, and ensures you get those beautiful crinkles after baking.
Once the dough is fully chilled, I preheat the oven to 350°F (175°C) and line my baking sheets with parchment paper. I scoop tablespoon-sized portions of dough and roll them quickly between my hands—working fast helps because the dough softens almost immediately with the warmth of your palms. Then I roll each ball generously in powdered sugar.
Don’t be shy; the thicker the coating, the more striking the crinkles look. As the cookies bake for about 10–12 minutes, they puff up and crack dramatically. The moment they emerge from the oven, they look like little chocolate snow-capped mountains.
Pro Tips for Best Results
One of the most game-changing tips I can offer is this: chill the dough long enough. I tested this recipe three different ways—30 minutes, 2 hours, and overnight—and the overnight batch had the deepest color, richest flavor, and best crinkles. So when in doubt, chill longer, not shorter.
Another trick I learned the hard way is to roll the dough balls in powdered sugar twice. Yes—twice. Roll them once, set them aside, and then give them a second coat right before baking. The double layer ensures the sugar doesn’t melt into the cookie and disappear. Once I started doing this, the crinkles became beautifully dramatic, with bright white patches against the dark chocolate.
If you want extra fudgy cookies, underbake them slightly. I pull them from the oven when the edges are just set but the centers still look soft. They firm up on the cooling rack, and trust me, that soft, brownie-like center is what makes people fall in love with these cookies.
Finally, measure your flour carefully. Too much flour and the cookies lose their fudgy texture and become cakey. I always use the spoon-and-level method rather than scooping directly from the bag, and it makes a noticeable difference in texture. Cookies that are too dry simply don’t develop the same beautiful cracks.
Common Mistakes to Avoid
I’ll be honest—it took me a few tries to truly master Chocolate Crinkle Cookies, and the first mistake I ever made was not chilling the dough enough. I know I already mentioned it, but I cannot stress it enough: warm dough will spread, and you’ll end up with flat, lifeless cookies with barely any crinkle pattern.
Another common mistake is rolling the dough balls too small. I tested smaller balls once, thinking I’d get dainty little cookies, but they didn’t crack properly because they didn’t have enough mass to create those dramatic fissures. Larger tablespoon-sized balls work beautifully, and anything smaller just doesn’t produce the same texture.
I also made the mistake of using natural cocoa powder once when the recipe needed Dutch-process cocoa. The flavor was noticeably different—less rich, more acidic, and not nearly as chocolate-forward. Now I always check the cocoa label before baking and stick with a consistent brand so I know exactly what I’m getting.
Finally, watch out for overbaking. Chocolate crinkles go from soft and fudgy to dry and crumbly very quickly. I once left a batch in for “just one more minute,” and that minute cost me the tender centers that make these cookies so special. When in doubt, take them out early.
Serving Suggestions
I personally love serving Chocolate Crinkle Cookies warm with a big mug of coffee or hot chocolate. There’s something about the warmth of the drink and the fudgy center of the cookie that makes it feel like the ultimate cozy treat, especially on cold winter evenings. If you’re a coffee lover, dipping one of these cookies into a cappuccino is pure bliss.
Another way I like serving them—especially around the holidays—is on a cookie platter with peppermint bark, sugar cookies, and gingerbread. The dark, dramatic look of the crinkles gives the whole spread more visual variety, and guests always reach for them first because they look so striking.
When I want to elevate the cookies a bit, I sandwich two of them together with vanilla ice cream in the middle. I can’t even tell you how good this is. The contrast between the soft cookie and cold creamy ice cream is irresistible, and it makes a simple cookie feel like a gourmet dessert.
And if you ever want to create a warm, nostalgic dessert for guests, place a warm Chocolate Crinkle Cookie on a plate with a scoop of vanilla ice cream on top, drizzle it with hot fudge, and add a pinch of flaky sea salt. It tastes like something you’d get at a fancy restaurant, but it’s incredibly easy.
Variations & Customizations
One variation I absolutely love is adding a teaspoon of espresso powder to the dough. This doesn’t make the cookies taste like coffee—it simply deepens and enriches the chocolate flavor. When I started doing this, my cookies became noticeably more decadent and complex.
If you love peppermint, try replacing the vanilla extract with peppermint extract or adding crushed peppermint candies to the dough. I made this version for a holiday party once, and people raved about them. The peppermint adds a cool, festive twist without overpowering the chocolate.
For a more indulgent version, you can fold mini chocolate chips into the dough. The result is even fudgier cookies with pockets of melted chocolate in the center. I’ve done this for chocolate lovers in my family, and they claim it’s the best version I’ve ever made.
You can also experiment with flavored powdered sugar coatings—cinnamon sugar, cocoa sugar, or even a blend of powdered sugar and freeze-dried strawberry powder. The strawberry version turns the cookies slightly pink outside and gives them a fruity twist that’s surprisingly delicious.
How to Store, Freeze & Reheat
Chocolate Crinkle Cookies store beautifully, and I always keep mine in an airtight container at room temperature for up to five days. The powdered sugar might melt slightly over time, but the cookies themselves stay soft and chewy. Sometimes I add a piece of bread to the container to keep them extra soft—it works like magic.
If you want to freeze them, you can freeze either the baked cookies or the dough balls. I personally prefer freezing the dough because it lets me bake fresh cookies whenever I want. Just scoop the dough into balls, roll them in powdered sugar, and freeze them on a tray before transferring to a bag. When ready to bake, roll them in powdered sugar again and bake straight from the freezer, adding an extra minute or two.
Baked cookies also freeze well. I layer them in a container with parchment paper between each layer so they don’t stick. When I want one, I let it thaw on the counter for 10 minutes or warm it in the microwave for about 8 seconds. Warming them brings the fudgy center right back to life.
If your cookies ever dry out—which rarely happens—microwaving them for just a few seconds softens them beautifully. Or you can crumble them over ice cream for a quick treat. There’s truly no wrong way to enjoy a Chocolate Crinkle Cookie.
Nutrition Information
Chocolate Crinkle Cookies are definitely an indulgence, but they’re one of those treats that feel worth every bite. Each cookie contains cocoa powder, sugar, oil, and eggs—classic baking ingredients that contribute to that dense, brownie-like texture. When I want to enjoy dessert without going overboard, I simply make the cookies a bit smaller or stick to just one with a cup of coffee.
The oil in the recipe contributes to the moist, fudgy texture and also provides fat that helps carry the chocolate flavor. While butter adds flavor to many cookies, using oil here is what gives these cookies their signature soft chew. I’ve tried replacing the vegetable oil with coconut oil before, but the flavor was too strong and overshadowed the chocolate.
Because the cookies are rolled in powdered sugar, they do have a higher sugar content—but that coating also gives them their stunning crinkle effect. If you want to lighten them slightly, you can reduce the granulated sugar by ¼ cup without impacting the texture much, although the flavor will be slightly less sweet.
Overall, these cookies are a classic dessert meant to be enjoyed in moderation and with joy. No guilt—just pure chocolate happiness in every bite.
FAQ Section
1. Why didn’t my cookies crack on top?
This usually means the dough wasn’t chilled long enough. I’ve made this mistake before, and warm dough simply doesn’t crack dramatically. Chill it at least 4 hours or overnight for best results.
2. Can I use Dutch-process cocoa powder?
Yes! I’ve used both natural and Dutch-process cocoa, and Dutch-process always gives a deeper, richer flavor and an even darker cookie.
3. My cookies melted flat—what happened?
This typically means the dough was too warm or the oil-to-flour ratio was off. Make sure to chill thoroughly and measure the flour using the spoon-and-level method.
4. Can I make the dough ahead of time?
Absolutely—I often prepare the dough a day before baking. The flavor gets deeper overnight, and the chilled dough is easier to handle.
5. Can I reduce the sugar?
You can reduce the granulated sugar by about ¼ cup, but don’t reduce the powdered sugar used for rolling. That powdered coating is essential for the crinkles.
Conclusion
Chocolate Crinkle Cookies have become one of my favorite treats to bake because they’re rich, beautiful, nostalgic, and surprisingly simple—and every time I pull a batch from the oven and see those dramatic cracks, I’m reminded why I love baking so much. I hope they bring just as much joy, coziness, and chocolatey comfort to your kitchen as they always bring to mine.