
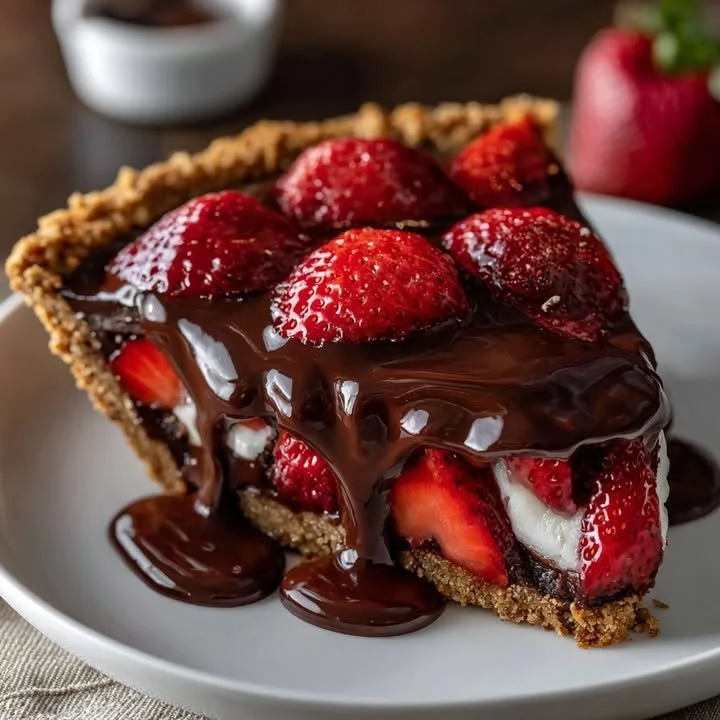
I recently found myself in the mood for a special treat, something that combined the sweetness of strawberries with the richness of chocolate. After rummaging through my kitchen, I decided to whip up a Chocolate Covered Strawberry Pie. It’s a delightful dessert that captures the essence of sunny picnics and romantic dinners. As I was mixing the ingredients and the hungry aroma filled my kitchen, I could hardly wait to slice into this beauty!
Why You’ll Love This Recipe
This recipe is a delightful fusion of flavors and textures. The creamy filling pairs beautifully with the sweet, juicy strawberries and the indulgent chocolate topping. It’s not just visually appealing with its vibrant colors but also satisfying to eat. Plus, it’s easy to make, which is a huge win in my kitchen! Whether you’re hosting a gathering, celebrating a special occasion, or just craving something sweet, this pie is sure to impress. (See the ingredients in the next page below…)
Ingredients
– 1 pre-made graham cracker crust
– 2 cups fresh strawberries, hulled and halved
– 8 oz cream cheese, softened
– 1 cup powdered sugar
– 1 tsp vanilla extract
– 1 cup heavy whipping cream
– 1 cup semi-sweet chocolate chips
– 2 tbsp coconut oil (optional, for drizzling)
– Extra strawberries for garnish (optional)
Equipment Needed
– Mixing bowls
– Electric mixer or whisk
– Spatula
– Double boiler or microwave-safe bowl
– Pie dish
– Measuring cups and spoons
– Parchment paper (optional, for easy cleanup)
Step-by-Step Instructions
To get started, I preheated my oven to 350°F (if you’re using a homemade graham cracker crust). I took my pre-made crust and placed it in a pie dish. Next, I whisked together the softened cream cheese, powdered sugar, and vanilla extract until smooth and creamy. The moment I added the vanilla, my kitchen filled with that warm, inviting scent that I adore! After that, I took my heavy cream and whipped it until soft peaks formed, then gently folded it into the cream cheese mixture for extra fluffiness. Everything came together beautifully. (See the next page below to continue steps…)
Now came the fun part! I arranged those halved strawberries in the bottom of the pie crust, with the cut sides facing down, ensuring they were beautifully spaced out. Then, I poured the creamy filling over the strawberries, spreading it evenly with a spatula. It looked so scrumptious, I could hardly wait to dig in! Before the pie could set, I put it in the fridge to chill for about 4 hours, allowing all the flavors to meld together and the filling to firm up.
Once the chilling time had passed, I melted my semi-sweet chocolate chips using a double boiler (you can also microwave them in short bursts) and added the coconut oil for a glossy finish. After cooling slightly, I drizzled the melted chocolate over the pie in a zigzag pattern. The chocolate trickled down the sides, making it look almost too pretty to eat.
I garnished it with a few intact strawberries on top and placed it back in the fridge to set. When it was finally time to cut into the pie, I took a deep breath as I gently slid my knife through the creamy layers. The smell was divine, and the first bite was pure bliss! The flavors exploded in my mouth—the sweetness of strawberries coupled with the richness of chocolate was irresistible.
Pro Tips for Best Results
I tested this chocolate-covered strawberry pie three ways—first with a homemade crust, then a store-bought graham cracker crust, and finally a cookie crumb crust! Honestly, they all turned out delicious, but I discovered that the pre-made crust saved so much time without sacrificing flavor. If you find yourself in a rush, that’s the way to go!
Also, when whipping your heavy cream, make sure your mixing bowl is cold for best results. This little tip makes it whip up faster and hold its shape better. Trust me, it’s a game-changer!
Lastly, I recommend letting your pie chill overnight if you can. The flavors deepen and the texture becomes even creamier, making it absolutely decadent. Every time I took it out after an overnight chill, I could hardly wait to share it with family and friends!
Common Mistakes to Avoid
One mistake I made the first time I tried this recipe was not hulling the strawberries properly. I left the green tops on, thinking it wouldn’t affect the overall taste, but they can actually make it hard to enjoy the pie fully. Hulling them is a simple step that really enhances the flavor. (See the next page below to continue…)
Another common pitfall is overwhipping the cream. I’ve done this before, trying to get it to stiff peaks too quickly, and instead ended up with a grainy texture. Once you start to see soft peaks forming, take it slow! The cream should still be soft and airy.
Lastly, be sure to let the chocolate drizzle slightly cool before applying it to your chilled pie. If you pour the hot chocolate on too soon, it can start to melt the filling or cause it to lose its structure. Patience is key here; trust me, it’s worth the wait!
Serving Suggestions
This Chocolate Covered Strawberry Pie is perfect for any occasion. I love serving it at birthday parties or family gatherings—it’s always a hit! For a lovely presentation, I recommend slicing it into wedges and serving each piece with a dollop of whipped cream and a sprinkle of chocolate shavings. It elevates the dish and makes it feel extra special!
During the summertime, pairing a slice of pie with a glass of iced tea is a delightful experience. The freshness of the strawberries complements the refreshing tea perfectly, which makes for a lovely afternoon treat or picnic dessert.
If you’re feeling adventurous, you can also serve it alongside a scoop of vanilla ice cream. The contrast in temperatures as you dive into a warm pie with cold ice cream is heavenly and leaves the taste buds dancing!
Variations & Customizations
One fun variation I tried was adding a splash of orange zest to the cream cheese mixture. It infuses a citrusy brightness that offsets the sweetness beautifully, enhancing the overall experience. If you love orange and chocolate pairings, I highly recommend giving it a go!
You could also switch up the chocolates—milk chocolate, dark chocolate, or even white chocolate can provide unique flavor profiles. My son loves milk chocolate, and when I made this pie with it, he couldn’t get enough!
Another customization I experimented with was adding a layer of crushed cookies between the strawberries and the cream filling. It gave the pie an unexpected crunch and extra depth of flavor. You could use Oreos, shortbread, or even graham crackers for that extra fun texture!
How to Store, Freeze & Reheat
To store leftover pie, simply cover it with plastic wrap or aluminum foil and pop it into the fridge. It’ll keep well for about 3-4 days, although I must admit it rarely lasts that long in my house!
If you want to freeze it for later, I recommend slicing the pie first, wrapping each slice in plastic wrap, and then placing them in an airtight container or freezer bag. This way, you can easily pull out a slice whenever the chocolate craving hits! It can be frozen for up to three months.
To enjoy, simply take a slice out of the freezer and let it thaw in the fridge for a few hours, or at room temperature for about 30 minutes. There’s something so comforting about knowing I have a slice of this pie ready and waiting during a busy week!
Conclusion
Making Chocolate Covered Strawberry Pie in my kitchen has been an exciting and scrumptious adventure! Each slice is like a little piece of joy, full of sweet memories composed of simple, fresh ingredients. Whether you’re enjoying it for a special occasion or as a mid-week treat, I hope you give this recipe a try and find as much happiness in it as I have. Happy baking!