
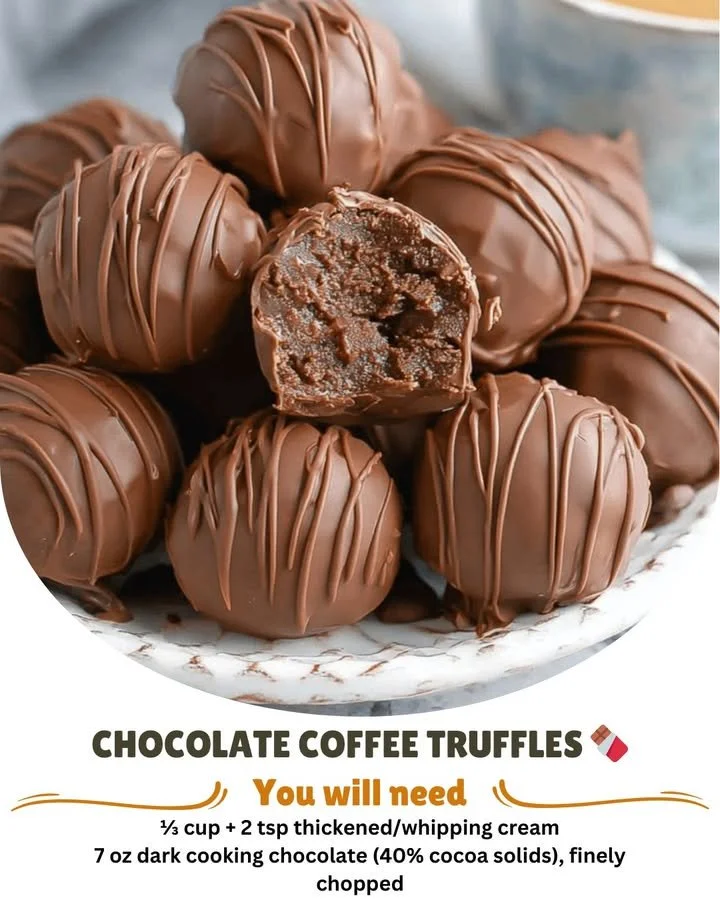
Welcome to my kitchen, where my love for baking and experimenting with flavors leads to some delightful treats! Today, I’m excited to share the recipe for Chocolate Coffee Truffles—a perfect blend of rich chocolate and bold coffee flavors. These little gems are not just a treat for your taste buds but also make for beautiful gifts, or simply a sweet indulgence to savor at home. So, roll up your sleeves, and let’s get started on these decadent delights!
Why You’ll Love This Recipe
I can’t tell you how many times I’ve whipped up a batch of these Chocolate Coffee Truffles—each bite is like a hug in chocolate form! The combination of smooth chocolate and a strong coffee kick makes for an irresistibly rich and satisfying treat. Plus, they are incredibly easy to make and require minimal ingredients, so you’ll find yourself making them time and time again for yourself or loved ones. (See the ingredients in the next page below…)
Ingredients
– 8 oz semisweet chocolate, chopped
– 1/2 cup heavy cream
– 1 tablespoon ground coffee (or espresso)
– 1 teaspoon vanilla extract
– Cocoa powder (for dusting)
– Optional: chopped nuts or shredded coconut (for coating)
Equipment Needed
– Saucepan
– Heatproof bowl or double boiler
– Whisk or spatula
– Baking sheet
– Parchment paper
– Melon baller or small scooper
– Mixing bowls
Step-by-Step Instructions
Making Chocolate Coffee Truffles is a delightful experience! First, I begin by heating the heavy cream in a small saucepan over medium heat. I keep a close eye on it, stirring gently until it comes to a gentle simmer—this usually takes just a few minutes. Then, I remove it from the heat and pour it over the chopped semisweet chocolate in a heatproof bowl. Watching the chocolate melt is one of my favorite parts! I let it sit for a minute before stirring until it forms a silky, glossy ganache. The aroma of rich chocolate mixed with a hint of coffee begins to waft through my kitchen. (See the next page below to continue steps…)
Next, I add in the ground coffee and vanilla extract. This is when it transforms from a basic chocolate ganache into something truly special. I mix everything together until it’s fully combined and smooth. Once that is done, I cover the bowl with plastic wrap and pop it into the refrigerator for a couple of hours. Waiting can be tough, but it’s essential for the truffle mixture to firm up—it’s totally worth it!
When I’m ready to shape the truffles, I pull the mixture out of the fridge. With a melon baller or small scooper, I scoop out small amounts of the ganache and roll them between my palms to form bite-sized balls. This part is so fun and a little messy, but I love that! I usually prepare a baking sheet lined with parchment paper to set the truffles on as I shape them.
Finally, I roll each truffle in cocoa powder, which adds a delicious bitterness that perfectly complements the sweetness. Sometimes, I get adventurous and coat them in chopped nuts or shredded coconut for added texture and flavor. Once that’s done, I let them chill in the fridge for an additional 30 minutes before serving. The anticipation makes the first bite even more special!
Pro Tips for Best Results
To really perfect your truffles, I learned that using high-quality chocolate makes all the difference. I once tried using chocolate chips, and I just wasn’t as impressed with the flavor or texture. Using a chocolate bar that you truly enjoy will elevate your truffles.
Also, I experimented with various kinds of coffee, and I found that using finely ground espresso gives the most robust coffee flavor without any granular texture. Another fun tip—I like to add a pinch of sea salt to the ganache for those who enjoy that sweet and salty combination. It truly enhances the overall flavor.
Lastly, play around with the coatings! I tested these truffles rolled in cocoa, powdered sugar, and even crushed graham crackers. Each variation turned out uniquely delicious! Don’t be afraid to have fun with this step.
Common Mistakes to Avoid
One big mistake I’ve made in the past was overheating the heavy cream. If you let it boil hard, you’ll risk burning the cream, which affects the flavor and can lead to a separated ganache. So, keep the heat gentle and watch it closely! (See the next page below to continue…)
Another thing to keep in mind is not letting your truffle mixture chill long enough. If it’s too soft when you scoop, it’ll be a messy situation—and trust me, I’ve had my share of truffle mishaps. Give it a couple of hours in the fridge to firm up nicely before shaping.
Also, be careful not to overmix your ganache once you’ve added coffee and vanilla. Overmixing can make the texture grainy. A gentle stir is all you need to incorporate those flavors.
Lastly, don’t rush the chilling process after shaping. If you skip this step and dive right into tasting, you might find your truffles miss that delightful, ganache texture you’re looking for!
Serving Suggestions
When it comes to serving, I love presenting these truffles in a cute little box or a decorative jar. It makes them feel extra special, especially if I’m gifting them to friends or family. I often add a few sprigs of mint for a pop of color and a fragrant touch—plus, they look so pretty!
Pairing these truffles with a cup of freshly brewed coffee or espresso is another highlight. The combination of chocolate and coffee brings out the best flavors in both. I especially love serving them at cozy gatherings or movie nights; they’re a hit every time!
You can even serve them alongside a platter of fruits, like strawberries or raspberries. The tartness from the berries complements the sweetness of the truffles beautifully, creating a delightful contrast that my guests always rave about.
Variations & Customizations
For those who love to experiment, why not try different types of chocolate? Dark chocolate gives a more intense flavor, while milk chocolate adds sweetness. I’ve even tried using white chocolate in the past, adding a hint of almond or hazelnut extract for a unique twist.
If you’re looking for more flavor profiles, consider infusing the cream with different spices such as cinnamon or cardamom. I was pleasantly surprised at how a little cinnamon added warmth and depth to the truffles. Depending on the season, you could have a whole range of flavors to enjoy!
Another option for customization is to roll your truffles in a mixture of spices or flavored coatings! I’ve rolled some in crushed espresso beans, matcha powder, and even spicy cayenne pepper for a bold kick. The possibilities are endless, and I find that there’s always something new to try!
How to Store, Freeze & Reheat
These Chocolate Coffee Truffles can be stored in an airtight container in the refrigerator for up to two weeks. I love making a big batch ahead of time and enjoying them little by little. Just be sure to separate layers with parchment paper to prevent them from sticking together.
If you want to make truffles in advance for special occasions, you can easily freeze them! Just let them chill completely after rolling, then place them in a single layer on a baking sheet in the freezer. Once they’re firm, transfer them to an airtight container or zip-top freezer bag. They can be kept frozen for up to three months.
When you’re ready to enjoy, just pop them in the fridge to thaw overnight. There’s no need to reheat these gems; they’re delightful cold, and the flavors tend to meld beautifully over time.
Conclusion
I hope you’re as excited as I am about making these Chocolate Coffee Truffles! They’re sure to become a favorite treat in your kitchen, whether for special occasions or a simple sweet craving. Enjoy the process, embrace your creativity, and savor every rich, chocolaty bite. Happy truffle-making!