
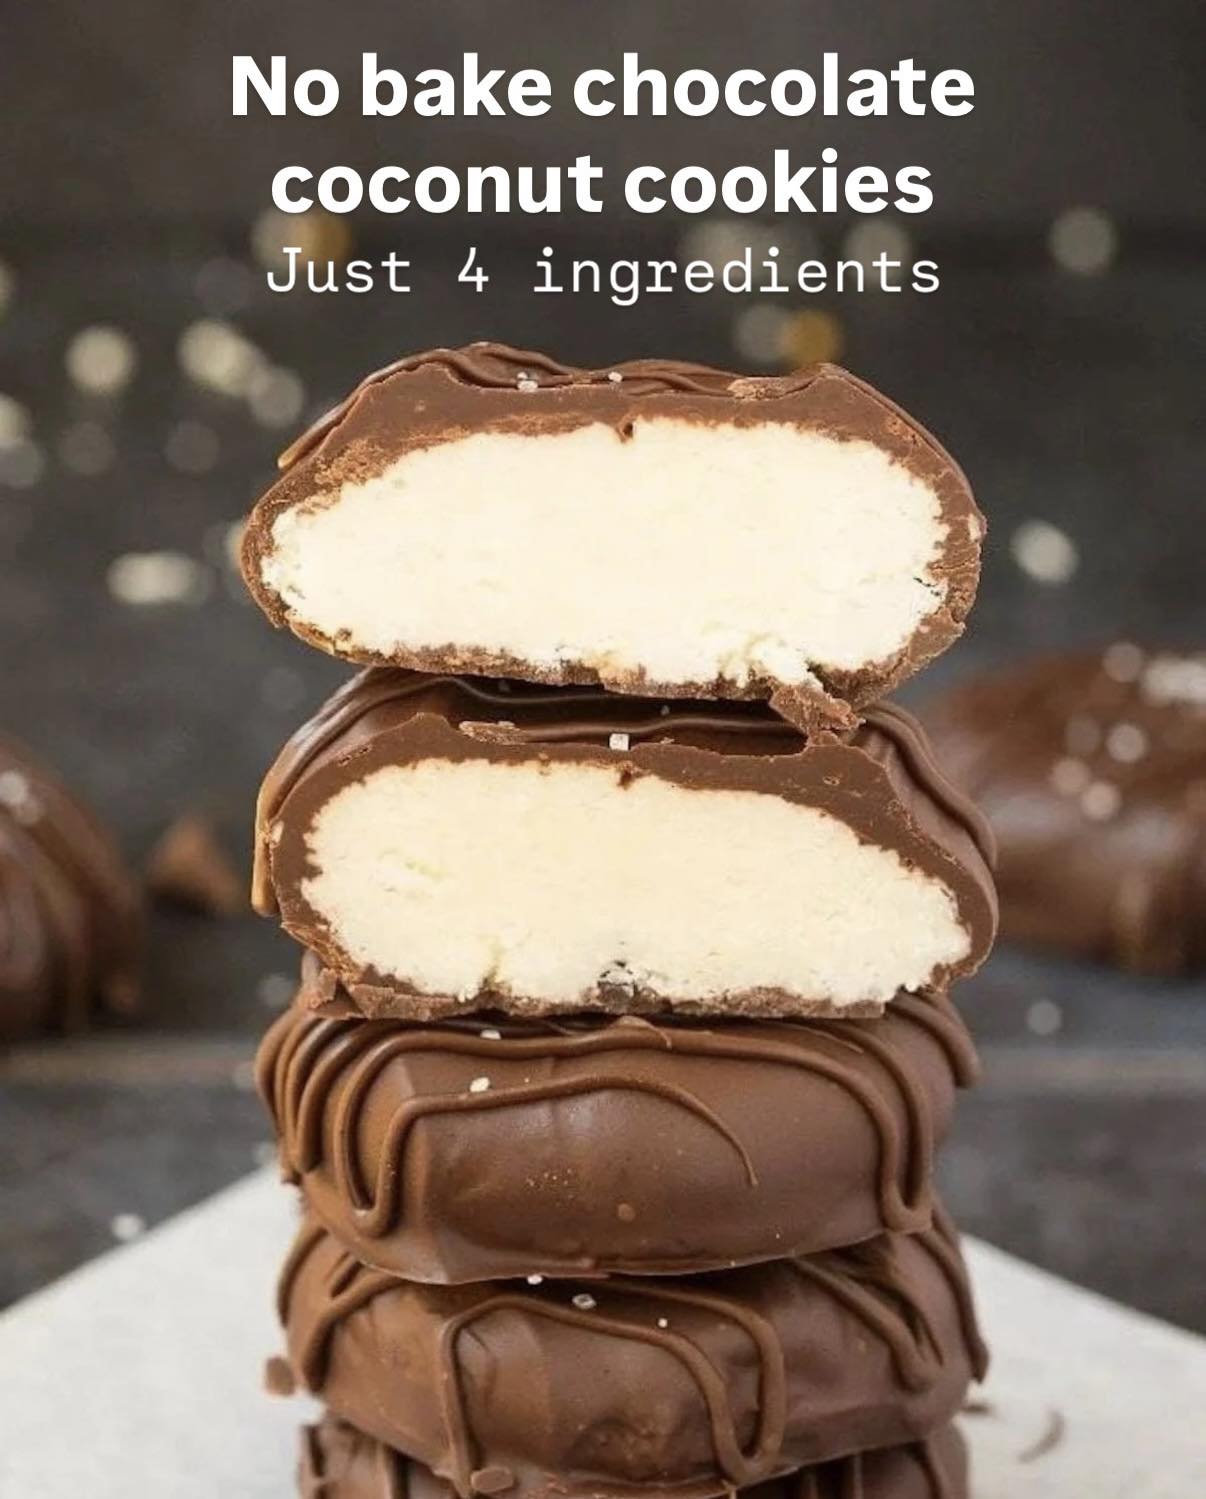
The first time I stirred together these four simple ingredients, my kitchen was cool, quiet, and smelled like a sweet tropical breeze mixed with rich cocoa. It was a sweltering summer day, and the thought of turning on the oven was unbearable. I needed a chocolate fix, fast. In less than ten minutes, I had a bowl of what looked like edible, chocolatey sand. Rolling it into little mounds, I was skeptical—could something so simple really work? But after a brief chill in the fridge, I took a bite. The result was pure magic: a fudgy, chewy, coconut-packed cookie that felt like a Mounds bar in cookie form. My no-bake love affair was officially born.
Why You’ll Love This Recipe
You’ll love this recipe because it delivers deep chocolate satisfaction and chewy coconut texture in about 15 minutes flat, with zero baking required. It’s the ultimate emergency dessert for sudden cravings, last-minute guests, or hot days when the oven is your enemy. With just four pantry staples, you can whip up a treat that feels indulgent and homemade without any fuss or special skills. From my no-bake kitchen to yours, I promise these will become your go-to for instant cookie gratification.
Ingredients
- 2 cups unsweetened shredded coconut
- 1/2 cup unsweetened cocoa powder (Dutch-process or natural)
- 1/2 cup pure maple syrup (or agave nectar)
- 1/4 cup coconut oil, melted
- (Optional) 1/4 teaspoon fine sea salt
Let’s talk ingredients, because their quality makes all the difference here. The shredded coconut is the star—you want the unsweetened, finely shredded kind, not the long, stringy threads or the sweetened flakes. It provides the perfect texture and a pure coconut flavor. For the cocoa powder, use the best you have; a rich Dutch-process cocoa will give a deeper, darker chocolate flavor, while natural cocoa is fruitier. The maple syrup is your sweetener and binder; its robust flavor pairs beautifully with the coconut. Don’t substitute with a milder honey unless you want a different flavor profile. The coconut oil is essential for binding and giving that melt-in-your-mouth quality—don’t use butter, as it won’t set the same way.(See the next page below to continue…)
Equipment Needed
- Medium mixing bowl
- Spatula or wooden spoon
- Measuring cups
- Baking sheet or plate
- Parchment paper
- Small cookie scoop (optional, but helpful)
Step-by-Step Instructions
I always start by lining a small baking sheet or plate with parchment paper. Having this ready to go is crucial because the mixture is easiest to handle right after mixing. Then, in my mixing bowl, I combine the dry ingredients: the two cups of fluffy shredded coconut and the half cup of cocoa powder. If I’m using the optional salt, I add it here. I use a fork or a whisk to stir them together thoroughly. This isn’t just mixing; it’s ensuring every strand of coconut gets coated in that dark, chocolaty powder. The mixture looks almost like a very coarse, black-brown soil, and the smell is already incredible—deeply chocolatey with a hint of tropical sweetness.
Now, for the wet ingredients. In a separate small bowl or glass measuring cup, I gently melt the coconut oil until it’s just liquid. I then pour in the half cup of maple syrup and whisk them together with a fork until they’re completely emulsified into a glossy, thin syrup. I’ve learned that adding them separately to the dry mix can lead to uneven distribution. Combining them first is the secret to a uniform cookie. I make a well in the center of my coconut-cocoa mountain and pour the maple-coconut oil mixture right into it.
This is where you get your hands (or spatula) dirty. I start folding the wet into the dry with a sturdy spatula. At first, it will seem like there’s not enough liquid, and you’ll have a dry, crumbly mess. Don’t panic! Keep folding and pressing. After a minute of persistent mixing, the coconut oil begins to coat everything, and the maple syrup acts like glue. The mixture will transform from dry crumbs to a slightly damp, clumpy sand that holds together when you squeeze a handful firmly. If after a full two minutes of mixing it still seems too dry and won’t hold, add another teaspoon of melted coconut oil or maple syrup.(See the next page below to continue…)
With the mixture ready, I use a small cookie scoop or a tablespoon to portion out the dough. I dump each portion into the palm of my hand and squeeze, then roll firmly into a tight ball. I then place it on the parchment-lined sheet and gently press down with my fingers to flatten it slightly into a rustic cookie shape. The key word is firmly—if you roll them loosely, they’ll crumble later. I repeat until all the mixture is used, then I pop the entire sheet into the refrigerator. They need at least 30 minutes to chill and set completely. This allows the coconut oil to re-solidify, turning your crumbly balls into firm, chewy, fudgy cookies.
Pro Tips for Best Results
I tested the binding agents three different ways: with all maple syrup, with half honey/half maple, and with a date paste. Pure maple syrup worked the best by far. It has the right viscosity and a flavor that doesn’t overpower the chocolate and coconut. Honey can be too floral and tends to make the cookies a bit too sticky. The maple syrup’s consistency is perfect for creating a dough that holds together without being gummy.
Here’s what I learned the hard way about the coconut oil: it must be melted, but not hot. The first time, I microwaved it until it was very warm, and when I mixed it with the maple syrup and added it to the coconut, it seemed to “cook” the cocoa powder a little, making the mixture seize up weirdly. Now, I melt it gently so it’s just liquid and cool to the touch. This ensures it blends smoothly and sets up with the perfect texture.
Don’t use sweetened coconut. I tried it once thinking it would be fine, but with the maple syrup, the cookies became cloyingly sweet and lost that beautiful, nuanced coconut flavor. The unsweetened coconut lets you control the sweetness and allows the chocolate and maple notes to shine through. It’s a non-negotiable for the perfect balanced bite.
Common Mistakes to Avoid
My biggest first-time mistake was not mixing thoroughly or patiently enough. I saw the crumbly stage and immediately added more liquid, which resulted in a greasy, wet mixture that never set properly. You have to trust the process and mix for a good 1-2 minutes, really pressing and folding, to allow the coconut to fully absorb the liquids. It will come together, I promise.(See the next page below to continue…)
Another pitfall is using old or stale cocoa powder. Cocoa powder can lose its potency over time. If yours has been in the pantry for over a year, it might taste flat or dusty. Since the cocoa flavor is front and center here, using a fresh, high-quality powder makes a dramatic difference. Give your cocoa a sniff—it should smell strongly and pleasantly of chocolate.
Don’t skip the chilling time. I was so eager that I tried one after just 10 minutes in the fridge. It held its shape but had a soft, almost granular texture and fell apart easily. The full 30-minute chill (or even longer) allows the fats to fully set, giving you that ideal fudgy, cohesive cookie that holds together when you bite into it. They are worth the wait.
Finally, avoid storing them at room temperature if your kitchen is warm. The coconut oil has a low melting point. If it’s above 75°F (24°C) in your house, they will become very soft and may lose their shape. They are happiest stored in the fridge or a very cool place. This isn’t a drawback—it just means you have a perfectly chilled, refreshing treat!
Serving Suggestions
I like serving these cookies straight from the fridge on a simple white plate. Their dark, rustic look is beautiful on its own. They are the perfect alongside a cup of black coffee or a glass of cold almond milk. The contrast of the cold, chewy cookie with a hot beverage is absolutely delightful.
For a more elegant dessert, I’ll place two cookies on a small plate with a few fresh raspberries or a twist of orange zest. The tart fruit cuts through the rich chocolate and coconut beautifully, making it feel like a fancy restaurant petit four. A tiny sprinkle of flaky sea salt on top before chilling also elevates them to something special.
When I’m packing treats for a picnic or hike, these are my first choice. They don’t melt like chocolate bars and are sturdy enough to travel. I’ll wrap them individually in a little parchment paper—they make for a wonderful, energizing sweet bite that feels like a real indulgence, even outdoors.
Variations & Customizations
This recipe is a fantastic canvas. My favorite variation is to add chopped nuts. After mixing the dough, I fold in 1/4 cup of finely chopped toasted almonds or pecans. They add a wonderful crunch and another layer of flavor that complements the coconut perfectly.
For a “Mounds Bar” effect, I take the basic mixture and press it into a small parchment-lined loaf pan. Once chilled, I cut it into small squares and then dip the bottoms in melted dark chocolate. Letting the chocolate set gives you that iconic chocolate shell and coconut center combo in a no-bake bar form.
If you want a different flavor profile, try adding 1/2 teaspoon of peppermint extract (for a festive twist) or orange extract to the wet ingredients. A tablespoon of chia seeds or hemp hearts can also be stirred in for a slight nutritional boost and extra texture without changing the flavor much.
How to Store, Freeze & Reheat
These cookies store beautifully in an airtight container in the refrigerator. They will keep their perfect fudgy texture for up to 2 weeks. The fridge is truly their home, keeping them firm and the flavors bright. I always keep a batch on hand for a quick sweet fix.
They freeze exceptionally well for long-term storage. Place them in a single layer on a parchment-lined sheet to freeze solid, then transfer to a freezer bag or container. They will keep for up to 3 months. You can eat them straight from the freezer for a frozen treat, or let them thaw in the fridge for 15 minutes.
There is no need to reheat these cookies. They are meant to be enjoyed cold or at a cool room temperature. If they’ve been out and have softened more than you like, simply pop them back in the fridge for 15 minutes to firm right back up. Their simplicity is part of their charm—no warming needed.
Conclusion
These No-Bake Chocolate Coconut Cookies are a testament to the magic of simplicity. They prove that incredible flavor and satisfaction can come from just four ingredients and a few minutes of effort. I hope this recipe brings as much easy, chocolaty joy to your kitchen as it has to mine. Give them a try the next time a cookie craving strikes—you’ll be amazed at what you can create without ever preheating the oven. Happy no-baking, friends.