
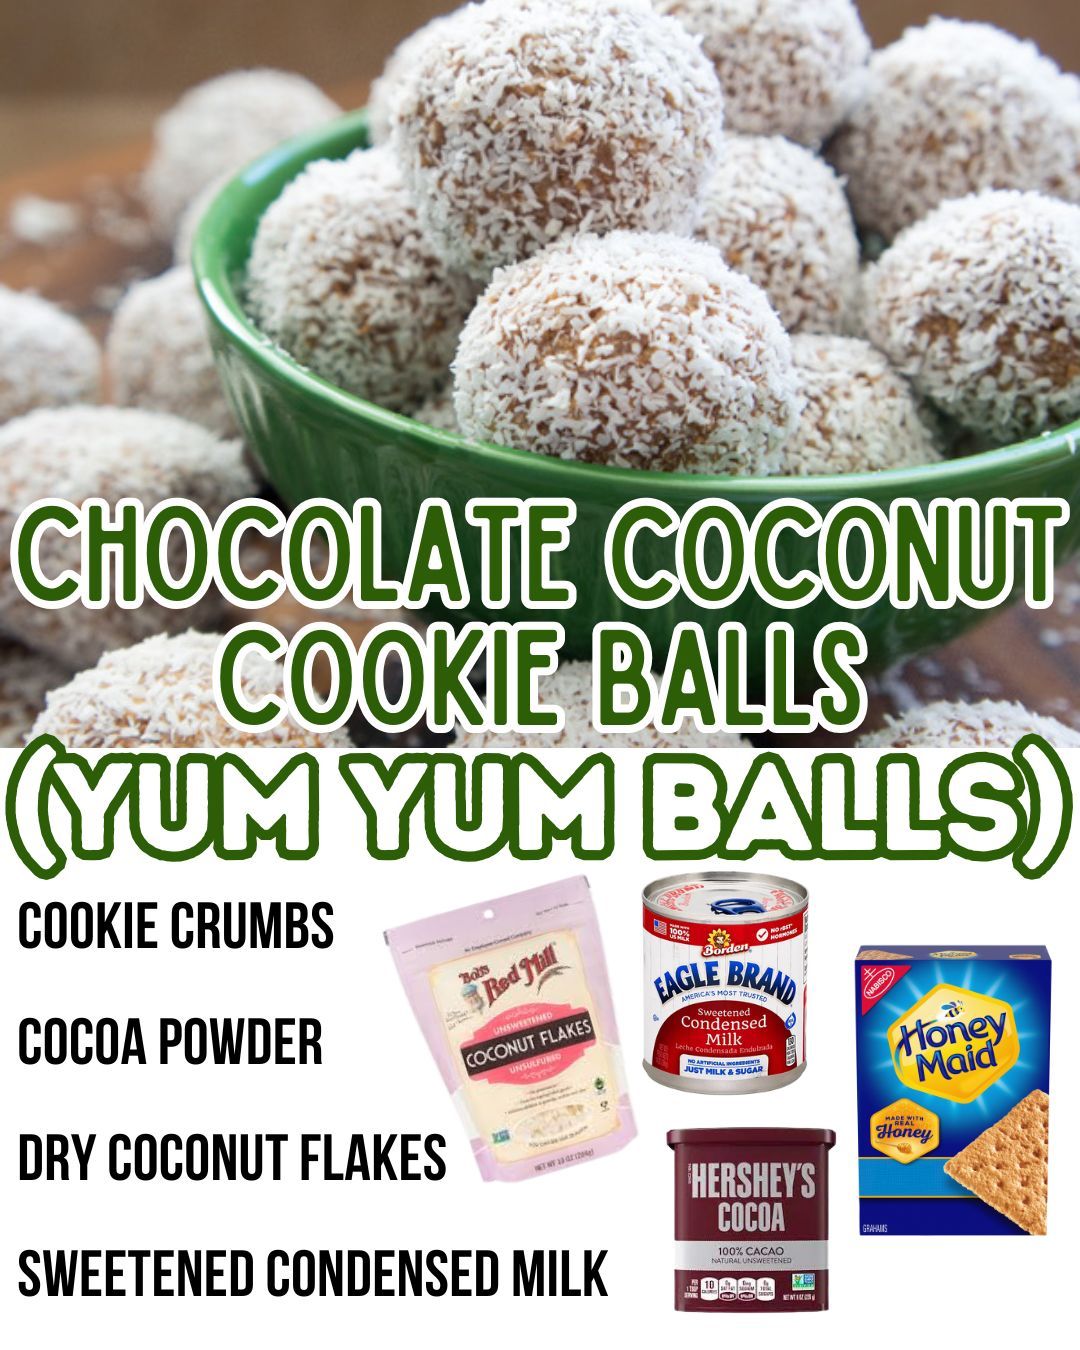
Another pitfall is using “cream of coconut” or coconut milk instead of dry coconut flakes. They are not the same thing at all! I made this error in a moment of pantry confusion. The liquid from cream of coconut will make your dough a soupy, impossible-to-roll mess. You need the dry, shredded flakes for both structure and that classic chewy-coconut texture inside the truffle.
Don’t skip the step of mixing your dry ingredients thoroughly before adding the wet. If you just dump everything in and stir, you’ll likely find pockets of unmixed cocoa powder or clumps of coconut. I’ve done it, and it results in truffles with inconsistent flavor and color. Taking that extra 60 seconds to whisk the crumbs, cocoa, and coconut together ensures every single bite is perfectly balanced.
Lastly, avoid making the truffles too large. It’s tempting to make big, luxurious balls, but remember, these are incredibly rich. A one-inch diameter is the sweet spot. A larger truffle can be overwhelming and is harder to eat neatly. Plus, you get more delightful little treats to share when you keep them bite-sized. I made mine too big once, and people ended up taking only half, which defeated the purpose of a perfect, pop-in-your-mouth confection.
Serving Suggestions
I love presenting these on a simple white platter, alternating between the cocoa-dusted and coconut-rolled varieties. The visual contrast is beautiful and lets guests choose their favorite. For a party, I often spear each one with a decorative toothpick or a mini dessert fork to make them even easier to grab and enjoy without sticky fingers.
These truffles are also a fantastic companion to coffee or tea. I like to serve a plate of them alongside a pot of strong black coffee or a creamy latte; the bitterness of the coffee cuts through the sweet richness of the truffle perfectly. For a dessert wine pairing, a glass of late-harvest Riesling or a tawny Port creates a heavenly match.
Don’t forget them as a homemade gift! I’ve placed them in small cardboard gift boxes lined with parchment paper or in clear cellophane bags tied with a ribbon. They look professional and taste infinitely better than store-bought chocolates. Adding a little note with storage instructions is a thoughtful touch that friends and family always appreciate.
Variations & Customizations
If you’re a fan of nuts, they are a wonderful addition. I’ve finely chopped toasted pecans or almonds and added about a half cup to the dry mixture. It gives a fantastic crunch and a deeper, nutty flavor. You could even roll the finished truffles in crushed nuts instead of coconut for a different look and texture.
For a festive twist, try rolling the truffles in different coatings. Around the holidays, I’ll use crushed candy canes or festive sprinkles. For a more elegant dinner party, a roll in edible gold dust or finely chopped dark chocolate curls makes them feel incredibly special. The basic dough is such a perfect canvas for your creativity.
If you love contrasting flavors, a pinch of sea salt sprinkled over the truffles right after rolling, or a tiny drop of peppermint or orange extract mixed into the condensed milk, can elevate these to a whole new level. I added a teaspoon of instant espresso powder to the dry mix once for a mocha version, and it was absolutely divine.
How to Store, Freeze & Reheat
Storing these is a breeze. Once set, I layer them in an airtight container between sheets of parchment paper. They will keep beautifully in the refrigerator for up to two weeks. I find their texture is actually best after 24 hours, once all the flavors have had time to meld completely. Just let them sit at room temperature for about 10 minutes before serving to take the deepest chill off.
Yes, you can freeze them! I freeze truffles on a parchment-lined sheet until solid, then transfer them to a freezer-safe bag or container. They’ll keep for up to three months. This is my secret for always having a homemade dessert on hand for unexpected guests. Thaw them overnight in the fridge.
There’s no need to reheat these truffles, as they are meant to be enjoyed cool or at room temperature. However, if you take one straight from the freezer, I sometimes let it sit for a minute and then give it a very brief, gentle microwave zap—no more than 5 seconds—to just soften the very center. It creates an almost molten, truffle-like experience that’s utterly decadent.
Conclusion
From that first rainy-day experiment to now, these Chocolate Coconut Cookie Truffles have earned a permanent spot in my recipe repertoire. They are proof that the most satisfying creations often come from the simplest processes and ingredients. I hope you’ll give them a try in your own kitchen, get your hands a little messy, and experience the joy of sharing something made with so much love and so little fuss. Happy rolling, and enjoy every delicious bite