
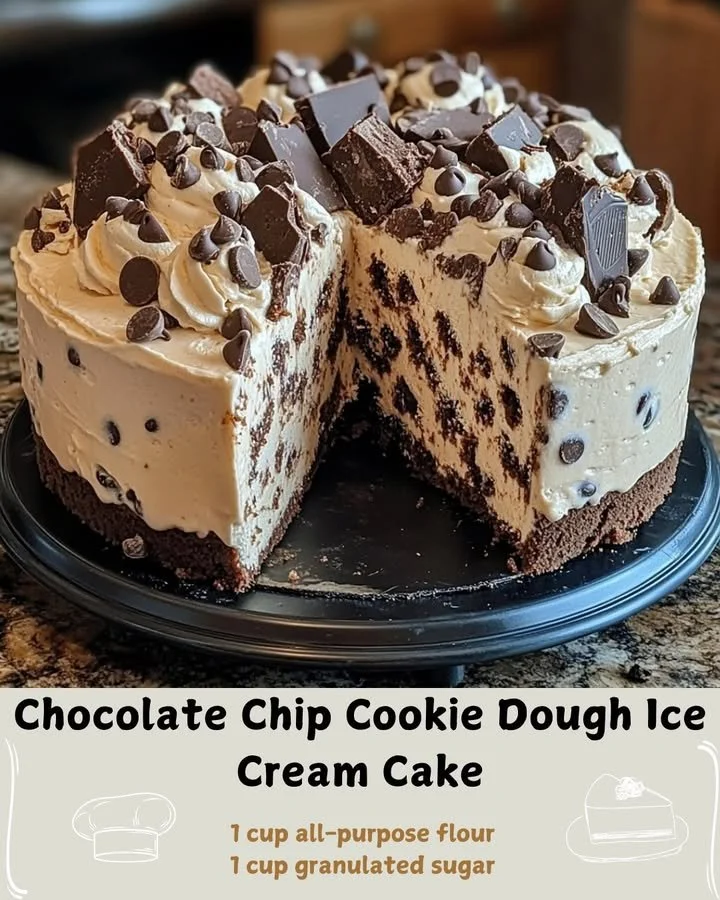
Hey there! Today, I’m thrilled to share one of my absolute favorite desserts from my kitchen: Chocolate Chip Cookie Dough Ice Cream Cake. There’s just something magical about the combination of creamy ice cream, chewy cookie dough, and a crumbly cake base. It’s the kind of dessert that instantly brings a smile to your face and warms your heart! Not only is this cake a showstopper for any celebration, but it’s also incredibly fun to make. So, grab your apron, and let’s dive into this sweet adventure together!
Why You’ll Love This Recipe
You’re going to love how easy and delicious this recipe is! With layers of rich chocolate chip cookie dough, smooth ice cream, and a light cake base, it’s everything you adore about traditional desserts, but in a fun, layered cake form. Perfect for birthdays, family gatherings, or simply because you want to treat yourself, this cake is sure to impress anyone who takes a bite. Trust me, it’s just as fun to make as it is to eat! (See the ingredients in the next page below…)
Ingredients
- 1 box chocolate cake mix (plus ingredients as per package)
- 1 quart vanilla ice cream (softened)
- 1 cup unsalted butter (softened)
- 1 cup brown sugar
- ½ cup granulated sugar
- 1 teaspoon vanilla extract
- 2 cups all-purpose flour
- 1 teaspoon baking soda
- ½ teaspoon salt
- 1 cup mini chocolate chips
Equipment Needed
- Two 9-inch round cake pans
- Mixing bowls
- Measuring cups and spoons
- Hand mixer or stand mixer
- Rubber spatula
- Parchment paper (for lining the pans)
- Freezer-safe container (for the ice cream)
Step-by-Step Instructions
First, let’s start with the chocolate cake base. Preheat your oven to 350°F (175°C) and prepare your cake pans by greasing them and lining the bottoms with parchment paper. In a large bowl, mix the chocolate cake mix following the package instructions, and then pour the batter equally into the two prepared pans. Bake for 25-30 minutes, or until a toothpick inserted in the center comes out clean. Once they’re done, let them cool in the pans for about 10 minutes before transferring them to a wire rack to cool completely. (See the next page below to continue steps…)
Once your cakes have cooled, it’s time to make that delightful cookie dough layer! In a large mixing bowl, beat together softened butter, brown sugar, and granulated sugar until creamy. Stir in the vanilla and mix well. Next, add the flour, baking soda, salt, and chocolate chips, and mix until everything is combined. You’ll have a thick, slightly crumbly dough.
Now, take a moment to admire that cookie dough because it’s the best part! You’ll want to divide this dough in half and flatten each half into a disc. Cover them in plastic wrap and pop them into the fridge for about 30 minutes to set. In the meantime, let’s prepare the ice cream layer.
Scoop the softened vanilla ice cream into a bowl, and with a rubber spatula, mix in some mini chocolate chips for that extra burst of chocolatey goodness. You can also fold in some chunks of that cookie dough if you want to get extra decadent! After the dough has chilled, you’re ready to assemble your cake. Place one of the chocolate cake layers on a serving plate, spread a layer of ice cream on top, then place one of the cookie dough discs next, followed by a second layer of ice cream and finish with the remaining chocolate cake. Pop it into the freezer for at least 4 hours to set properly.
Pro Tips for Best Results
I’ve tested this recipe three ways to make sure you get the best results. First, I recommend letting the ice cream soften a little at room temperature before you spread it on the cake; this makes it way easier to work with. Secondly, if you want to prevent freezer burn on your cake, tightly wrap it with plastic wrap once it has fully frozen. Lastly, the flavor gets better after a day, so if you can resist temptation, make it a day before!
One thing I’ve learned is that cookie dough can be a bit tricky. If you find your dough too crumbly, just add a teaspoon or two of milk until it reaches the perfect consistency. Keep the dough thicker, but not too dry.
Lastly, this cake is perfect for decorating! I love throwing on some hot fudge or caramel sauce before serving for an extra touch of decadence; it’s completely worth it!
Common Mistakes to Avoid
One common mistake I made the first few times was not allowing my cakes to cool completely before layering. This can cause the ice cream to melt, and trust me, no one wants a gooey mess! Ensure you allow ample time for the cakes to cool on a wire rack. (See the next page below to continue…)
Another thing to watch out for is using a soft ice cream. You want it to be soft enough to spread but not melted. You could end up with a lopsided cake or, worse, an ice cream soup!
Some people forget to line the cake pans with parchment paper. This little step makes it so much easier to remove the cake layers without breaking them. Honestly, I’ve had a few cake disasters because I skipped this part!
Finally, don’t rush the freezing process. I know it’s hard to wait, but let the cake freeze for at least 4 hours. This helps everything to set and come together nicely, so it’s easier to slice and serve later!
Serving Suggestions
When it comes to serving this Chocolate Chip Cookie Dough Ice Cream Cake, presentation is key! I love to slice it into generous wedges and serve them topped with melted chocolate, a sprinkle of mini chocolate chips, or even some whipped cream if I’m feeling extra indulgent. A scoop of vanilla ice cream is also a delightful addition—more is more, right?
This cake is very versatile for any occasion. If you’re celebrating a birthday, toss some fun sprinkles on top for that festive vibe. You could also even personalize it with custom decorations based on the month or theme you’re honoring.
Pairing this cake with a cold glass of milk or even a scoop of coffee helps balance the sweetness and adds a comforting element. Trust me; it’s the perfect ending to any meal!
Variations & Customizations
Let’s be honest; there are endless possibilities with this cake! If you want to switch things up, feel free to replace the vanilla ice cream with chocolate or cookie dough flavor for extra chocolatey goodness. I’ve experimented with different flavors, and each version brings something special.
You can also customize the cookie dough. How about adding some peanut butter chips or a handful of nuts? I’ve done this before, and it gives such a delightful crunch and variation in flavor. It’s the little things that can really make a difference!
If you want to make it a bit healthier, you can sneak in some oats to the cookie dough or try using a sugar substitute in the cake. Just remember, this might change the texture a bit, so play around until you find what works for you!
How to Store, Freeze & Reheat
Storing this cake can be a bit tricky since you want to keep it perfectly intact! To store leftovers, wrap the cake tightly in plastic wrap to prevent freezer burn, and keep it in the freezer. It’ll stay good for about a week (if you can resist it that long!).
If serving to a crowd, I recommend cutting slices and placing them in individual freezer-safe containers, allowing you to serve and enjoy without thawing the entire cake. Just make sure not to stack them, or they might stick together!
When it comes to reheating, this dessert is best enjoyed frozen, but if you want the cake a bit softer, allow it to sit out for about 10 minutes at room temperature before serving. That will make it easier to slice and eat!
Conclusion
I hope you feel inspired to try making this Chocolate Chip Cookie Dough Ice Cream Cake! Trust me; it’s a sweet delight that’s worth every step. Whether you’re celebrating a special occasion or just treating yourself, it’s a dessert that’s sure to bring joy and happiness. Enjoy the process, and happy baking!