
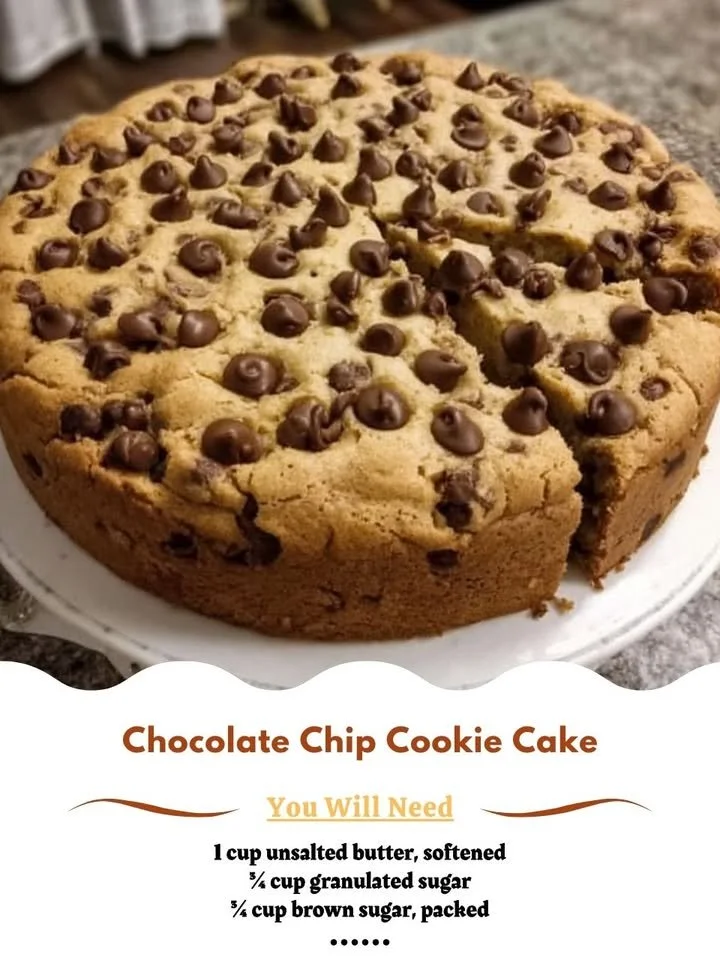
There’s just something magical about the combination of warm chocolate and the subtle sweetness of cake. When I want to satisfy my sweet tooth or surprise my friends at a gathering, I turn to my favorite Chocolate Chip Cookie Cake recipe. This delightful dessert pays homage to the classic cookie we all know and love while providing a moist and fluffy cake that is perfect for any occasion. Let me take you on a delicious journey through the steps of creating this marvel in my kitchen!
Why You’ll Love This Recipe
This Chocolate Chip Cookie Cake is a crowd-pleaser, blending the textures of a cookie with the fluffiness of a cake, all while being incredibly easy to whip up. The aroma that wafts through my kitchen while it’s baking is nothing short of heaven; it’s an invitation for anyone nearby to come and enjoy. It’s the perfect dessert for birthdays, celebrations, or just a cozy night in. Plus, there are endless possibilities for customization! (See the ingredients in the next page below…)
Ingredients
- 2 1/4 cups all-purpose flour
- 1/2 teaspoon baking soda
- 1 cup unsalted butter, softened
- 3/4 cup granulated sugar
- 3/4 cup packed brown sugar
- 1 teaspoon salt
- 2 teaspoons vanilla extract
- 2 large eggs
- 2 cups semi-sweet chocolate chips
- Optional: whipped cream or ice cream for serving
Equipment Needed
- Mixing bowls
- Electric mixer or whisk
- Measuring cups and spoons
- 9-inch round cake pan
- Parchment paper
- Cooling rack
Step-by-Step Instructions
Now, let’s get started on this delicious venture! First, I preheat my oven to 350°F (175°C) and grease my 9-inch round cake pan. To begin, I whisk together the flour and baking soda in a bowl, setting it aside for later. In a separate large bowl, I cream together the softened butter, granulated sugar, brown sugar, and salt with my electric mixer until it’s light and fluffy. This step is key as it creates that delightful texture! (See the next page below to continue steps…)
Next, I beat in the eggs, one at a time, and add the vanilla extract. The mixture will start to look glossy and rich, and I can’t resist sneaking a taste. After that, I gradually incorporate the dry ingredients into the wet mixture, mixing until just combined. Then come the chocolate chips! I fold them in gently with a spatula, letting the creamy dough surround those little bites of chocolate goodness.
Now, it’s time to pour the batter into the prepared cake pan. I spread it evenly, making sure to get it into the corners. As it bakes, my kitchen fills with such an intoxicating aroma that it almost makes me want to dive right in! I bake it for about 25-30 minutes, or until a toothpick inserted into the center comes out clean. Once out of the oven, I let it cool in the pan for a few minutes before transferring it to a cooling rack.
Pro Tips for Best Results
I can’t stress enough the importance of using softened butter. When I tried using cold butter once, the cake just didn’t have that fabulous texture—it was dense and less flavorful. So, always remember to set it out ahead of time! I also recommend mixing the flour in gradually; over-mixing can lead to a tough cake, which is definitely not what we’re after here.
If you’re a chocolate lover (like I am!), try adding a little extra chocolate chips on top of the batter before baking. I tested this three ways: adding them into the batter, laying them on top, and putting them on after baking, and I found the top method to be the most satisfying. That melty goodness is pure bliss!
Lastly, once the cake cools, a dusting of powdered sugar can make it look extra fancy. When I bring this cake out to share, the presentation just elevates the whole experience, making everyone feel special.
Common Mistakes to Avoid
One mistake I see often is not letting the butter soften enough. It’s tempting to rush it, but cold or partially softened butter won’t incorporate properly, leading to that dense texture I previously mentioned. So be patient and let it sit! Another common pitfall is overbaking. Trust me, no one likes a dry cake, and if you keep a close eye on it in the last few minutes, you’ll nail that perfect moisture level. (See the next page below to continue…)
I also learned the hard way that using the wrong-sized pan can affect the baking time. I once grabbed an 8-inch pan and ended up with a cake that took forever to bake while it kept rising and rising. Stick to the 9-inch pan for best results, and don’t be afraid to check in on it as it bakes.
Lastly, I hope you learn from my experience with oven hot spots. If you find that yours tends to bake unevenly, rotate the pan halfway through baking to ensure even cooking. A simple little adjustment that can make all the difference!
Serving Suggestions
When it’s time to dig in, I usually serve this Chocolate Chip Cookie Cake warm, as the chocolate chips are quite melty and delicious. I like to add a big scoop of vanilla ice cream on the side or even a dollop of whipped cream for that added indulgence. Everyone appreciates the contrast of the warm cake against the cold ice cream—it’s a match made in dessert heaven!
For a little extra flair, I sometimes drizzle chocolate sauce on top before serving. It elevates the dessert and makes it look even more enticing. It also gives a fun surprise element to every slice!
If I feel like trying something different, I’ll serve it with fresh berries. The tartness of the berries balances out the cake’s sweetness perfectly. Strawberries, raspberries, or even blueberries give it an appealing pop of color, making each serving feel like a special treat.
Variations & Customizations
While I adore the classic version, one of my favorite variations is to add nuts! Chopped walnuts or pecans can give an excellent texture contrast and a satisfying crunch to the cake. The nuttiness complements the chocolate beautifully and takes the flavor to another level.
Another fun twist I tried was incorporating peanut butter chips along with the chocolate chips. Let me tell you, my chocolate-peanut butter-loving heart was in heaven. The flavor combo was outstanding, and it caters to those who crave that salty-sweet profile.
For a more festive approach, consider adding a splash of almond extract or even a bit of cinnamon to the batter. These flavor notes give it a unique twist—especially nice for holiday gatherings!
How to Store, Freeze & Reheat
I find that if I have leftovers (which is often unlikely!), I store the cake in an airtight container at room temperature. It usually stays fresh for a couple of days, if it lasts that long! Just remember to cut it into slices so it’s easy to grab for a quick treat anytime.
If you want to make it ahead of time, this cake freezes beautifully. I wrap individual slices in plastic wrap and then place them in a zip-top bag. That way, I can pull a slice out whenever a chocolate craving strikes! To thaw, I simply leave it at room temperature for about 30 minutes before digging in.
When reheating, I recommend using the microwave for just a few seconds so that it warms through without drying out. If I’m reheating a more considerable amount, I’ll often opt for the oven at a low temperature to keep that delicious texture intact.
Conclusion
So there you have it! My go-to recipe for Chocolate Chip Cookie Cake is sure to leave a lasting impression on anyone you share it with. Whether you’re baking for a birthday or just because, this cake is the warm hug of desserts. Happy baking, and enjoy every delicious bite!