
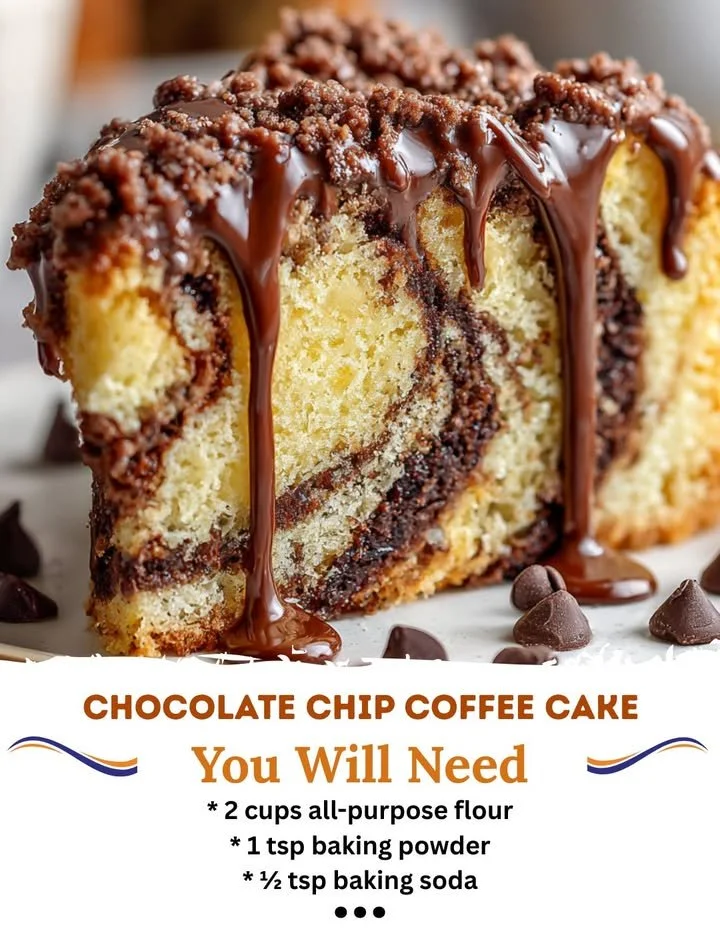
There’s something undeniably comforting about a lovely slice of chocolate chip coffee cake, especially when paired with a warm cup of coffee or tea. I love the way the rich chocolate chips blend with the buttery, tender cake, creating a delightful treat for any time of day. This recipe has become a beloved staple in my kitchen, perfect for brunch gatherings or just a cozy afternoon pick-me-up.
Why You’ll Love This Recipe
This chocolate chip coffee cake is simple enough for a baking beginner, yet delicious enough to impress your friends and family. With its wonderful balance of sweetness and a hint of coffee, every bite is simply heavenly. And let’s not forget the wonderful aroma that fills my kitchen while it bakes—pure bliss! You’ll find this recipe is versatile and can even be customized to suit your taste. One bite, and I guarantee you’ll be coming back for more! (See the ingredients in the next page below…)
Ingredients
– 2 cups all-purpose flour
– 1 teaspoon baking powder
– 1 teaspoon baking soda
– ½ teaspoon salt
– ½ cup (1 stick) unsalted butter, softened
– 1 cup granulated sugar
– 2 large eggs
– 1 teaspoon vanilla extract
– 1 cup sour cream
– 1 cup semi-sweet chocolate chips
– ½ cup brown sugar (for the topping)
– 1 tablespoon cinnamon (for the topping)
Equipment Needed
– Mixing bowls
– Electric mixer (or whisk)
– Measuring cups and spoons
– 9×13 inch baking pan
– Rubber spatula
– Cooling rack
Step-by-Step Instructions
To start off, preheat your oven to 350°F (175°C) and grease your baking pan. I always find it makes a world of difference to have everything ready before I begin. In a medium bowl, whisk together the flour, baking powder, baking soda, and salt, then set it aside. In my kitchen, I usually turn to my trusty electric mixer for the next step. Cream together the softened butter and granulated sugar until it’s light and fluffy. This process is not just about mixing the ingredients; it’s about getting that lovely air into the butter. Can you imagine the rich aroma? (See the next page below to continue steps…)
Next, add the eggs one at a time, mixing well after each addition, then stir in the vanilla extract. After that, it’s time to incorporate the dry ingredients and sour cream alternately to the mixture. I like to begin and end with the flour mixture for the best results. Remember, don’t overmix; you want your coffee cake to be light and fluffy, not dense! Once everything is combined, fold in the chocolate chips gently.
Now, pour about half of the batter into the prepared baking pan. This is where the fun begins! For the topping, mix together the brown sugar and cinnamon in a small bowl, then sprinkle a portion over the first layer of batter. Pour the remaining batter on top and swirl it with a knife to create a beautiful marbled effect. Finish off by adding more of that scrumptious brown sugar mixture on top. Pop it into the oven and bake for 30-35 minutes or until a toothpick inserted in the center comes out clean. Your kitchen will soon be filled with sweet and inviting scents!
Pro Tips for Best Results
I’ve tested this recipe a few different ways, and what worked best for me was using room temperature ingredients. I find that when the butter and eggs are at room temperature, they blend together more smoothly, making a tender cake. If you forget to take them out ahead of time, a quick trick is to place the eggs in warm water for about 10 minutes.
Another little secret I’ve discovered is to use a toothpick to check for doneness. Instead of relying solely on time, I like to insert a toothpick into the center of the cake; if it comes out with a few moist crumbs (not wet batter), it’s ready to come out of the oven. Overbaking can lead to a dry cake, and that’s the last thing I want for this treat!
Lastly, don’t rush the cooling process. I know it’s tempting to dig in right away, but letting the cake cool in the pan for at least 10-15 minutes before transferring it to a wire rack allows the flavors to settle and makes it easier to slice.
Common Mistakes to Avoid
One common pitfall I encountered early on was not measuring my ingredients accurately. Baking is a science, and even slight variations in flour or sugar can throw off the entire texture of your cake. I learned to always spoon the flour into the measuring cup and level it off with a knife—no scooping directly from the bag!(See the next page below to continue…)
Another mistake I made was not checking the freshness of my baking powder and soda. These ingredients lose potency over time, which can result in a cake that doesn’t rise as well. I now regularly check expiration dates, and if I’m ever unsure, I’ll do a quick test in warm water to see if they’re still active.
Lastly, forgetting to preheat the oven is a rookie mistake I’ve made before! I was always impatient to get baking, but I quickly realized that starting with a preheated oven is key to achieving that perfect rise. Always set your oven first; it will save you from having to deal with potential baking mishaps!
Serving Suggestions
When it comes to serving this chocolate chip coffee cake, there are so many delightful options! I love to serve it still warm, perhaps with a generous dollop of whipped cream or a scoop of vanilla ice cream on the side. The warm cake paired with the chilled ice cream creates a delectable contrast that makes every bite memorable.
For a casual afternoon gathering, I often slice the cake into squares and serve it on a large platter. A sprinkle of powdered sugar on top not only makes it visually appealing but also adds a lovely touch of sweetness. This treats everyone to a taste of indulgence without being too over the top.
This cake is also a fantastic companion for a cozy coffee date or brunch with friends. Its soft texture and rich flavor pair beautifully with coffee or tea, making it the perfect centerpiece for an enjoyable gathering at home. Don’t be surprised if your friends start requesting this specific cake for future get-togethers!
Variations & Customizations
One of the things I love about this coffee cake is how easy it is to customize. If I’m in the mood for a fruity twist, I’ll often add a cup of fresh berries—blueberries or raspberries add a burst of flavor that complements the chocolate so well. Just make sure to toss them lightly in flour to prevent them from sinking to the bottom of the batter.
Another variation I’ve tried is replacing chocolate chips with nuts or shredded coconut for a different texture. Walnuts or pecans can add a delightful crunch, while coconut gives a subtle sweetness that works wonders alongside the coffee flavor of the cake. Don’t hesitate to experiment and find your perfect combination!
If I’m feeling adventurous, I sometimes add a layer of homemade cream cheese frosting or a simple glaze on top. A drizzle of vanilla or coffee glaze not only looks beautiful but also adds an extra layer of flavor that elevates the coffee cake to an entirely new level.
How to Store, Freeze & Reheat
Storing this chocolate chip coffee cake is a breeze! I usually keep it in an airtight container at room temperature for up to three days. If you find that you have leftovers (which is often rare in my house), I recommend slicing it up and placing parchment paper between the slices before storing to help preserve their freshness.
If you want to make this coffee cake ahead of time or save some for later, freezing is an excellent option. Just wrap the whole cake tightly in plastic wrap and then aluminum foil before placing it in the freezer. It can stay fresh for up to three months! To thaw, I like to move it to the fridge overnight and then bring it to room temperature before serving.
When it comes to reheating, a few seconds in the microwave works wonders. I generally start with 10-15 seconds to achieve that warm, gooey texture without overdoing it. You can also lightly toast slices in a toaster oven for a lovely crispy finish on the outside while keeping it soft inside.
Conclusion
I truly hope you find joy in baking this chocolate chip coffee cake as much as I do. From the heavenly aroma to the delightful flavors, it’s one of those recipes that brings warmth into any home. Whether you share it with friends or savor it all by yourself, each bite promises to bring a smile to your face. Happy baking, and enjoy the deliciousness!