
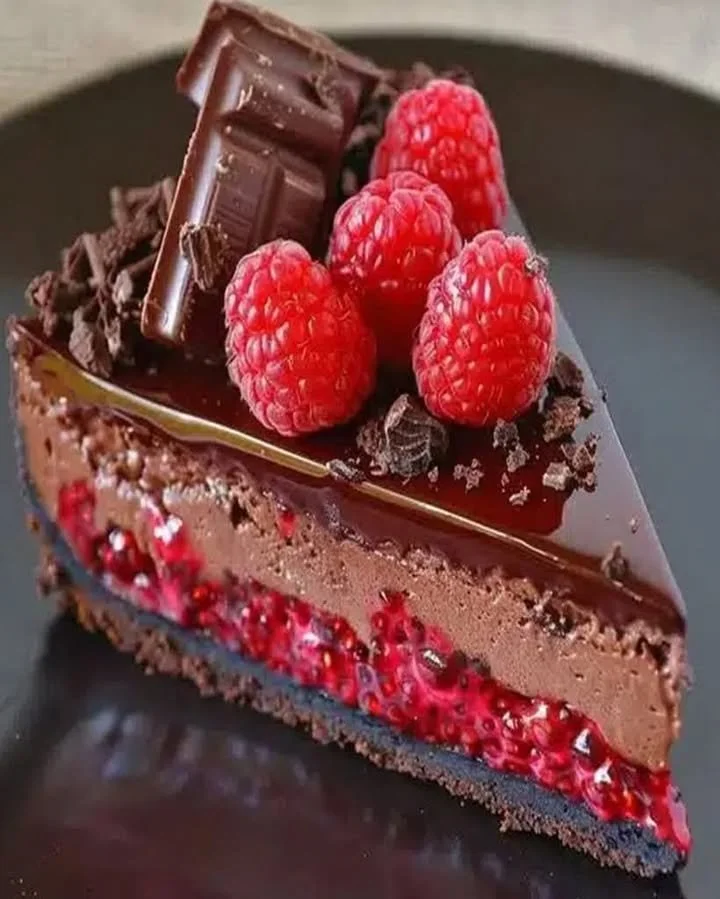
When it comes to dessert, I can’t think of anything quite as indulgent as chocolate cheesecake. There’s something magical about the creamy texture paired with rich chocolate; it’s like a warm hug for your taste buds! This recipe has become one of my go-to favorites that consistently wows family and friends. With a velvety smooth filling layered on a crunchy chocolate crust, this cheesecake is bound to become a classic in your kitchen too!
Why You’ll Love This Recipe
The beauty of this chocolate cheesecake is its simplicity combined with an impressive flavor that makes it a perfect treat for any occasion. Whether you’re celebrating a birthday, hosting a dinner party, or just needing a little chocolate fix, this recipe checks all the boxes. Plus, it’s easy enough for any skill level, giving you a decadent dessert without the stress of complicated techniques. Trust me, once you taste it, you’ll be hooked! (See the ingredients in the next page below…)
Ingredients
– 1 ½ cups chocolate cookie crumbs
– ½ cup unsalted butter, melted
– 4 packages (8 ounces each) cream cheese, softened
– 1 cup granulated sugar
– 1 teaspoon vanilla extract
– 4 large eggs
– 1 cup sour cream
– 1 cup semisweet chocolate chips, melted
Equipment Needed
– 9-inch springform pan
– Mixing bowls
– Electric mixer or whisk
– Rubber spatula
– Measuring cups and spoons
– Oven
Step-by-Step Instructions
To start off, I preheat my oven to 325°F (160°C). This is an essential step because you want a nice even bake for that perfect texture. While the oven is heating up, I prepare my crust by combining the chocolate cookie crumbs with melted butter in a mixing bowl. I make sure the crumbs are well coated and then press this mixture firmly into the bottom of my springform pan. It’s important to pack it down well so it holds together during baking. (See the next page below to continue steps…)
Once the crust is ready, I place it in the fridge to firm up while I prepare the delicious filling. In a large mixing bowl, I beat the cream cheese until it’s smooth and creamy. I gradually add in the sugar and vanilla extract, mixing until fully incorporated. Then, one by one, I add the eggs, making sure to mix just enough to blend them without over-beating—which can lead to cracks later. Oh, the smell at this stage is heavenly!
Next, I gently fold in the sour cream and melted chocolate chips. This is where the magic happens! The mixture turns into a luscious, chocolatey dream that’s impossible to resist. I pour this filling over my chilled crust and smooth it out with a spatula before popping it into the preheated oven. Baking for about 55-60 minutes really helps set the cheesecake while keeping it rich and creamy. I like to turn off the oven and leave the cheesecake inside for an additional hour to prevent cracks, making for an even better presentation.
After the bake time, I carefully remove it from the oven and let it cool on a wire rack before transferring it to the fridge. Allowing it to chill for at least 4 hours (or overnight, if you can wait) lets the flavors meld together beautifully. Trust me, the anticipation is worth it!
Pro Tips for Best Results
I tested this recipe three ways, adjusting the baking time and temperatures. I found that allowing the cheesecake to crack slightly isn’t the end of the world, but if you want a smooth top, the key is really to avoid overmixing when adding the eggs. It’s tempting to whip them in, but a gentle fold keeps your cheesecake’s beautiful texture.
Using room temperature cream cheese made such a difference! I’ve made the mistake of using cold cream cheese, and believe me, it leads to lumps that just won’t blend in. By letting it sit out for about 30 minutes before I start baking, it’s much easier to achieve that smooth filling.
Lastly, I love experimenting with different chocolates! While semisweet chocolate gives that classic flavor, using dark chocolate can elevate it to a whole new level. If you’re feeling adventurous, a touch of espresso powder mixed into the filling amplifies the chocolate richness beautifully.
Common Mistakes to Avoid
One mistake I’ve made in the past is not properly preparing the springform pan. I’ve had my fair share of leaks that caused batter to spill all over the oven—what a mess! To avoid this, I recommend wrapping the bottom of the pan tightly with aluminum foil before adding your crust and filling. This helps catch any drips and keeps your kitchen (and oven) clean. (See the next page below to continue…)
Another common pitfall is not letting the cheesecake cool gradually. Taking it straight from the oven to the fridge can shock it and lead to cracks. Instead, leaving it in the turned-off oven for an hour and then at room temperature for another hour allows it to gradually cool and sets the perfect texture.
Finally, waiting to cut into the cheesecake is tough, but patience is a virtue! I made the mistake once of serving it too soon. It’s always best to let it chill for at least four hours, but overnight is even better. The flavors deepen, and you’ll be rewarded with a creamier texture that melts in your mouth.
Serving Suggestions
When it comes to serving my chocolate cheesecake, I love adding a dollop of whipped cream on top for an extra creamy touch. It not only looks beautiful, but the lightness balances out the rich cheesecake perfectly. Sometimes, I even drizzle some chocolate sauce or a berry compote for a pop of color and flavor that takes it over the top.
For a fun twist, I like to sprinkle some crushed chocolate cookies on top before serving. It adds a nice crunch and showcases the cookie crust. If I’m feeling fancy, a sprig of mint or berries can make the dessert look incredibly elegant.
And let’s not forget about coffee! I find that a rich cup of coffee pairs beautifully with the chocolate cheesecake. The bitterness of the coffee complements the sweetness, creating a delightful balance that’s hard to resist.
Variations & Customizations
One of the best parts of making chocolate cheesecake is how adaptable it is! I’ve played around with different flavored extracts like almond or orange to give it a unique twist. These subtle changes can elevate the dessert and surprise your guests with a flavor profile they weren’t expecting.
If you’re looking for a healthier option, switching out some ingredients can work wonders. I’ve made a version using Greek yogurt instead of sour cream, and while it’s slightly different in texture, it still tastes amazing and cuts down on the fat content a bit.
For a no-bake chocolate cheesecake, simply skip the baking step! Use gelatin to help it set, and fridge it for a few hours. It’s a great alternative during the hot summer months when you don’t want to heat up the kitchen.
How to Store, Freeze & Reheat
If you manage to have leftovers (which is rare in my house!), you can store your chocolate cheesecake in an airtight container in the fridge for up to a week. Just make sure to cover the top to prevent it from drying out.
If you want to make it ahead of time, this cheesecake freezes beautifully! I wrap individual slices in plastic wrap and then in foil before placing them in a freezer-safe bag. They can last up to three months. When the craving hits, simply take a slice out and thaw it in the fridge overnight.
Reheating is usually not necessary, but if you prefer it warm, I suggest warming individual slices in the microwave for about 10-15 seconds. Just enough to take the chill off but not so much that it disrupts the creamy texture.
Conclusion
Baking chocolate cheesecake has truly become one of my favorite ways to express my love for baking. There’s something so gratifying about creating a dessert that not only looks gorgeous but tastes divine too. I hope you love making this recipe as much as I do! Whether for special occasions or a little self-care treat, this cheesecake is sure to bring smiles and satisfaction to your table. Happy baking!