
The first time I made these Chocolate Caramels, my entire kitchen filled with the nostalgic scent of bubbling sugar, melting chocolate, and warm cream—like walking into an old-fashioned candy shop where everything feels magical. I remember leaning over the pot, watching the mixture transform from a pale, creamy swirl into a glossy, velvety river of chocolate caramel that smelled so rich I couldn’t help grinning. When the caramels cooled and I cut into that perfectly firm yet tender block, I knew this was a recipe I’d be making every holiday season.
Why You’ll Love This Recipe
You’ll love this Chocolate Caramels recipe because it creates candies that taste truly handcrafted—smooth, buttery, deeply chocolatey, and just chewy enough without sticking aggressively to your teeth. Even though the ingredients are simple, the flavor is unbelievably luxurious. You’ll also appreciate how customizable the recipe is; with just a few tweaks, you can control the texture, richness, and even the add-in flavors. If you’ve ever wanted to make homemade candy that looks and tastes gourmet without the intimidation, this recipe will become your new go-to.
Ingredients
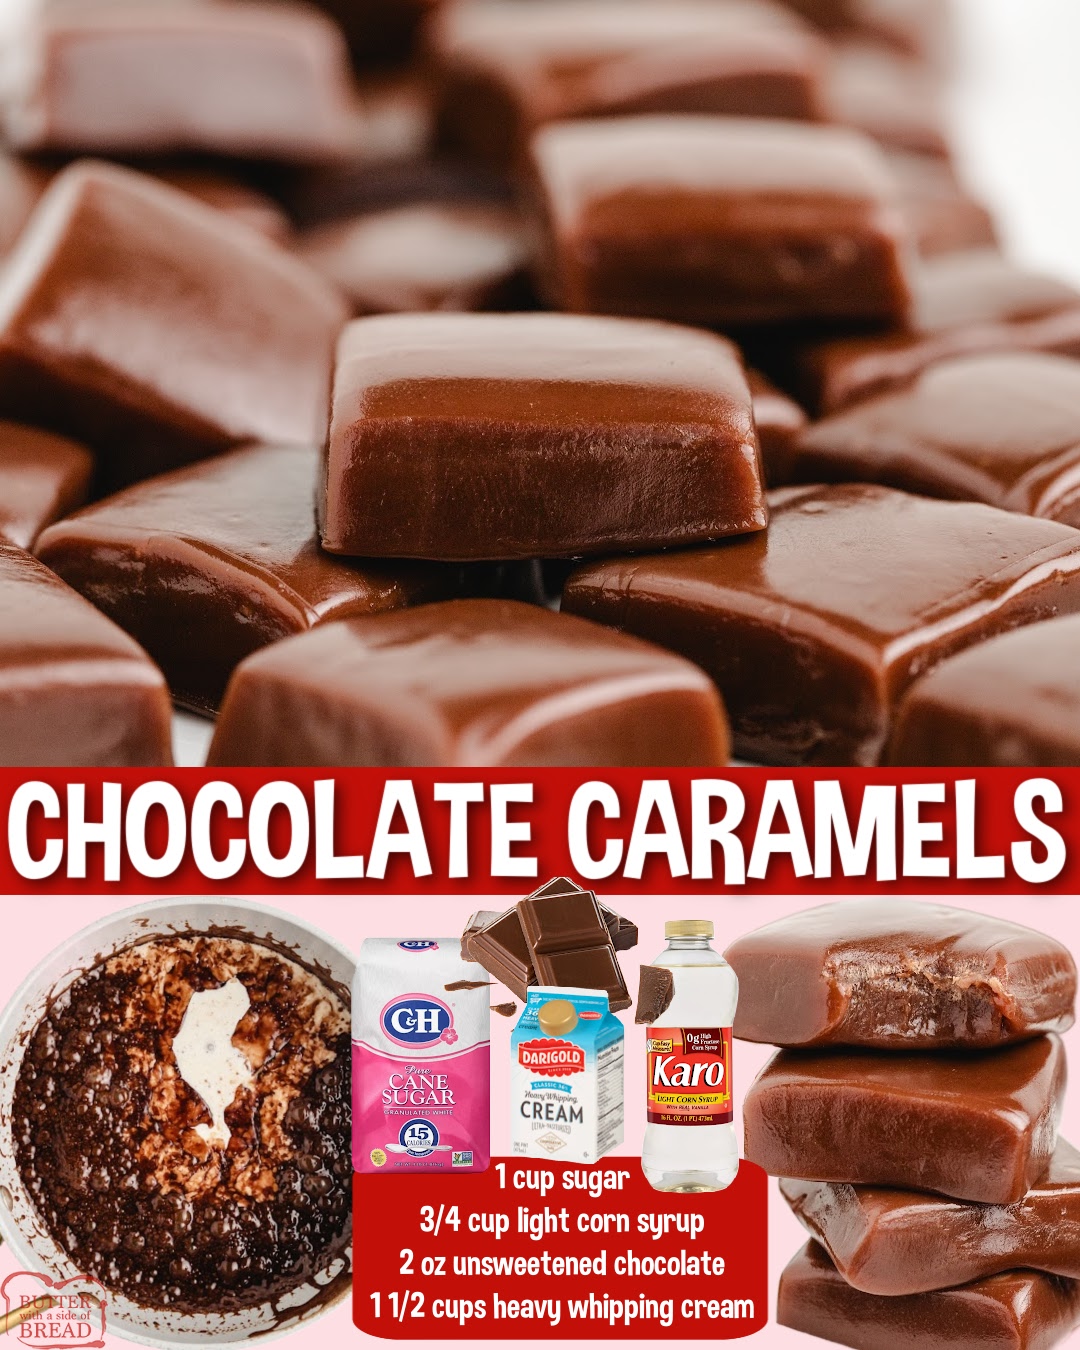
- 1 cup sugar
- 3/4 cup light corn syrup
- 2 oz unsweetened chocolate
- 1 1/2 cups heavy whipping cream
I’ve experimented with substitutions over the years, and there are a few worth mentioning. For the chocolate, unsweetened chocolate gives the deepest, truest cocoa flavor, but you can use bittersweet chocolate if you prefer a smoother, slightly sweeter caramel. Light corn syrup is essential for preventing crystallization, so I don’t recommend swapping it, though glucose syrup can work if corn syrup isn’t available. Heavy cream gives the caramels their signature softness and melt-in-your-mouth feel; using half-and-half will create a firmer, less luxurious result. Sugar is non-negotiable for proper caramelization—don’t reduce it, or the texture won’t set correctly.
Equipment Needed
- Heavy-bottomed saucepan
- Candy thermometer
- Wooden spoon or heatproof spatula
- 8×8 pan
- Parchment paper
- Sharp knife
A heavy-bottomed saucepan evenly distributes heat, which matters more than you’d think—thin pans scorch caramels very easily. A candy thermometer is your best friend here; even though I’ve made these many times, guessing the temperature always ends in a too-soft or too-hard batch. A wooden spoon or heatproof spatula won’t melt and helps you scrape every bit of caramel from the sides of the pot. Lining your pan with parchment paper makes removing and cutting the cooled caramel incredibly easy, and a sharp knife ensures clean, beautiful caramel squares.
Step-by-Step Instructions
I start by preparing my pan so I’m not scrambling once the caramel is ready. An 8×8 pan lined with parchment paper is perfect, and I leave a little overhang so I can lift the caramel slab out later. After prepping the pan, I measure my ingredients ahead of time because caramel-making moves quickly and you never want to be searching for chocolate or cream while the sugar is boiling.
In a heavy saucepan, I combine the sugar and corn syrup over medium heat. As the mixture warms, I stir gently until the sugar begins to dissolve. I’ve learned not to stir too aggressively—stirring too much encourages crystallization. When the mixture becomes clear and starts bubbling, I slowly pour in the heavy cream. This moment always feels like kitchen magic to me—the mixture hisses softly and rises slightly before settling into a creamy, bubbling pot of deliciousness.(See the next page below to continue…)