
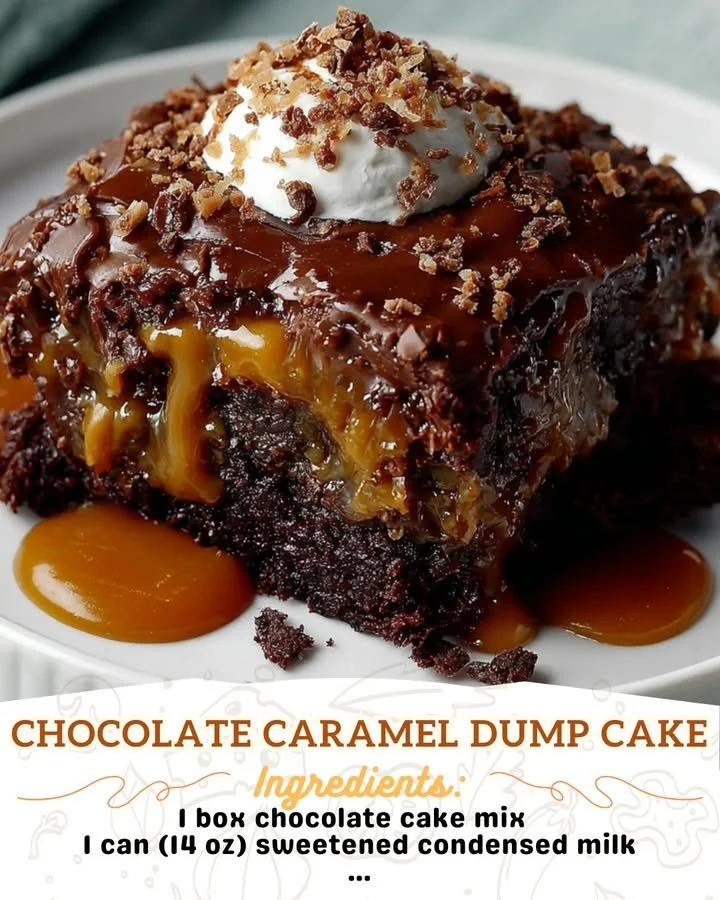
Chocolate Caramel Dump Cake! If you’re in the mood for something decadent and incredibly easy to prep, you’re in the right place. This cake is perfect for any occasion, be it a family gathering or simply indulging in a cozy night at home. Grab your ingredients, and let’s get started on this sweet adventure!
Why You’ll Love This Recipe
I absolutely adore this Chocolate Caramel Dump Cake because it’s as simple as it is delicious. With gooey caramel and rich chocolate blending beautifully together, it’s hard to resist! The best part? You can whip it up in just a few minutes, and it bakes while you relax. It’s truly a hassle-free dessert that will wow anyone who takes a bite. (See the ingredients in the next page below…)
Ingredients
– 1 box chocolate cake mix
– 1 can (14 oz) sweetened condensed milk
– 1 jar (12 oz) caramel sauce, divided
– 1 cup semi-sweet chocolate chips
– 1 cup chopped nuts (optional)
– 1/2 cup unsalted butter, melted
– 1 cup water
Equipment Needed
– 9×13 inch baking dish
– Mixing bowl
– Whisk
– Measuring cups and spoons
– Rubber spatula
– Oven mitts
Step-by-Step Instructions
First things first, preheat your oven to 350°F (175°C) and grease your 9×13 inch baking dish. I love to use a bit of non-stick spray to ensure that nothing sticks. In a large mixing bowl, combine the dry chocolate cake mix with the water, melted butter, and half of the caramel sauce. Mix together until just combined. Be careful not to overmix; a few lumps are perfectly fine! This mix smells heavenly even at this stage! (See the next page below to continue steps…)
Next, pour your chocolate mixture into the prepared baking dish, spreading it out evenly. Now, sprinkle the semi-sweet chocolate chips on top, followed by the chopped nuts if you chose to include them. These nuts add a fantastic crunch that complements the softness of the cake beautifully. Drizzle the remaining caramel sauce over everything. Trust me, don’t skip this step—it’s where the magic happens!
Now it’s time to bake! Place your dish in the oven for about 30-35 minutes, or until the cake is set and a toothpick comes out mostly clean, with a few moist crumbs. The aroma of chocolate and caramel wafting through the kitchen is absolutely irresistible. Allow the cake to cool for a few minutes before serving. I serve mine warm, topped with a scoop of vanilla ice cream for that little extra indulgence!
Pro Tips for Best Results
I tested this recipe a few times to get it just right, and one of my favorite tweaks was using different types of chocolate chips. While semi-sweet are great, adding some dark chocolate chips really takes the flavor to the next level! The contrast of flavors is divine and adds a deeper chocolatey taste.
Another tip I have is to not skimp on the caramel sauce. I found that using a little extra caramel not only enhances the flavor but also makes for a more gooey texture throughout the cake. It creates little pockets of creamy caramel goodness that you’ll absolutely love!
For an even richer experience, I recommend serving it with whipped cream. The coolness of the cream against the warm cake creates a delightful contrast. I can’t explain how satisfying it is to take that first bite!
Common Mistakes to Avoid
One common mistake I made on my first try was not greasing the baking dish well enough, and my precious cake got stuck! It’s such a bummer to have a beautiful cake ruined by sticking to the pan, so be sure to grease well! Just a light coat of non-stick spray is all you need for an easy release. (See the next page below to continue…)
Another thing to be cautious about is overbaking. Keep an eye on your cake in the last few minutes of baking; it should be set around the edges but still slightly soft in the middle. If you let it go too long, it might lose that lovely gooey texture!
Lastly, remember to let the cake sit for just a few moments before serving. I know how tempting it can be to dive right in, but this little cooling period lets the caramel and flavors settle and makes it easier to scoop out servings. You’ll thank yourself later when it’s not a drippy mess!
Serving Suggestions
This Chocolate Caramel Dump Cake is delicious on its own, but I love to elevate it with some whipped cream or a generous scoop of vanilla ice cream. The contrast between the warm cake and the cold ice cream is beyond divine, and it adds a refreshing element to the dessert.
For those who aren’t too sweet-toothed, a sprinkle of flaky sea salt on top of the cake enhances the flavors beautifully and balances the sweetness just right. It’s the perfect finishing touch that takes it from a yummy treat to a truly gourmet experience.
If you’re feeling particularly adventurous, serve it with a drizzle of more caramel sauce and some chopped nuts for added texture. I guarantee your guests will swoon at the presentation, and the flavor combination will leave them raving!
Variations & Customizations
One of the fantastic things about this recipe is its flexibility. You can easily switch up the chocolate cake mix for a different flavor, like vanilla or even red velvet. Imagine a red velvet caramel dump cake! How fun would that be for a special occasion or birthday? The possibilities are endless!
If you want to incorporate some fruit, consider adding sliced bananas or raspberries on top before baking. The tartness of the fruit contrasts beautifully with the richness of the cake and caramel. It’s a delightful way to sneak in some freshness!
For a more indulgent experience, you could swap out the chocolate chips for peanut butter chips or butterscotch chips. The sweet and nutty flavors add another layer of deliciousness and make the cake feel even more special.
How to Store, Freeze & Reheat
If you happen to have leftovers (though I highly doubt it will happen), you can store your Chocolate Caramel Dump Cake in an airtight container in the fridge for up to three days. Just reheat individual servings in the microwave for a quick and satisfying dessert.
If you want to prepare this cake in advance, it freezes beautifully! I recommend cooling it completely, then wrapping it tightly in plastic wrap or aluminum foil before placing it in a freezer-safe container. It’ll keep for up to three months. Just remember to label the container so you can easily find it later!
When you’re ready to enjoy it again, simply thaw it in the fridge overnight and reheat as mentioned above. The cake will retain its gooey goodness, and you’ll still be able to revel in its chocolatey caramel charm.
Conclusion
I hope you feel inspired to dive into this delightful Chocolate Caramel Dump Cake recipe! It’s become a staple in my kitchen, and I know it will soon hold a special place in yours as well. Remember, cooking is all about having fun and enjoying the process, so don’t worry too much about perfection—just savor every delicious bite! Happy baking!