
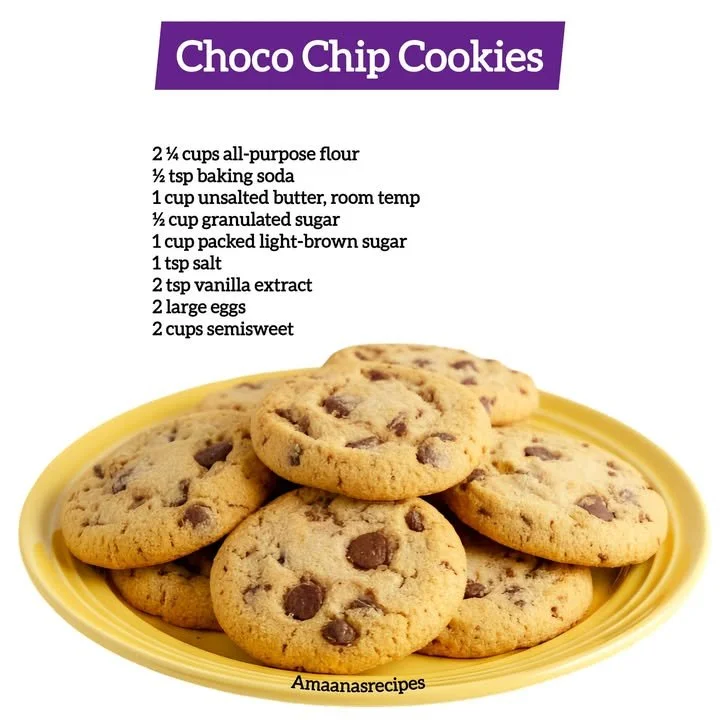
Ah, the aroma of fresh-baked chocolate chip cookies wafting through my kitchen—the very scent that brings back sweet childhood memories! There’s something so comforting about cookies, especially when they’re warm, gooey, and packed with chocolatey goodness. Whenever I feel like treating myself or surprising my loved ones, these humble cookies never fail to deliver joy and warmth. Let me take you through my cherished recipe for the ultimate choco chip cookies!
Why You’ll Love This Recipe
This recipe is not just about mixing ingredients; it’s about the experience of creating something delightful and sharing it with those you care about. I’ve perfected this over the years, leaning on the right balance of ingredients that yield a chewy center and a slight crisp around the edges. Each bite is packed with rich chocolate, and the feel of the cookie melts in your mouth. You won’t be able to stop at just one! Trust me, these cookies have a way of making any day feel a little brighter. (See the ingredients in the next page below…)
Ingredients
– 2 1/4 cups all-purpose flour
– 1 tsp baking soda
– 1/2 tsp salt
– 1 cup unsalted butter, softened
– 3/4 cup granulated sugar
– 3/4 cup brown sugar, packed
– 1 tsp vanilla extract
– 2 large eggs
– 2 cups semi-sweet chocolate chips
Equipment Needed
– Large mixing bowl
– Electric mixer or whisk
– Measuring cups and spoons
– Baking sheets
– Parchment paper
– Cookie scoop (optional)
– Wire cooling rack
Step-by-Step Instructions
To start, I preheat my oven to 375°F (190°C). It’s that exciting moment when I hear the oven roar to life, anticipating the magic about to unfold! In a large bowl, I whisk together the flour, baking soda, and salt. I love the way the ingredients come together—the fine flour mixing with the rough textures of the baking soda creates a great combination. Next, in another bowl, I tightly cream together the softened butter, granulated sugar, and brown sugar until it’s light and fluffy. There’s something therapeutic about this process, as the butter transforms into a smooth mixture that’s almost dreamy. (See the next page below to continue steps…)
Then, I add the vanilla extract and the eggs, one at a time, making sure everything is well incorporated. When I see the mixture change color to a lovely golden hue, I know I’m on the right track! Slowly, I mix the dry ingredients into the wet mixture. I find it’s best to do this gradually to prevent any flour explosion in my kitchen! Finally, I fold in the semi-sweet chocolate chips, ensuring they are evenly distributed—this is the part where I can’t help but sneak a taste of the dough. Yum!
Using a cookie scoop, I drop rounded tablespoons of dough onto a lined baking sheet, spacing them out evenly. The anticipation builds as they bake for about 9-11 minutes, until the edges are lightly golden and the centers are still soft. I can hardly contain my excitement—my kitchen is filled with an irresistible chocolate aroma! Once they’re out of the oven, I let them cool for a couple of minutes before transferring them to a wire rack. These cookies look picture-perfect, and I can’t wait to dig in.
Pro Tips for Best Results
I’ve experimented a lot with this recipe to dial in the best taste and texture. One thing I always do is to let my butter soften at room temperature rather than melting it. This creates a fluffy base that helps the cookies rise beautifully. I’ve tried melting the butter in the past, and while the cookies were still delicious, they didn’t hold their shape as well.
Another trick I like to use is chilling the dough for at least 30 minutes before baking. This not only enhances the flavor but also keeps the cookies from spreading too much in the oven. Plus, the thrill of waiting makes the first bite even more rewarding!
Finally, if you’re feeling adventurous, consider adding a pinch of sea salt on top of the cookies right before baking. It enhances the sweetness and adds a burst of flavor that takes these cookies to the next level. I tried it on a whim last week, and it disappeared faster than the others!
Common Mistakes to Avoid
One common mistake I see people make is overmixing the cookie dough once they add the flour. I used to do this too! Overmixing leads to tough cookies instead of the chewy texture we all adore. My solution now? As soon as the flour is just combined, I stop mixing—it’s all about that balance!
Another pitfall is not letting the butter soften enough. If it’s too hard, it won’t cream properly with the sugars. I’ve learned the hard way that cold butter will lead to cookies that are dense and less inviting. Be patient; let it sit out for a bit before you start baking. (See the next page below to continue…)
Also, keep an eye on those cookies while they’re in the oven. Every oven is different, and there have been times I’ve taken my eyes off the clock and ended up with cookies that were either too burnt or not done enough. Setting a timer is crucial! And I usually check for doneness a minute or two before the time runs out.
Lastly, be careful about how thick the cookies are when you scoop them. I once made some cookies that were way too thick, thinking they wouldn’t spread that much. Instead, they turned into cookie mountains rather than those delightful little rounds I was hoping for.
Serving Suggestions
These chocolate chip cookies are best served warm, straight from the oven, but they also shine a second time when paired with a glass of cold milk. I love to pour a tall glass and savor both the cookie and the milk together—the perfect blend of textures and flavors! You can also serve them at parties; guests normally can’t resist coming back for seconds.
Cookie sandwiches are another fun serving suggestion. Grab two cookies, and add a scoop of your favorite ice cream in between—now that’s a treat that really elevates the humble cookie to new heights. I’ve done this for summer gatherings, and it’s always a hit!
Finally, don’t forget about the possibilities for a cozy night in. Warm up a couple of cookies and curl up with a good movie. Each bite feels like a warm hug, making it a perfect treat for a quiet evening at home.
Variations & Customizations
If you want to switch things up, there are countless variations you can try! For those who aren’t keen on semi-sweet chocolate chips, you can use milk chocolate or even dark chocolate for a richer flavor. I’ve experimented with both, and each brings a unique twist to the cookies.
Another delightful variation is to add nuts. My favorites are walnuts or pecans for a delightful crunch. I once added a handful of chopped almonds, and the mix of textures was fantastic! Just be sure to chop them finely for even distribution throughout the cookie dough.
For those who love a bit of spice, try adding cinnamon or a hint of espresso powder to the mix. The warmth of the spices enhances the chocolate flavor and gives the cookies an unexpected depth. I tried it on a rainy day, and they turned out to be the perfect cozy treat!
How to Store, Freeze & Reheat
These cookies can be stored in an airtight container at room temperature for about a week—if they last that long! To keep them fresh, I like to add a slice of bread to the container, which helps absorb moisture and keep those cookies chewy.
If you want to make a batch ahead of time, consider freezing the dough. Scoop individual cookie portions onto a baking sheet, freeze until solid, then transfer them to a freezer-safe bag. Whenever I’m in the mood for fresh cookies, I simply bake them straight from the freezer, adding a minute or two to the baking time. It’s like having fresh cookies at my fingertips!
Reheating these cookies is a breeze. Just pop them in the microwave for a few seconds, and they’ll warm up and get that gooey goodness back. I love the little burst of warmth that envelops me when I take that first bite—it’s like being wrapped in a soft, chocolaty blanket!
Conclusion
So there you have it—my cherished chocolate chip cookie recipe that brings so much joy into my kitchen! From the baking process to the first warm bite, it’s a comforting experience I hope you’ll enjoy as much as I do. Let your kitchen fill with that sweet aroma, and remember to share these delights with everyone you love. Happy baking!