
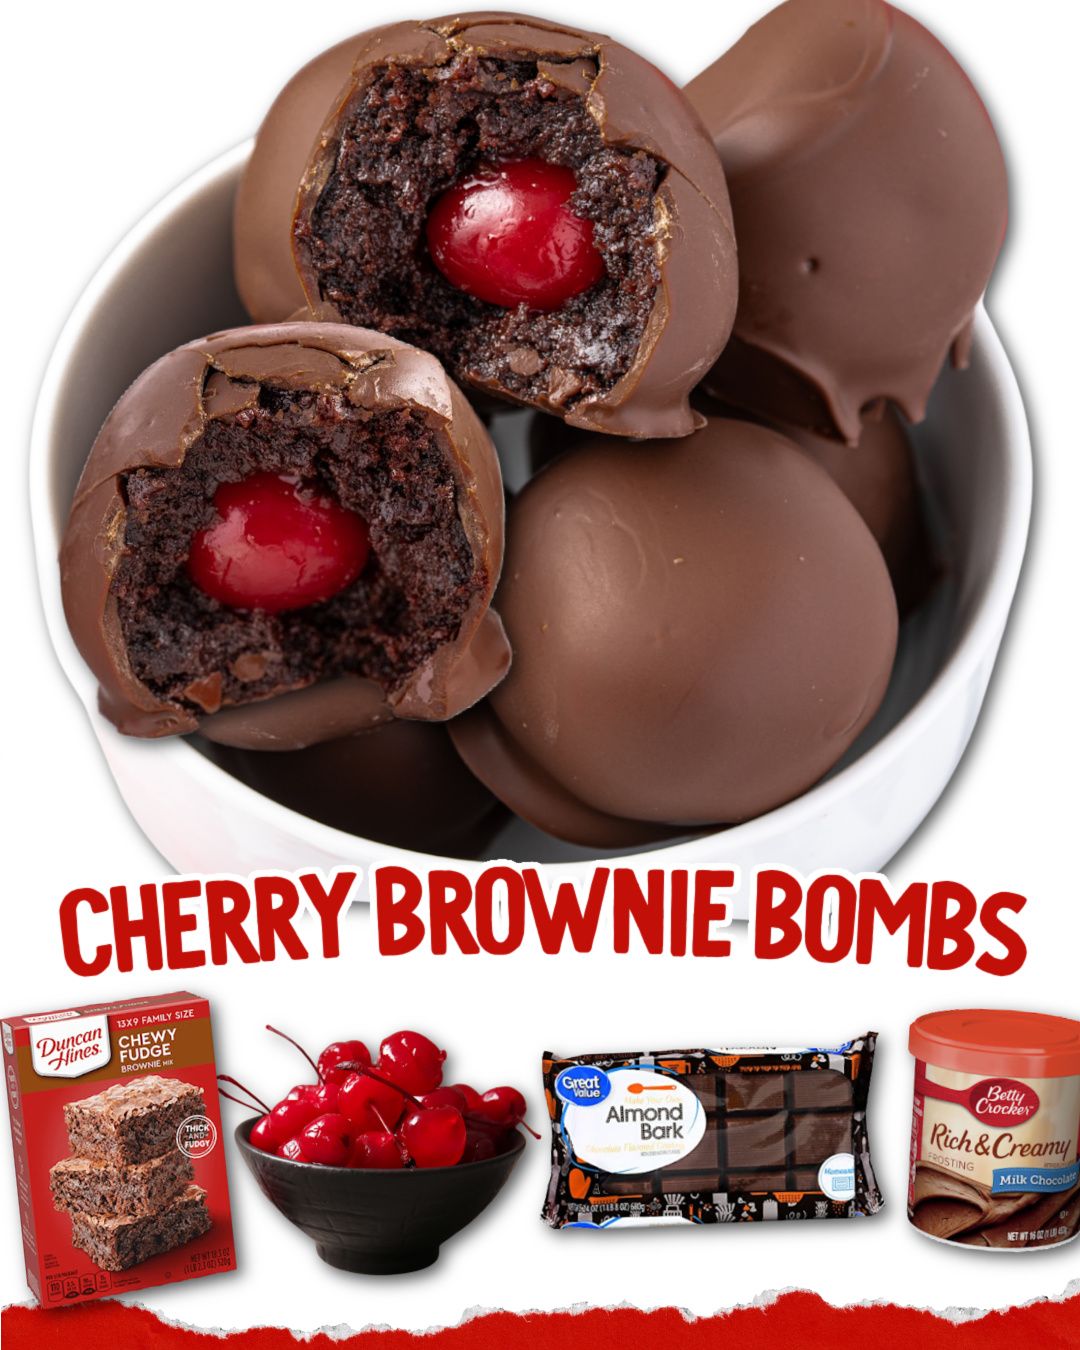
I dreamt up these Cherry Brownie Bombs one snowy afternoon, craving a dessert that was equal parts nostalgic and spectacular. The idea was simple: take the fudgy, chewy joy of a brownie and turn it into a bite-sized explosion of flavor. As the boxed brownies baked, my kitchen filled with that deep, chocolatey perfume I love. The real magic happened when I rolled the warm, crumbled brownie around a maraschino cherry and dipped it in creamy almond bark. The sweet, tart cherry surrounded by rich chocolate and a crisp white shell was a revelation. They were an instant hit, and now they’re my go-to for making any occasion feel special.
Why You’ll Love This Recipe
You are going to adore this recipe because it transforms a simple box of brownie mix into the most elegant, fun, and irresistible little treats. They look like they came from a fancy chocolatier but are surprisingly easy to make. The contrast of the fudgy brownie, the juicy cherry center, and the smooth, sweet almond bark coating is pure magic in every bite. They’re perfect for holiday trays, party favors, or just a special treat that feels like a celebration. They’re guaranteed to impress everyone who tries one.
Ingredients
- 1 box (approx. 18 oz) fudge brownie mix (like Duncan Hines), plus required ingredients listed on the box (typically oil, water, and eggs)
- 1 jar (10 oz) maraschino cherries with stems (about 24-30 cherries)
- 24 oz white almond bark or vanilla candy coating
- 1 teaspoon vegetable shortening or coconut oil (optional, for thinning coating)
- Optional for garnish: Sprinkles, crushed nuts, or drizzle of melted chocolate (See the next page below to continue…)
Equipment Needed
- 9×13 inch baking pan
- Parchment paper
- Mixing bowls and spatula
- Toothpicks
- Heatproof bowl for melting (or double boiler)
- Baking sheet
- Wax paper or a fresh sheet of parchment
Step-by-Step Instructions
Our journey starts with the brownie base. I prepare the brownie mix exactly as directed on the box for fudgy brownies (usually this means slightly underbaking them). I line my 9×13 pan with parchment paper for easy removal. As the brownies bake, that incredible chocolate scent fills the kitchen. The key here is to bake them just until a toothpick inserted comes out with a few moist crumbs, not clean. An overbaked brownie will be too dry and crumbly to form into balls. I let the brownies cool completely in the pan—this is patience-testing but essential. A warm brownie will fall apart when you try to handle it.
Once the brownies are completely cool, I use my hands to crumble the entire batch into a large mixing bowl. You want fine, even crumbs, almost like moist sand. I find using my fingers works best to break up any larger pieces. Now, here’s a fun, slightly messy part: take a maraschino cherry and pat it completely dry with a paper towel. This step is crucial. If the cherry is wet, it will seep moisture into the brownie and make the ball soggy, and the coating won’t stick properly. I learned this the hard way with a batch of weepy, messy bombs.
Take about a tablespoon of the brownie crumbles and flatten it in your palm. Place a dried cherry in the center, stem pointing up. Gently fold the brownie around the cherry, pressing and rolling it in your hands to form a smooth, compact ball with the cherry stem sticking out like a little handle. If the brownie mixture isn’t sticking together, you can add a tiny dab of frosting or a teaspoon of cherry juice to act as glue, but be very sparing—too much liquid will cause problems later. Place each formed ball on a parchment-lined baking sheet. Once they’re all rolled, I pop the tray into the freezer for 15-20 minutes. This firms them up and makes the dipping process infinitely easier. (See the next page below to continue…)
While the balls are chilling, I melt the almond bark. I break it into chunks and melt it in a heatproof bowl according to the package directions, usually in 30-second increments in the microwave, stirring in between. If the coating seems too thick for easy dipping, I stir in that optional teaspoon of vegetable shortening to thin it slightly. Now, for the dip! Holding a brownie ball by the cherry stem, I carefully dip it into the melted coating, swirling to cover completely. I let the excess drip off, then place it back on the parchment paper. If the coating starts to thicken, just reheat it for a few seconds. Before the coating sets, I add any sprinkles or garnishes. Then, I let them sit at room temperature until the almond bark is completely hard and set.
Pro Tips for Best Results
My number one tip is about the brownie texture. I’ve tested this with cake-like brownies, fudgy brownies, and even from-scratch brownies. The winner is always a box mix prepared for a fudgy outcome. Box mixes have the perfect density and moisture level to hold together when rolled. Homemade brownies can be too tender. And underbaking them slightly is the secret to a moist, chewy center that won’t dry out. Let them cool completely before crumbling—warm brownies will turn into a paste, not crumbs.
The second tip is all about the cherry prep and the freeze. Drying those cherries thoroughly cannot be overstated. I pat each one with 2-3 paper towels until no red juice transfers. And that short freeze before dipping is a game-changer. A firm, cold brownie ball is much easier to handle, it won’t fall apart in the warm coating, and it helps the almond bark set quickly and smoothly around it. Trying to dip a room-temperature, soft ball is a recipe for frustration and broken treats.
Finally, work in small batches when dipping and keep your coating fluid. Almond bark can set up quickly. I melt only half the bark at a time to ensure it stays at a good dipping consistency. If it gets too thick, it will coat unevenly and look lumpy. The optional teaspoon of shortening is my insurance policy for a perfectly smooth, glossy finish. If you don’t have shortening, a tiny bit of coconut oil works the same way.
Common Mistakes to Avoid
The first mistake I made was not drying the cherries. I was lazy and just pulled them from the jar, shook them off, and wrapped them. The moisture from the cherry syrup leaked into the brownie, making the center mushy and preventing the almond bark from adhering properly. The result was a tacky, messy exterior and a coating that slid right off. Take the minute to dry them thoroughly—it’s the most important step for structural integrity. (See the next page below to continue…)
Another error is trying to roll the balls with warm brownies. In my excitement, I couldn’t wait for them to cool. The warm brownie was too soft and sticky, turning my hands into a chocolate mess and creating misshapen, fragile balls that fell apart. Letting the brownie cool completely gives you the perfect crumbly-yet-moldable texture. If you’re in a hurry, you can speed this up by placing the pan in the refrigerator after it’s cooled to room temperature.
Skipping the freezer chill before dipping is a common pitfall. I thought, “They’re firm enough,” and went straight to the coating. The first bomb disintegrated into my bowl of almond bark, creating a chocolatey swirl. The cold temperature keeps the brownie ball solid long enough to get in and out of the hot coating with its shape intact. It also causes the coating to set almost instantly against the cold surface, giving you a cleaner finish.
Finally, overheating the almond bark is a sure way to ruin it. Almond bark and candy coating can scorch or become grainy if heated too quickly or too high. I always use the microwave at 50% power or a double boiler for gentle, indirect heat. Stir frequently and stop heating when there are just a few small lumps left—the residual heat will melt them as you stir. Burnt or seized coating cannot be fixed and will waste all your beautiful brownie balls.
Serving Suggestions
I love presenting these on a decorative platter or in mini cupcake liners arranged on a tiered stand. They look absolutely stunning and make people feel like they’re choosing a special treat from a candy shop. For the holidays, I’ll use red and green sprinkles; for a birthday, I’ll use colorful nonpareils. The cherry stem makes them easy to pick up, so they’re perfect for a party finger food.
These are fantastic as homemade gifts. I place a few in a clear cellophane bag, tie it with a ribbon, and add a tag. They’re always received with huge smiles. They also make wonderful additions to cookie swap boxes or holiday treat trays, as they offer something different from the usual array of cookies and bars. I like to pair them on a dessert table with other chocolate treats and some fresh fruit for balance.
While they are perfect on their own, I sometimes like to serve them with a side of vanilla ice cream or a dollop of whipped cream for an extra-decadent dessert. The cold creaminess alongside the rich, chewy brownie bomb is heavenly. A cup of strong coffee or cold milk is also the ideal beverage pairing to cut through the sweetness.
Variations & Customizations
This recipe is a fantastic canvas for creativity. Instead of a cherry, you can use other fillings. A square of your favorite chocolate bar (like a caramel-filled square), a whole raspberry (dried well), or even a roasted marshmallow are all delicious options. You can also roll the plain brownie ball in cocoa powder, powdered sugar, or crushed nuts instead of dipping it in almond bark for a simpler finish.
To change up the coating, use dark or milk chocolate candy melts instead of white almond bark. You can also drizzle the finished bombs with a contrasting color of melted chocolate for a professional, striped look. For a nutty flavor, roll the freshly dipped bomb in finely chopped toasted almonds or pecans before the coating sets.
For an adult twist, you can soak the dried cherries in a little bit of bourbon, rum, or kirsch for 30 minutes before patting them dry. This infuses them with a wonderful boozy note. Just be sure to let any excess liquid evaporate before wrapping them in the brownie. You can also add a pinch of espresso powder to the brownie mix to deepen the chocolate flavor.
How to Store, Freeze & Reheat
Store these bombs in a single layer in an airtight container at cool room temperature for up to 3 days. If your kitchen is warm, or if you need them to last longer (up to a week), store them in the refrigerator. The almond bark may develop slight condensation when brought back to room temperature, but the flavor and texture will still be great.
You can freeze these for longer storage. Arrange the fully set bombs in a single layer on a baking sheet to flash-freeze for an hour, then transfer them to a freezer-safe bag or container. They will keep for up to 2 months. Thaw them in the refrigerator overnight or at room temperature for about an hour before serving. The texture holds up remarkably well.
There is no need to reheat these treats—they are meant to be enjoyed cool or at room temperature. If they have been in the fridge and the coating seems to have “sweated,” you can gently pat them dry with a paper towel. Microwaving will melt the coating. For the best experience, simply let them come to your desired temperature naturally.
Conclusion
These Cherry Brownie Bombs are more than just a dessert; they’re little packages of joy that turn a simple brownie into a memorable experience. They’ve brought so much fun to my kitchen and delight to everyone who’s tried them. I hope this recipe inspires you to play, create, and share these delicious bites of chocolatey cherry bliss. Now, go grab that brownie mix and get ready to make some bombshell treats that will absolutely explode with flavor.