
Another pitfall is not allowing the dessert enough time to chill. If you try to dig into it too soon, the layers won’t have time to set, and you risk making a jumbled, messy portion. I’ve had to clean up many “samples” because I was too impatient. Trust me when I say: good things come to those who wait!
Lastly, be careful with the whipped cream. Over-mixing can lead to a grainy texture that no one wants. I always stop mixing as soon as I see stiff peaks because I prefer a smooth, fluffy finish. Trust your instincts; when it’s just right, you’ll know!
Serving Suggestions
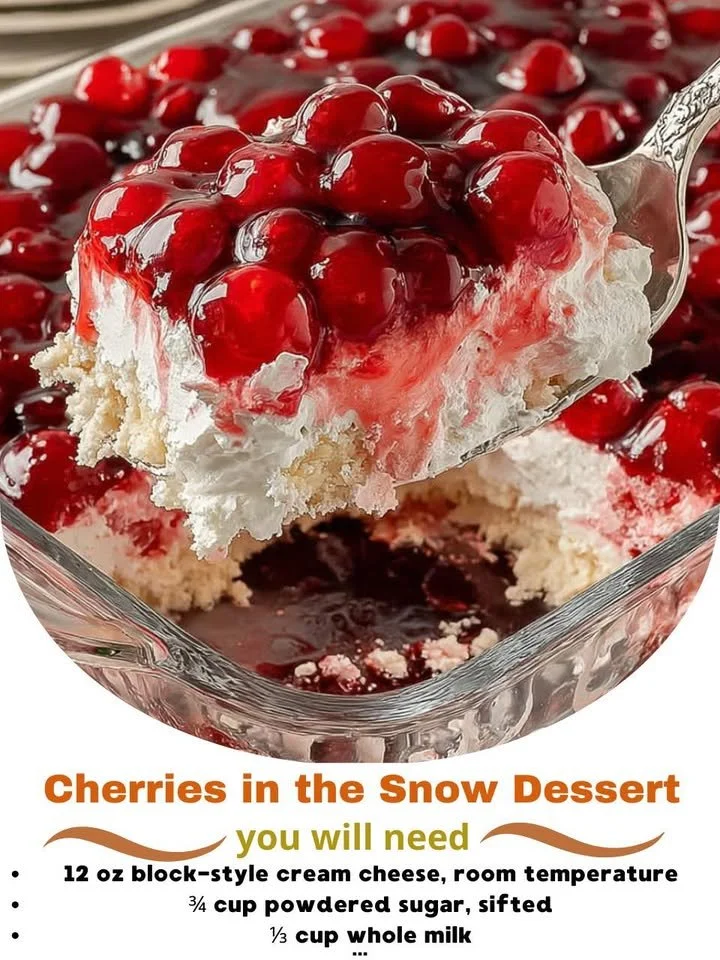
When it comes time to serve Cherries in the Snow, I love to present it in a clear glass dish. This not only shows off the beautiful layers but also gives a sense of elegance to the table. A simple scoop with a large spoon is all you need to serve, and I recommend topping each portion with a few extra cherries for that pop of color. Even a drizzle of chocolate sauce can take it up a notch if you’re feeling fancy!
I also find that this dessert pairs perfectly with a cup of coffee or a light fruit-forward wine. The sweetness of the dessert complements the bitterness of coffee beautifully, making it an excellent finish for a dinner party. If you’re serving it at a summer gathering, adding some fresh mint leaves on top adds a great touch of freshness and aroma.
Additionally, I love to let my guests serve themselves, allowing them to choose how much they’d like. It’s a fun touch that invites everyone to dig in and enjoy! The delight on their faces when they take that first forkful is one of my favorite parts of hosting!
Variations & Customizations
While I adore the classic Cherries in the Snow, I also love to get a little creative depending on what I have on hand or what’s in season. For instance, I’ve substituted the cherries with blueberries or strawberries on occasion. Each variation drives home the flexibility of this recipe; just make sure to adjust the sweetness based on the fruit used! The fresh colors still look stunning and taste fantastic.
Another variation I’ve tried is adding a splash of almond extract instead of vanilla. This small change adds a whole new flavor dimension that gives a nod to marzipan! It’s a great way to mix things up if you’re looking for something a bit different but equally delicious. The almond flavor pairs wonderfully with the fruits, creating a beautiful balance of sweetness and nuttiness.
For a more decadent twist, I’ve folded in some crumbled brownies or graham cracker crumbs between the layers. It adds a delightful crunch and chocolatey richness that elevates the dessert to a whole new level. It’s like a surprise in every bite, and trust me, your guests will love it!
How to Store, Freeze & Reheat
Cherries in the Snow can be stored in the refrigerator in an airtight container for up to three days. However, trust me when I say it tends to disappear faster than that! The flavors will continue to develop, making each bite as delightful as the first. It’s a perfect make-ahead option for gatherings, allowing you to prep in advance and easily serve later.
If you find yourself with leftovers, you can certainly freeze it! I recommend cutting it into individual portions and placing them in airtight containers. This makes it easy to grab a treat whenever the craving strikes. However, keep in mind that while freezing preserves the flavors, the texture may alter a bit once defrosted. I’d recommend thawing it in the fridge for a few hours before serving, rather than in the microwave, to help reduce any texture loss.
Reheating is a bit tricky, as this dessert is best served cold. If you do need to reheat any portions (which I can’t imagine, but I guess it can happen), do so gently at a low temperature while watching closely to avoid melting the layers too much. However, I always find it tastes best straight out of the fridge, ready to be enjoyed!
Conclusion
I really hope you give this Cherries in the Snow recipe a try; it truly holds a special place in my heart and has brought smiles to many faces over the years. With its charming layers and delightful taste, it’s bound to become a favorite in your kitchen as well. Trust me, you’ll want to have this easy, no-bake dessert on hand for all your gatherings—it’s an absolute crowd-pleaser! Happy baking!