
Next, in a separate bowl, whip the heavy cream until stiff peaks form. This will take a few minutes, but the effort is absolutely worth it. Gently fold the whipped cream into the cream cheese mixture. Take your time with this step, as it’s important to maintain the light, airy texture. Once everything is combined, it’s time to layer! Spread half of the creamy mixture into the bottom of your prepared 9×13 inch baking dish. Make sure it’s evenly distributed, creating a lovely base for your beautiful dessert.
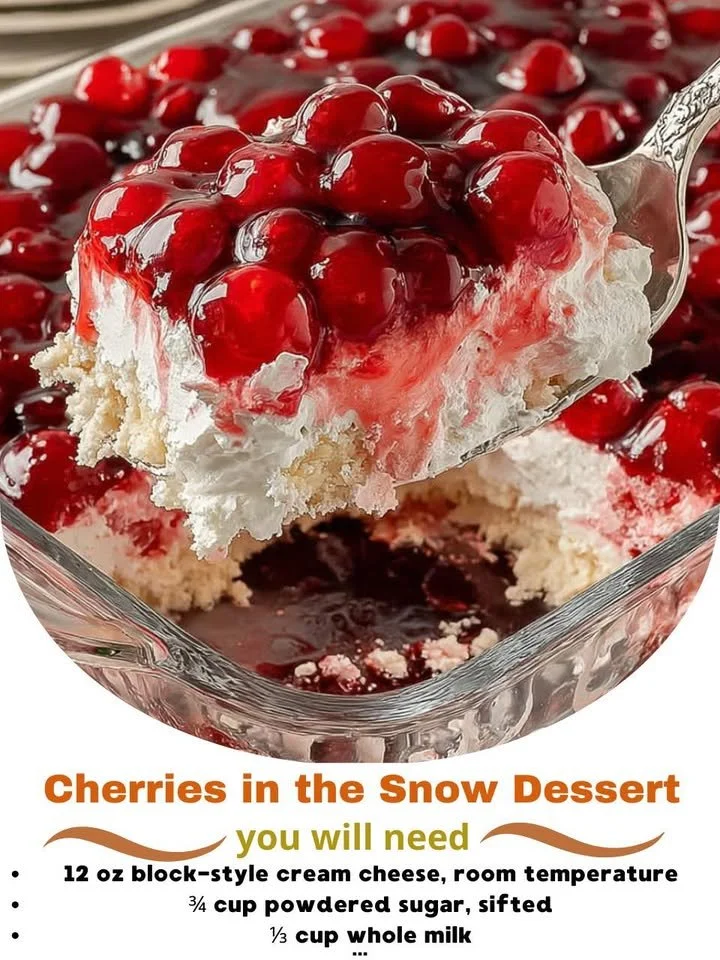
Now comes the fun part—adding the cherries! Spoon the cherry pie filling or fresh cherries over the first layer. If you’re using fresh cherries, I recommend pitting and slicing them for an even spread. After this, place the remaining creamy mixture on top, smoothing it out to create an even layer. The contrasting colors of the cherries and the fluffy white cream mixture bring a smile to my face every time! Finish by sprinkling the chopped walnuts or pecans on top if you’re using them for that added crunch.
Finally, cover the dish with plastic wrap and refrigerate for at least 4 hours, or even overnight, to allow all those wonderful flavors to meld together. When I take it out of the fridge, I can’t help but admire how beautifully it sets. It’s pure bliss!
Pro Tips for Best Results
First and foremost, I highly recommend using fresh cherries when they’re in season. They pack an incredible flavor punch! I’ve tried this recipe both with canned cherries and fresh ones, and there’s no contest—the fresh ones make all the difference. I’ve even experimented with different cherry varieties like Bing or Rainier, and each one brings a unique sweetness that complements the creamy base beautifully.
Another tip I learned from making this dessert multiple times is regarding the whipped cream. To get those perfect stiff peaks, ensure your mixing bowl and beaters are completely clean and chilled. Sometimes, I chill the mixing bowl in the freezer for about 15 minutes before whipping the cream! This little trick not only helps achieve a better texture but also gives me some peace of mind that my dessert will hold up nicely when slicing it for serving.
Lastly, let the dessert chill overnight if you can. I’ve found that allowing the flavors to meld overnight creates a deeper and more cohesive flavor profile. The wait can be tough, but I promise it’s worth it when you take that first bite!
Common Mistakes to Avoid
One common mistake I’ve fallen victim to is skipping the step of draining the crushed pineapple thoroughly. Trust me; the excess moisture can make the dessert soggy, which isn’t the texture you want! Now, I always make sure to press the pineapple in a fine mesh strainer for a minute to remove any excess juice before adding it to the mixture. It keeps the layers looking lovely and prevents it from becoming a mushy mess! (See the next page below to continue…)